
Flat Icon Design is the most popular topic from around the design blogs and forums for the last couple of months. The major mobile operating systems started to use or already using the Flat Design (WindowsPhone + Metro, Android, iOS7).
(We updated this tutorial. If you want to read only the update click here)
It seems that the Flat Design trend has already reached a new evolutionary level. Jeff Escalante, the one who initiated this trend discussion, called it Long Shadow Design. As he mentioned in a tweet, it started as a joke: “I actually can’t believe what’s happening now. It was a joke but its evolved out of my control…”
Check out this gallery of Flat Icons!
So how can one create a great, trendy icon with flat style and long shadow? Follow this tutorial and learn to use the basic tools and the tools on the Pathfinder Panel.
Set Up your Document
Create an art board that is 800 x 600px. Select CMYK color mode, Screen (72ppi) and make sure that the “Align New Objects to Pixel Grid” box is unchecked before your click OK.
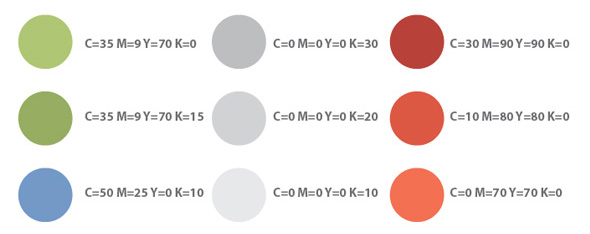
1. Create a Rounded Rectangle with the Rounded Rectangle Tool (width / height=250px). When drawing, hold down the Shift key to create a square. If you want to change the roundness, press the Up or Down keys while pressing the Mouse Left Button. Fill the object with a nice color (C=35 M=9 Y=70 K=0).
![]()
2. Create another Rounded Rectangle (width=50px / height=250px). Fill it with red. No need to align it to the another rectangle, you can place it anywhere on the canvas.
![]()
3. Create a Rectangle with the Rectangle Tool (M) set it’s width to 50px and height to 25px. If you don’t set a size you can set it later (Step 11). Place it over the red object.
![]() 4. Create another Rectangle, this time make it square by pressing the Shift key while drawing. The size doesn’t matter, we will set it later. Rotate with 45º. Go to Object -> Transform -> Rotate and set the angle to 45 or simply grab one of the handles from the edge of the object and start rotating while holding down the Shift key. This way you can rotate exactly 45, 90, 135 degrees.
4. Create another Rectangle, this time make it square by pressing the Shift key while drawing. The size doesn’t matter, we will set it later. Rotate with 45º. Go to Object -> Transform -> Rotate and set the angle to 45 or simply grab one of the handles from the edge of the object and start rotating while holding down the Shift key. This way you can rotate exactly 45, 90, 135 degrees.
![]()
5. As you can see on the image above, the bounding box is rotated too. In this case you are not able to modify the object’s width or height. You can still change the width or height by editing the values on top of the screen but if you want to edit with the mouse, you need to Reset the Bounding Box. Go to Object -> Transform -> Reset Bounding Box.
![]()
6. Set the object’s width to 50px and its height to 80px. Place it over the red object. Align them vertically.
Tip: Select the two objects by holding the Shift key and click again on the object you don’t want to move. In this example Shift + click to the red object, Shift + click to the grey object, and click again on the red one. This way the grey object will be aligned to the red one while the red object will stay in its place. (I hope I explained it clearly 🙂 )
![]()
UPDATE: to place the gray shape behind the pencil’s body, select it press Ctrl + X. Select the pencil’s body, and press Ctrl + B, to place back the shape BEHIND the pencil.
7. Create a Circle with the Ellipse Tool (E), align it with the other two objects and place it onto the bottom of the second object. This will be the tip of the pencil. Select the grey object (NOT the cirlce!), duplicate it (Ctrl + C, Ctrl + F). Select the duplicated object and the circle, then select Intersect from the Windows -> Pathfinder Panel.![]()
8. As a result, you should see this:
![]()
9. Draw three circles with the Ellipse Tool. Place them over the red object (You can increase the middle circle). Select each circle, then press Unite from the Pathfinder Panel. Fill it with a distinctive color (yellow).![]()
10. Duplicate the red object (Ctrl + C, Ctrl + F). Select the duplicated object and the yellow one, and press Minus Front on the Pathfinder Panel.
![]()
11. Remember Step 3 when I said that we can set the size of the grey object? If you already have, then you can skip this step. If not, duplicate the red object, select the duplicated object and the grey one and select Intersect on the Pathfinder Panel.![]()
12. Create a rectangle over the upper part of the “Pencil“. I believe you are familiar with the steps by now: duplicate the red object, select the duplicated object and the newly created rectangle, and press Intersect on the Pathfinder Panel. To place the new object behind the grey shape, go to Object -> Arrange -> Send Backward.
![]()
13. Create two Rectangles, arrange their sizes to fit the red object as you see on the image below. Now it’s time to fill every object with its final color.
![]()
14. After you filled each object with nice colors, finish the Pencil. Duplicate the pencil’s body, select the duplicated object, and the left Rectangle, then select Intersect from the Pathfinder Panel. Repeat this step with the last rectangle too. When you’re done doing this, bring the grey shape on top of the other objects (Select it, go to Object -> Arrange -> Bring to Front).
![]()
15. Repeat steps 13 and 14 with the grey object and use the color codes attached. You’re done with the flat style Pencil.
![]()
16. Create a Rectangle and place it over the pencil until it covers half of it. Set its width to 500px and its height the same as the height of the Pencil. This will be the shadow of the Pencil.
![]() 17. Bring the shadow behind the Pencil (you can use the Arrange option as you did before, or cut and place behind the Pencil. Ctrl + X, select the green Rounded Rectangle from the background and Ctrl + F). Select the Pencil and its shadow, go to Object -> Transform ->Rotate and set the angle to 45º.
17. Bring the shadow behind the Pencil (you can use the Arrange option as you did before, or cut and place behind the Pencil. Ctrl + X, select the green Rounded Rectangle from the background and Ctrl + F). Select the Pencil and its shadow, go to Object -> Transform ->Rotate and set the angle to 45º.
![]()
18. There is only one more thing you need to do. Duplicate the green Rounded Rectangle. Select the duplicated shape and the shadow of the Pencil, then press Intersect on the Pathfinder Panel. This is the final image. Feel free to experiment with other colors to get a trendy, flat icon for your web or mobile apps.
![]()
UPDATE: What if… the icon is not so simple or straight as a pencil? Then we have a better trick to achieve the shadow effect.
1. Duplicate the icon / shape (Ctrl + C, Ctrl + F). Move the duplicated shape to the right and down.

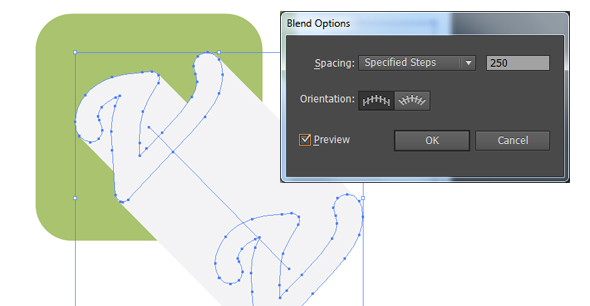
2. Select both shapes then go to Object -> Blend -> Make (Ctrl + Alt + B). Go to Object -> Blend -> Blend Options and set the steps to 250. Doing this you will increase the objects number between the two original shapes.
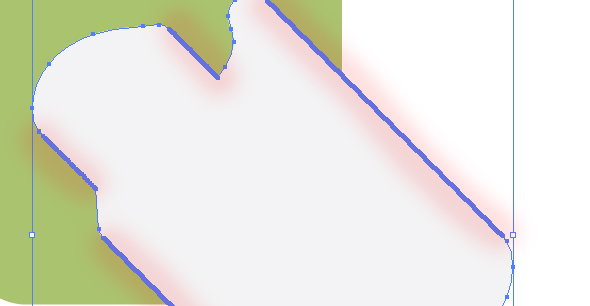
3. Go to Object -> Expand. Select both Object and Fill, then press OK. While the shapes selected select Unite on the Windows -> Pathfinder Panel. As you see there are too many points so you have to get rid of them.
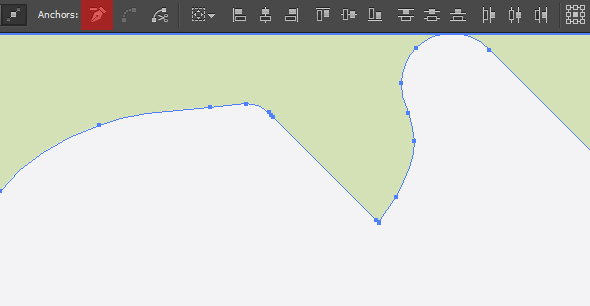
4. Select these anchor points with the Direct Selection Tool (A) while pressing the Shift key then Remove them with the Remove Selected Anchor Points tool.
5. Insert the original icon / shape from the Clipboard (Ctrl + F). Select the base rounded rectangle and place it to the Clipboard (Ctrl + C). While pressing the Shift key, select the “shadow” shape, then select Intersect on the Pathfinder Panel. You should see something like this:

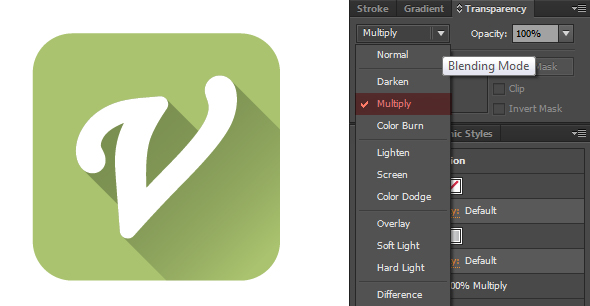
6. Fill the shadow with a dark green color or with a gradient from gray to white then set it’s Blending Mode to Multiply on the Window -> Transparency Panel.

Thank you for following this tutorial!
If you enjoyed this tutorial please subscribe to our RSS Feed, Follow us on Twitter or recommend us to your friends!