In this tutorial, you will learn how to create a clipboard illustration using the basic tools, vector shape building techniques and some effects of Adobe Illustrator.
Create a New Document
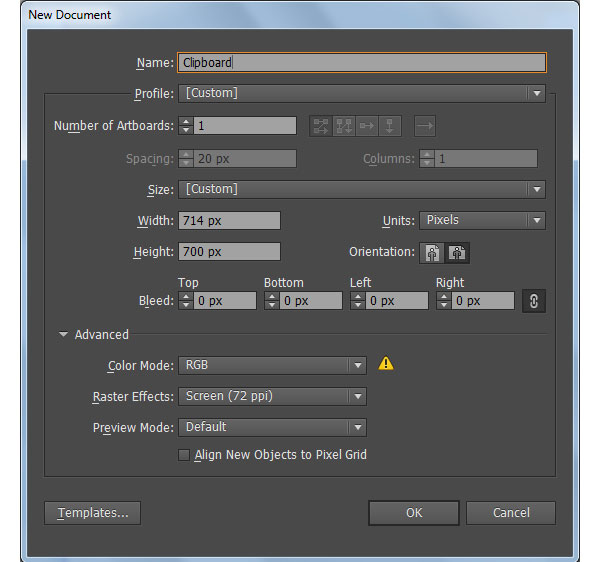
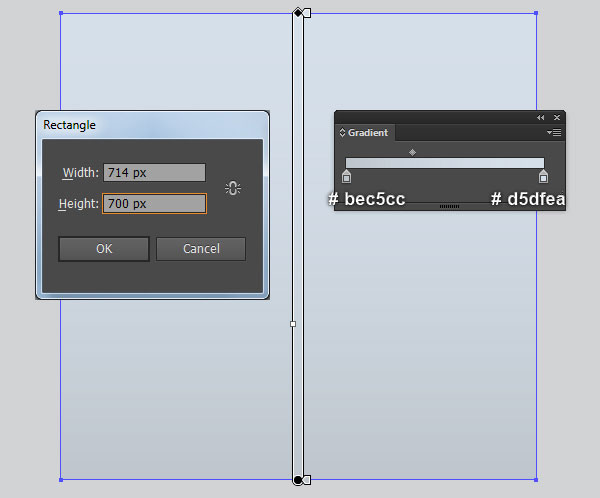
1. Launch Illustrator and then press (Ctrl + N) to create a New document. Select Pixels from the Units drop-down menu, enter 714 in the width box and 700 in the height box then click on the Advanced button. Select RGB, Screen (72ppi) and make sure that the Align New Objects to Pixel Grid box is unchecked before you click OK.
Create the Paper Pad Holder
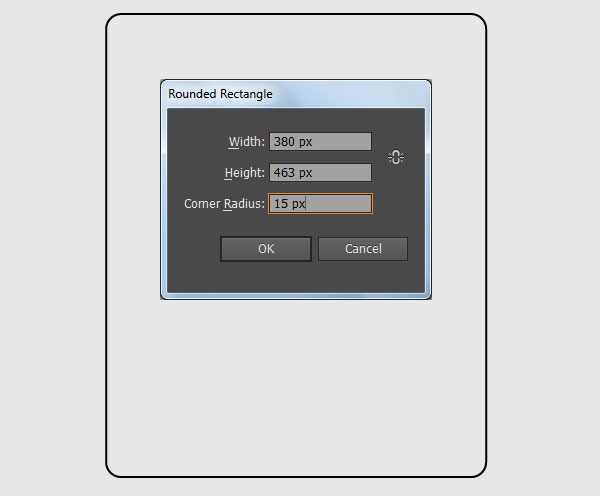
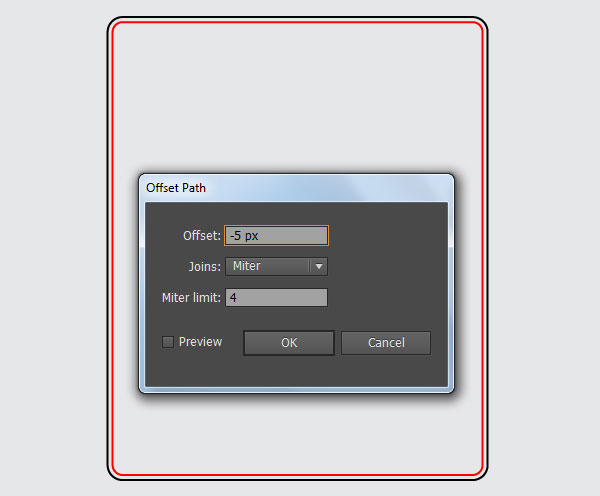
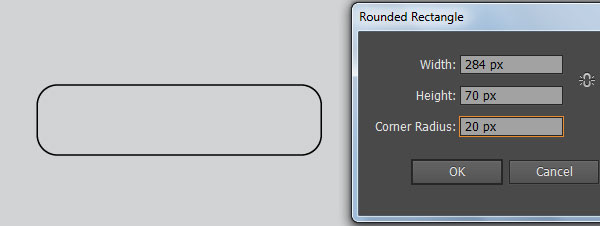
2. Pick the Rounded Rectangle Tool from the Tools panel and simple click on the artboard. In the Rounded Rectangle dialog box, enter the data like you see in the first image and click OK. Make sure that the newly created rectangle is still selected and go to the Object > Path > Offset Path… Enter a -5px Offset and click OK. Then replace the existing stroke color of the newly created rectangle with red.
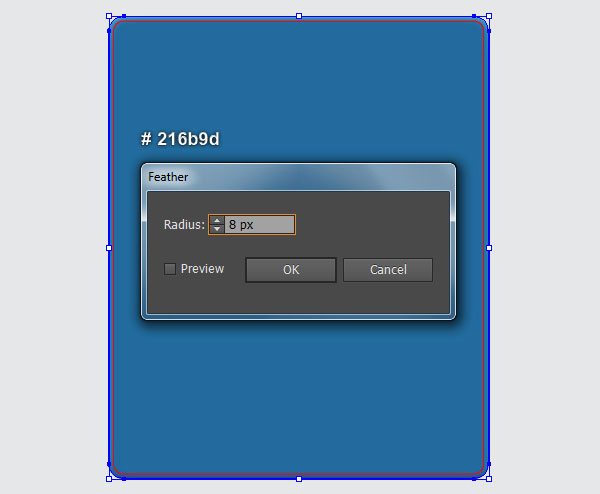
3. Select the black rectangle created in the step 2, remove its stroke and fill this object with the linear gradient as shown in the first image. Make a copy (Ctrl +C, Ctrl +F) of the resulting rectangle, then replace the existing fill color of the newly created rectangle with dark blue (# 216b9d). Keep the resulting rectangle selected and go to the Effect > Stylize > Feather… Enter a 8px Radius and click OK.

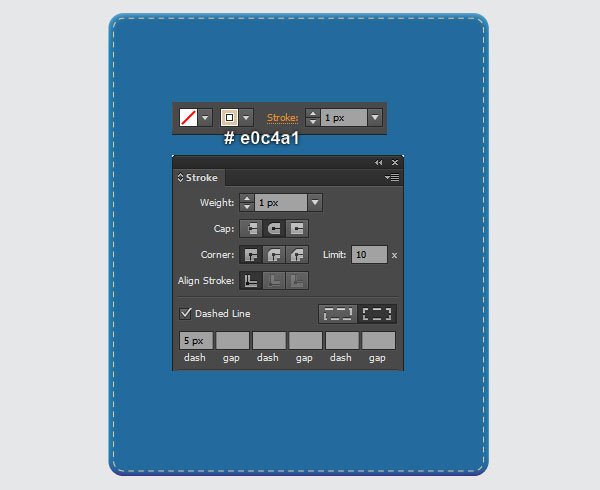
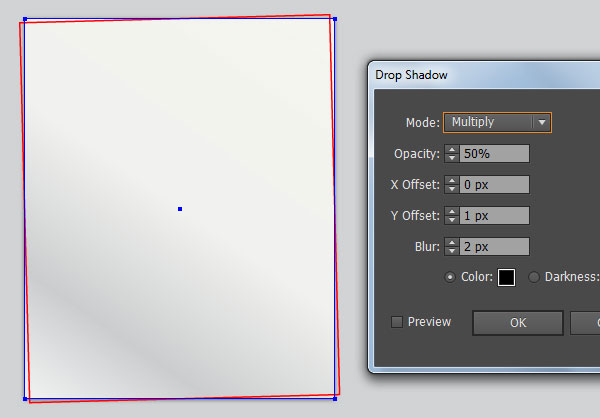
4. Select the red rectangle created in the step 2 and replace the existing stroke color with very soft orange (# e0c4a1). Still having the resutling rectangle selected and open the Stroke panel (Window > Stroke). Check the Dashed Line box and then enter 5px in the dash box. Keep the resulting rectangle selected and go to the Effect > Stylize > Drop Shadow… Follow the data like you see in the second image and click OK.
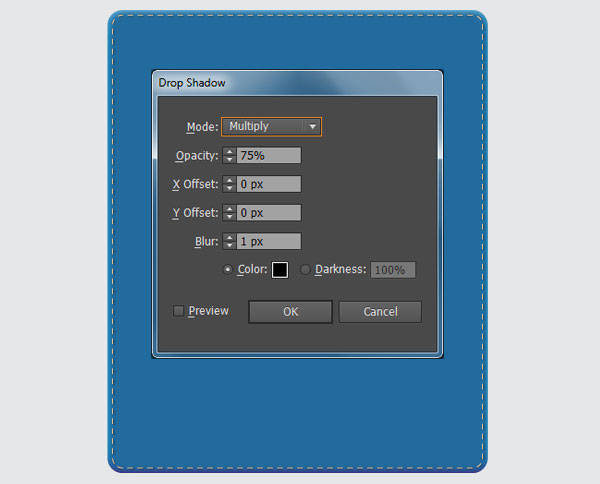
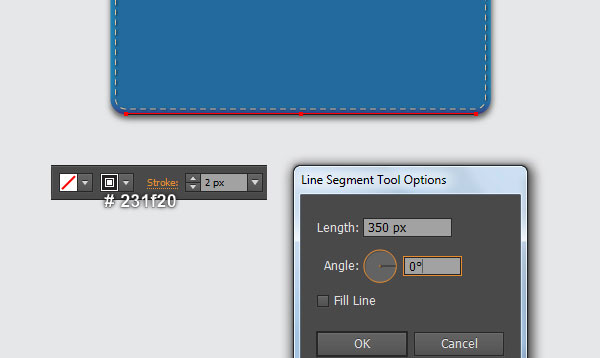
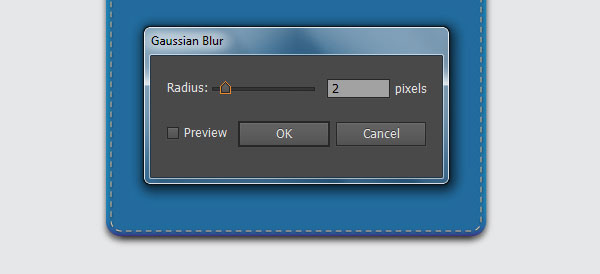
5. Select the first shape created in the step 3 and go to the Effect > Stylize > Drop Shadow… Follow the data as shown in the first image and click OK. Now using the Line Segment Tool (\) create a horizontal line of length 350px, with a 2px very dark red stroke (# 231f20) and no fill. Then place the newly created line to the correct position as shown in the second image. Keep this line selected and go to the Effect > Blur > Gaussian Blur… Enter a 2px Radius and click OK. Finally send the resulting line to back (Ctrl +Shift +Left Square Bracket).
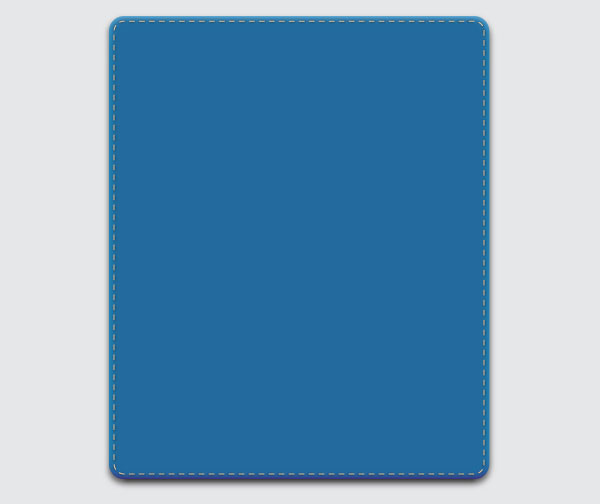
6. Select and group (Ctrl +G) all objects created from beginning step 2 to this time. The paper pad holder is ready and looks like this:
Create the White Paper Pages
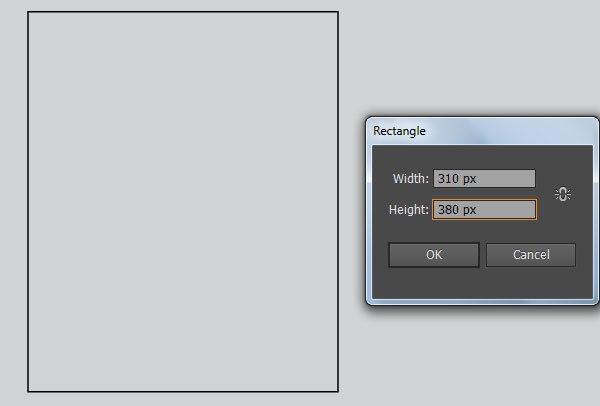
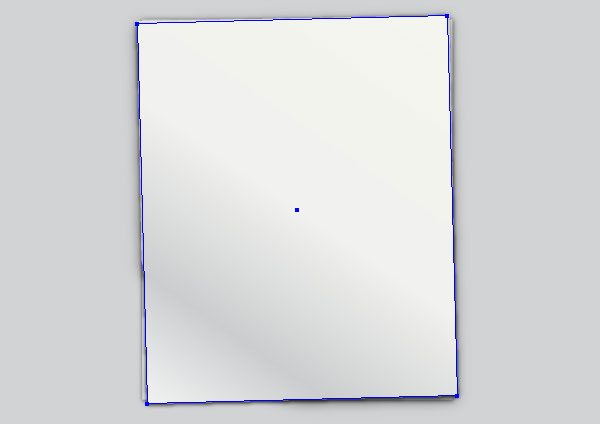
7. Pick the Rectangle Tool (M) and create a 310 by 380px black rectangle. Keep the newly created rectangle selected and double-click on the Rotate Tool icon from the Tools panel. In the Rotate dialog box, enter a 1.5 degrees Angle and click Copy. Then replace the existing stroke color of this copy with red.

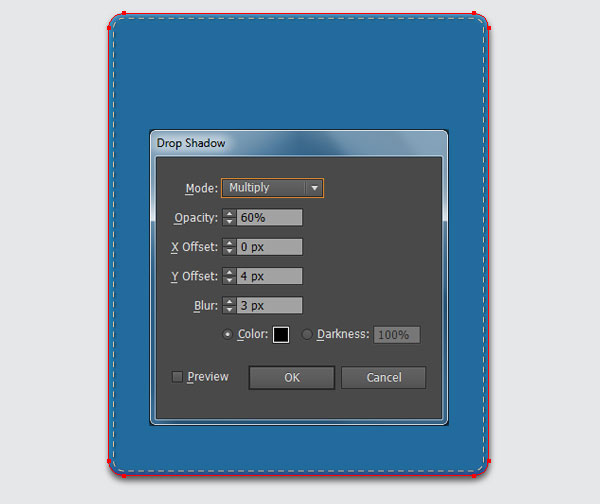
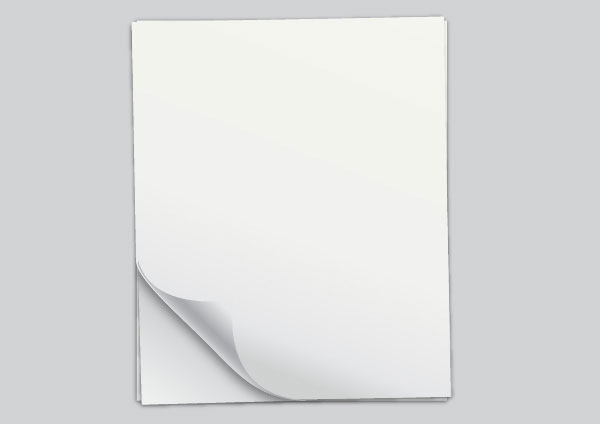
8. Select the black rectangle created in the step 7, remove its stroke and fill this object with the linear gradient as shown in the first image. Having the resulting rectangle selected and go to the Effect > Stylize > Drop Shadow… Follow the data like you see in the second image and then click OK.

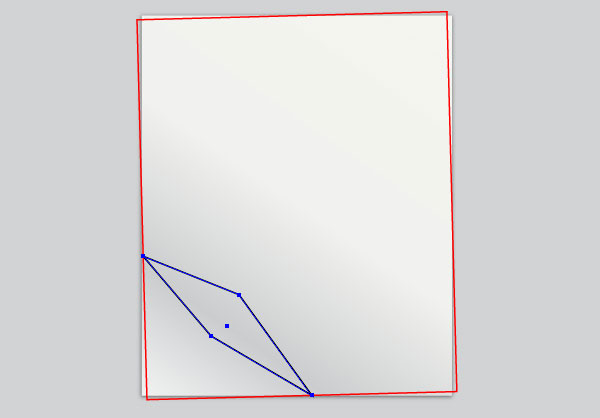
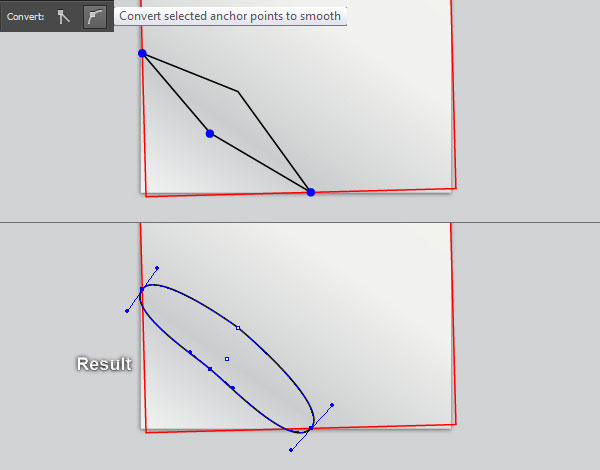
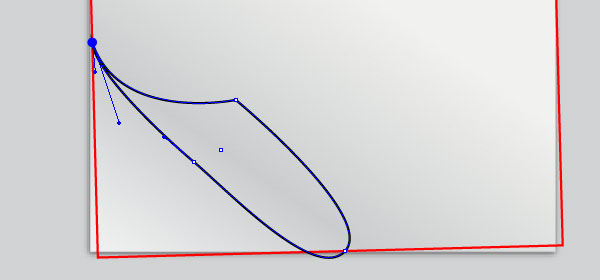
9. Next comes the folded page corner. Pick the Pen Tool (P) and created a black object like you see in the first image. Next with the help of the Direct Selection Tool (A) and the Shift, select three anchor points highlighted with blue of the black object. Then click on the “Convert selected anchor points to smooth” icon from the Properties bar. The resulting object should look like the last image below.
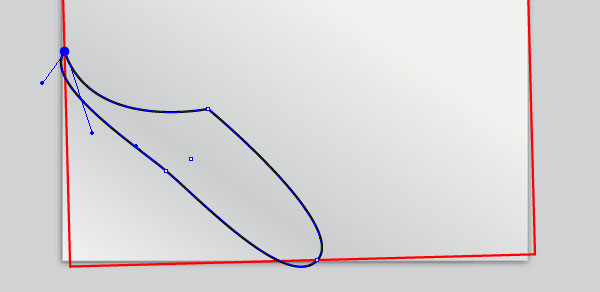
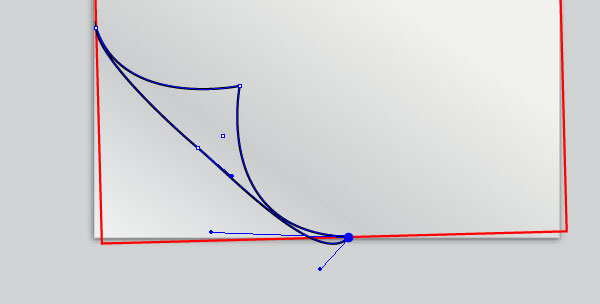
10. Pick the Convert Anchor Point Tool (Shift +C), click on the upper handle of the top anchor point of the black object, then hold mouse and drag it down. Next click on the remaining handle of the top anchor point, hold mouse and drag it to the right. Focus on the third image, with the Convert Anchor Point Tool, click on the upper handle of the bottom anchor point and drag it to the left. Finally select the remaining handle ò the bottom anchor point and drag it up.
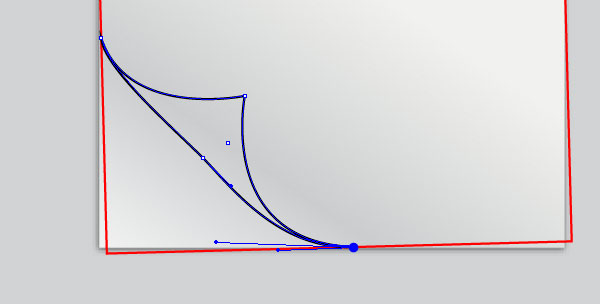
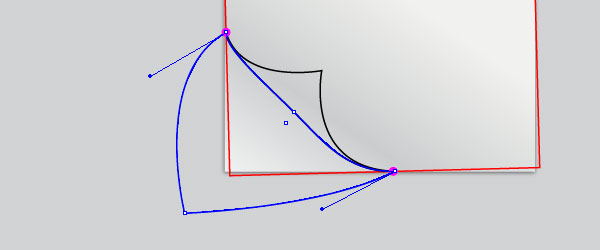
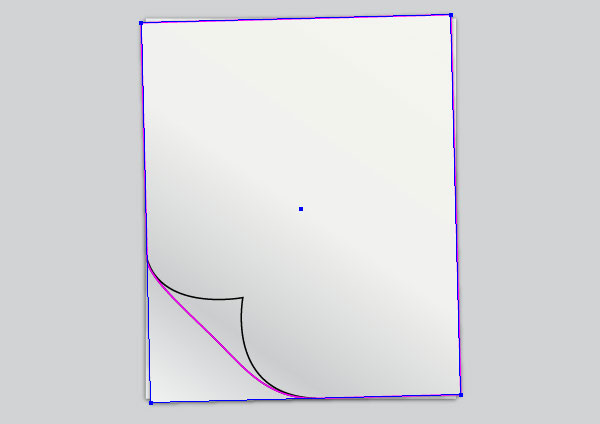
11. After you are done adjusting the shape of the black object, reselect it and make a copy (Ctrl +C, Ctrl +F) of this object. Then replace the existing stroke color of the copy with blue. With the Direct Selection Tool (A), select the anchor point highlighted with magenta and drag the mouse to the direction of the arrow. Keep working with the Direct Selection Tool, select the longer handle of the upper anchor point highlighted with magenta and drag it to the left. Next select the longer handle of the lower anchor point highlighted with magenta and drag it down. The resulting object should look like the last image below.

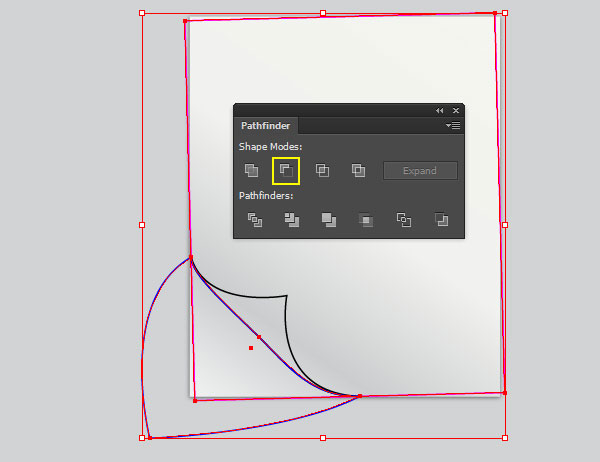
12. Select the red rectangle created in the step 7 and make a copy (Ctrl +C, Ctrl +F) of it, then replace the existing stroke color of the copy with magenta. Keep the magenta rectangle selected, hold down the Shift and click on the blue object created in the step 11. Open the Pathfinder panel (Window > Pathfinder) and click on the Minus Front button. The resulting object should look like the last image below.


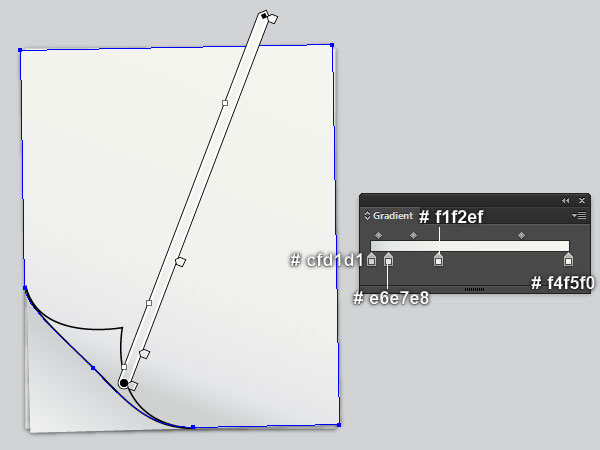
13. Select the red rectangle, then pick the Eyedropper Tool (I) and click on the rectangle with shadow effect applied in the step 8. This will sample all appearance attributes of rectangle with shadow effect applied in the step 8 and apply them to the red rectangle. Next select the magenta object created in the step 12, remove its stroke and fill this object with the linear gradient as shown in the last image.
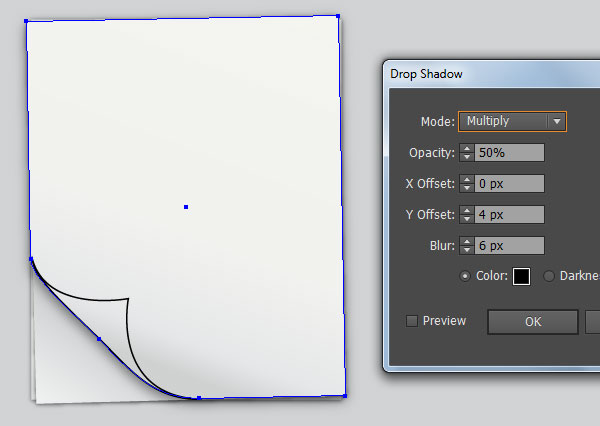
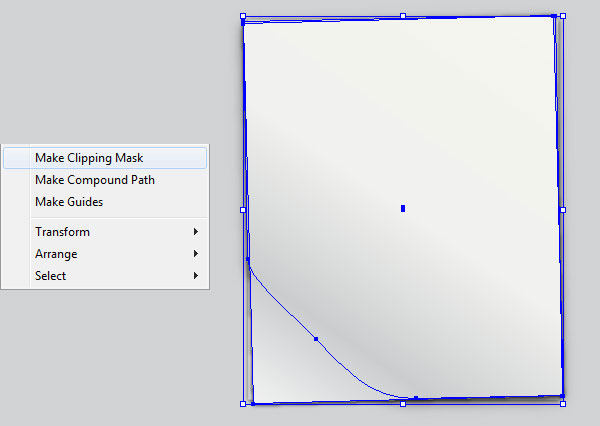
14. Select the last shape created in the step 13 and make a copy (Ctrl +C, Ctrl +F) of it. Keep this copy selected and go to the Effect > Stylize > Drop Shadow… Follow the data like you see in the first image and click OK. Now select the first shape created in the step 13 and make a copy of it, then bring the copy to front (Ctrl +Shift +Right Square Bracket). Still having the copy selected, hold down the Shift and click on the shape with shadow effect applied in this step. Right-click on the artboard and then select the Make Clipping Mask section from the drop-down menu. Finally hide the clipping set behind the last shape created in the step 13.
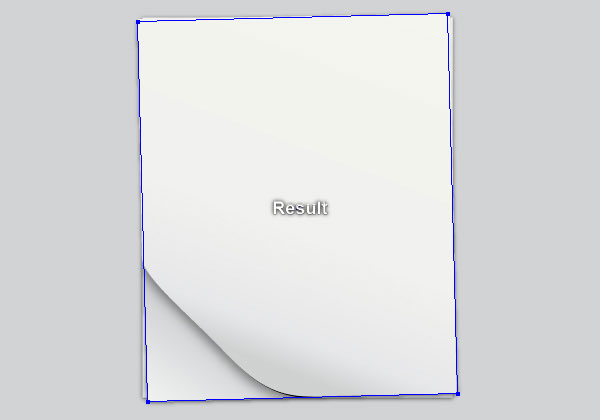
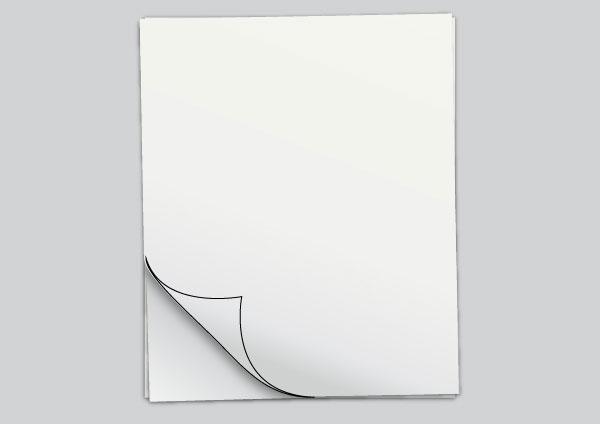
15. Select the black object created in the step 10, remove its stroke and fill this object with the linear gradient as shown in the first image. We are done with the white paper pages for the moment.

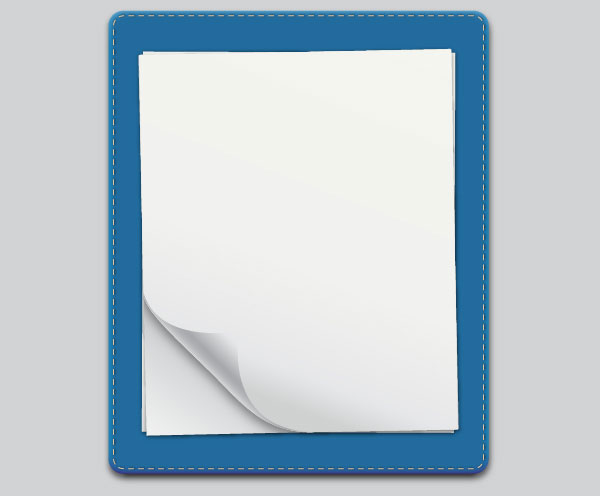
16. Place the paper pages into the paper pad holder.
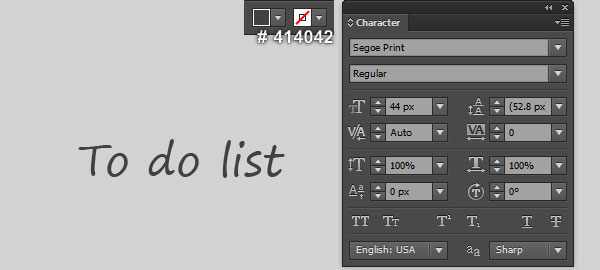
17. Now pick the Type Tool (T), open the Character panel (Window > Type > Character) and set the data as shown below. Next simply click on your artboard and add the text like you see in the first image, then set its color to very dark grayish violet (# 414042). Finally place this text into the white pages.

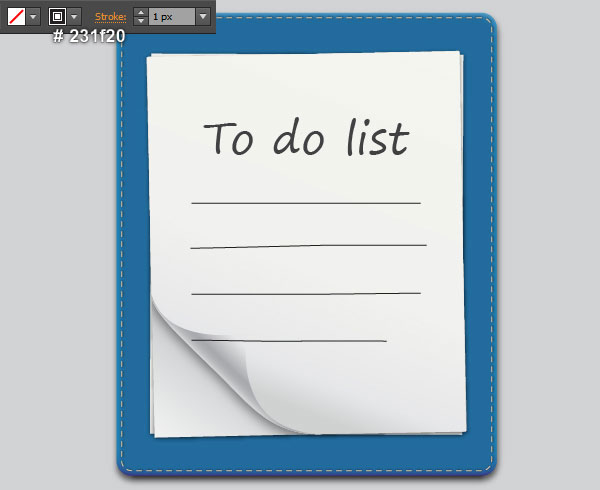
18. Using the Pen Tool (P) create four horizontal lines, with a very dark red stroke (# 231f20) and no fill. Next hide these lines behind the folded page corner.

Create the Metal Clip
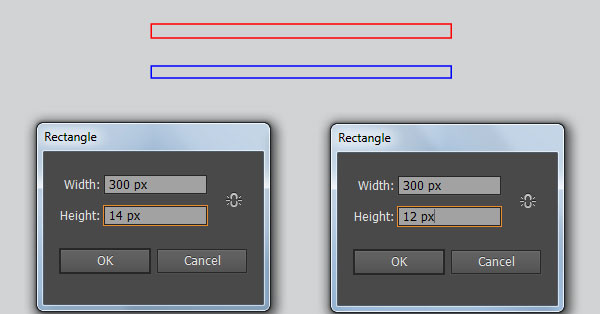
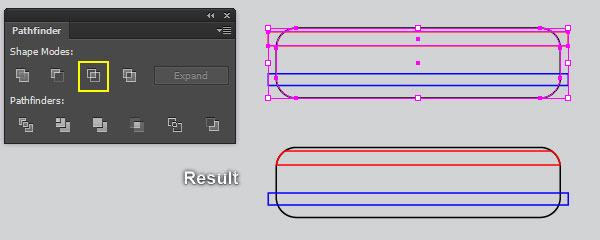
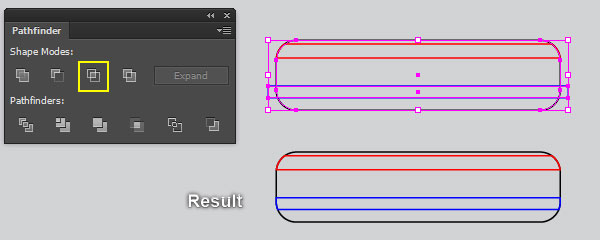
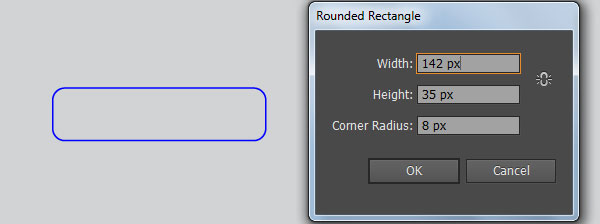
19. It’s time to draw the metal clip. Pick the Rounded Rectangle Tool from the Tool bar and simple click on the artboard. Enter the data like you see in the first image and click OK. Next pick the Rectangle Tool (M) and create two rectangles with dimensions: 300 by 14px and 300 by 12px. Then place the two newly created rectangles to the positions as shown in the third image. Before you continue, reselect the black rounded rectangle created in this step and make two copies of it (Ctrl +C, Ctrl +F, Ctrl +F). Keep a copy of the black rounded rectangle selected, hold down the Shift and click on the red rectangle. Open the Pathfinder panel (Window > Pathfinder) and click on the Intersect button. Next select the remaining copy of the black rounded rectangle, hold down the Shift and click on the blue rectangle. Finally click on the Intersect button from the Pathfinder panel.

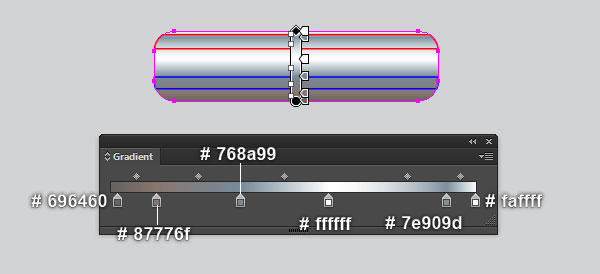
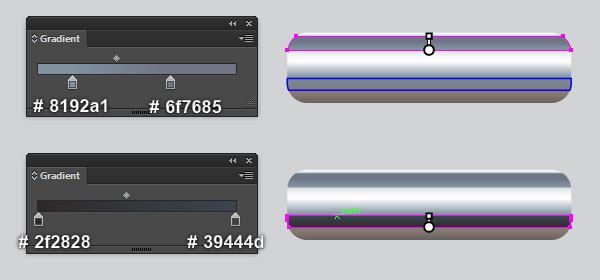
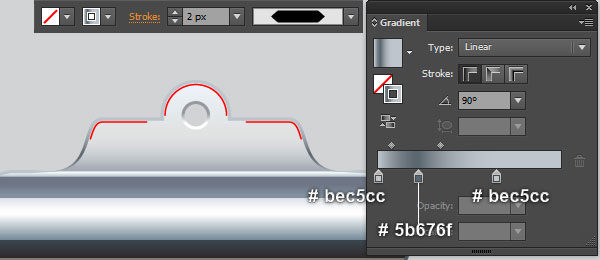
20. Select the black rounded rectangle created in the step 19, remove its stroke and fill this object with the linear gradient as shown in the first image. Next select the remaining two objects created in the step 19, remove their strokes and fill these objects as shown in the second and the third images.
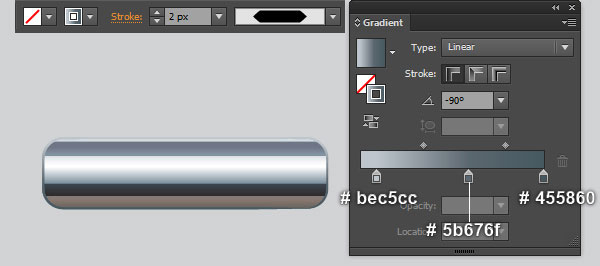
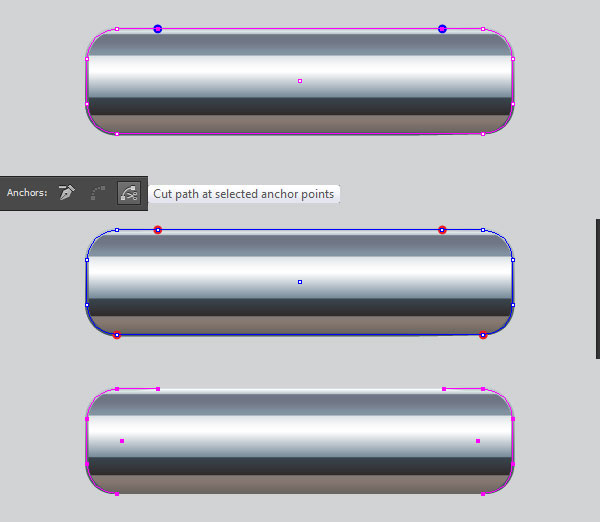
21. Select the first shape created in the step 20 and make a copy (Ctrl +C, Ctrl +F) of it, then bring the copy to front (Ctrl +Shift +Right Square Bracket). Keep the newly created object selected, swap the fill and stroke colors by clicking the bent double-headed arrow next to the Fill and Stroke color swatches in the Tools panel. Still having the resulting object selected, replace the existing stroke color with new linear gradient as shown in the first image. Change the stroke weight of the resulting object to 2px and apply the Width Profile 3 for it. Focus on the second image, pick the Add Anchor Point Tool (+) and add two anchor points at the points highlighted with blue. Now focus on the third image, select the four anchor points highlighted with red, then click on the “Cut path at selected anchor points” icon from the Properties bar. This make the object becomes four paths. Select the two horizontal paths and remove them.
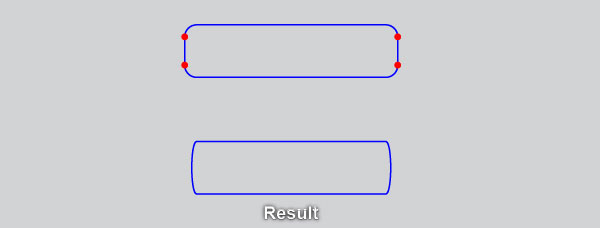
22. With the Rounded Rectangle Tool, create a blue rounded rectangle like you see in the first image. With the help of the Direct Selection Tool (A) and the Shift, select and remove four anchor points highlighted with red. Focus on the fourth image, select the bottom-left anchor point of the blue object and move it 35px to the left. Now pick the Convert Anchor Point Tool (Shift +C), click on the left handle of the bottom-left anchor point, then hold mouse and drag it to the right while holding Shift. Next pick the Direct Selection Tool (A), select the left handle of the top-left anchor point and drag it to the left. Don’t forget to hold the Shift key on the keyboard for straight dragging.

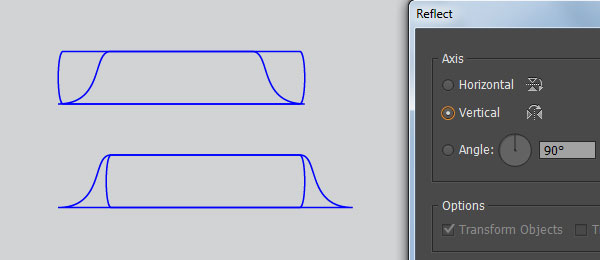
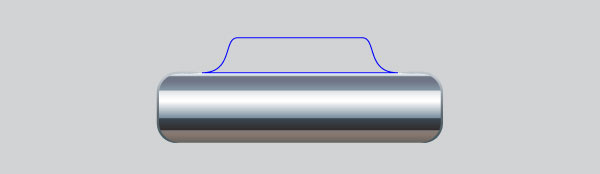
23. Reselect the blue object created in the step 22 and double-click on the Reflect Tool icon from the Tools panel. In the Reflect dialog box, check the Vertical and click Copy. Then move the newly created object 32px to the right. Now select the two blue objects created from beginning step 22 to this time. Next open the Pathfinder panel (Window > Pathfinder) and click on the Unite button. Finally place the resulting object to the correct position as shown in the last image.

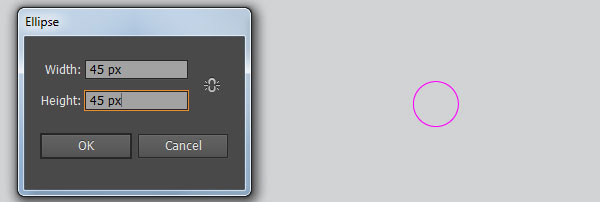
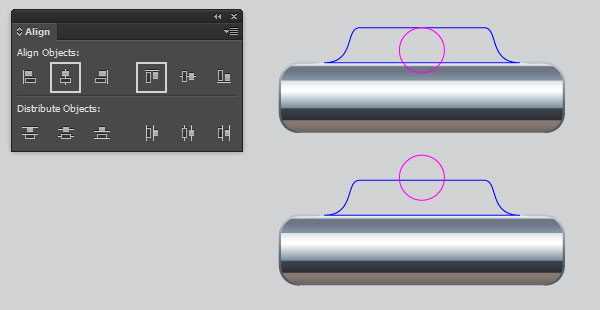
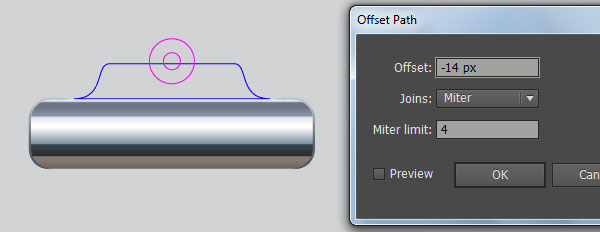
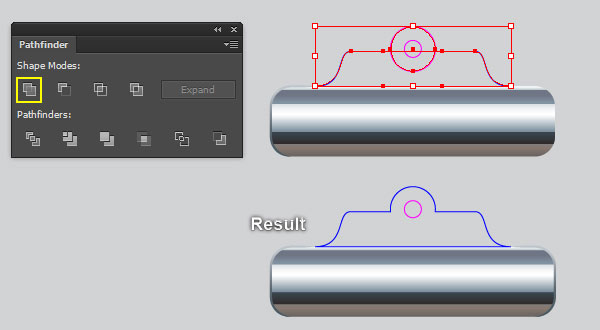
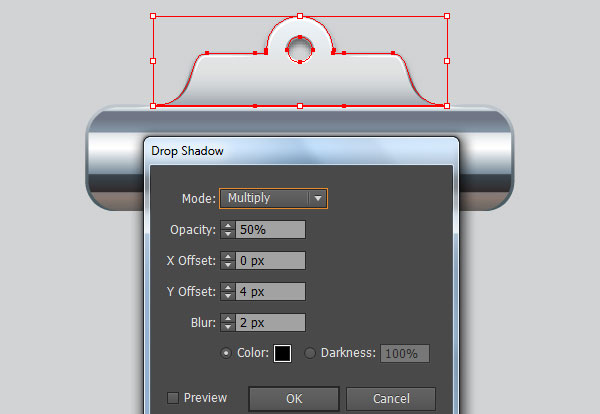
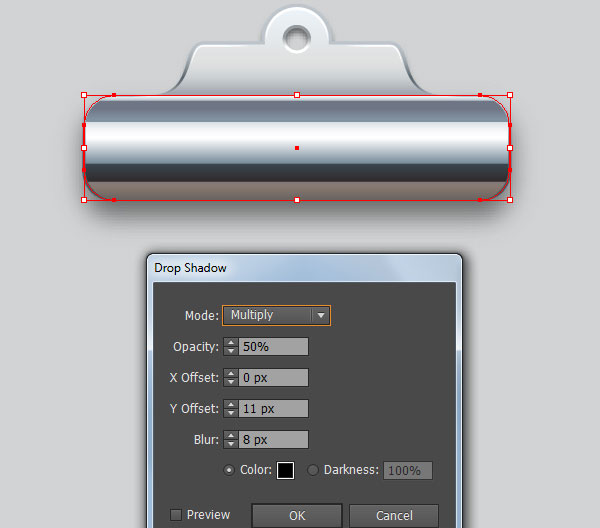
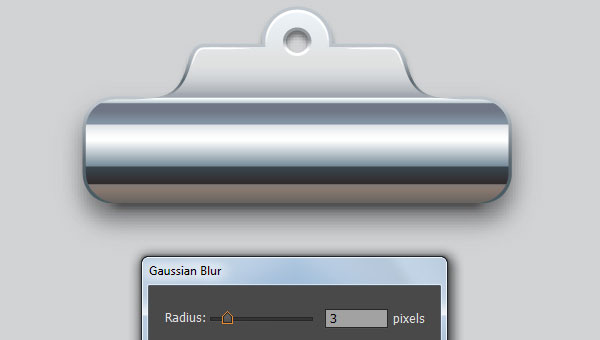
24. Pick the Ellipse Tool (L) and create a 45 by 45px magenta ellipse. Keep this ellipse selected, hold down the Shift and click on the blue object created in the step 23. Release the Shift and click on the blue object again (to fixed its position). Next open the Align panel (Window > Align), click on the Horizontal Align Center button and click on the Vertical Align Top button. Then reselect the magenta ellipse and move it 25px up. Still having this ellipse selected and go to the Object > Path > Offset Path… Enter a -14px Offset and click OK. Now select the bigger magenta ellipse and the blue object. Then open the Pathfinder panel (Window > Pathfinder) and click on the Unite button.
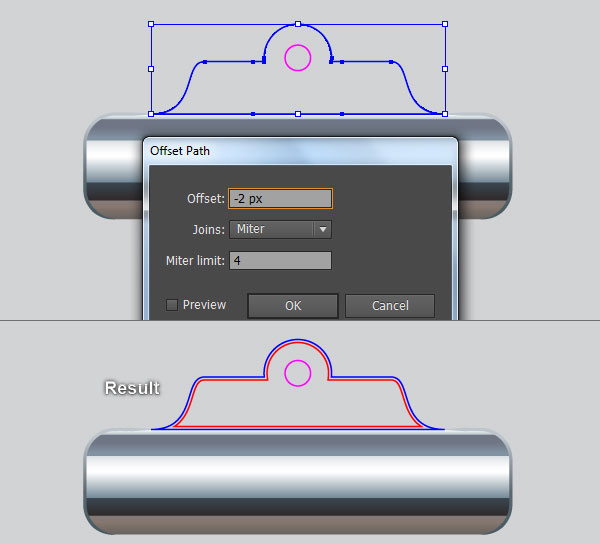
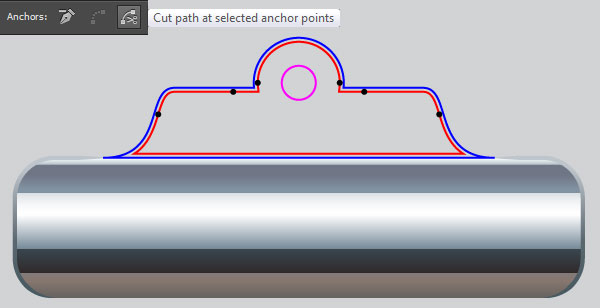
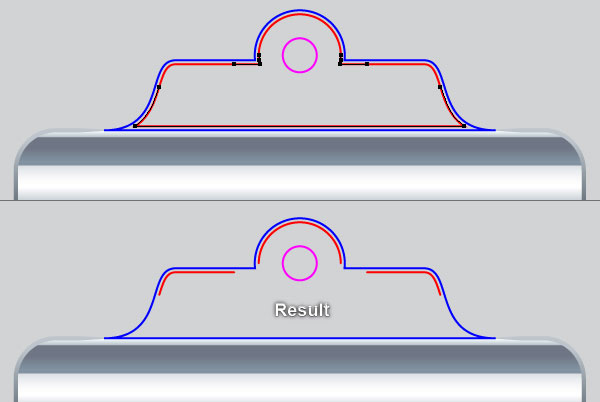
25. Select the blue object created in the step 24 and go to the Object > Path > Offset Path… Enter a -2px Offset and click OK, then replace the existing stroke color of the newly created object with red. Focus on the third image, pick the Add Anchor Point Tool (+) and click on the six points highlighted with black. This will add six new anchor points for the red object. With the help of the Direct Selection Tool (A) and the Shift, select six newly added anchor points. Then click on the “Cut path at selected anchor points” icon from the Properties bar. This make the red object becomes six paths. Select the three paths like you see in the next to last image and then remove them.
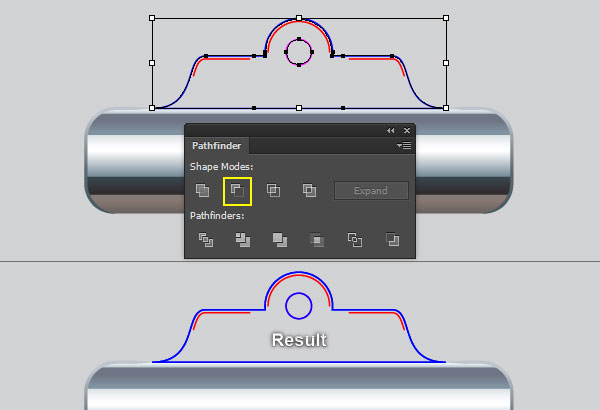
26. Before you continue, select the blue object and the magenta ellipse, then make a copy (Ctrl +C, Ctrl +F) of them. Keep these copies selected, open the Pathfinder panel (Window > Pathfinder) and click on the Minus Front button. Having the resulting object selected, remove its stroke and fill this object with the linear gradient as shown in the third image. Then send the resulting shape to back (Ctrl +Shift +Left Square Bracket).

27. Select the magenta ellipse and change the stroke weight to 2px, then replace the existing stroke color with the linear gradient within stroke. Focus on the second image, select the two anchor points highlighted with black of the blue object. Then click on the “Cut path at selected anchor points” icon from the Properties bar. This make the blue object becomes two paths. Select and remove the horizontal path. Next select the remaining blue path, change the stroke weight to 2px and fill this path with the linear gradient within stroke. Now select the three red paths, replace the existing stroke color with white (# ffffff) and then apply the Width Profile 1 for the resulting paths. Finally reselect the curved path as shown in the last image and change the stroke weight to 2px.


28. To give a more realistic look I’m going to be adding some shadows on some key places. Select the shape created in the step 26 and go to the Effect > Stylize > Drop Shadow… Follow the data like you see in the first image and click OK. Continue select the first shape created in the step 20 and apply the shadow effect as shown in the second image. Now using the Line Segment Tool (\) create a horizontal line of length 244px, with a 3px very dark red stroke (# 231f20) and no fill. Then place this line to the correct position like you see in the next to last image. Finally apply a 3px Gaussian Blur effect for the newly created line, then hide the resulting line behind the clip.

29. Select and group (Ctrl +G) all objects created from beginning step 19 to this time. The metal clip is done! Place this clip to the position like you see in the image below.

30. With the help of the Rectangle Tool (M) and the Gradient Tool (G), create a 714 by 700px grayish blue rectangle as shown below. The last thing to do is place the clipboard into the newly created background.
And We’re Done!