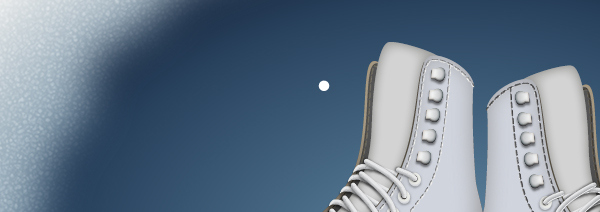
In this tutorial you will learn how to create a pair of Ice Skates in Adobe Illustrator. We’ll create all of these starting from simple shapes and using a few manipulation techniques along with the Pathfinder palette. Next, you will learn how to add details and highlights on your artwork using the Stroke palette plus the Blend Options and some effects (Inner Glow, Drop Shadow…). Moving on you will learn how create a text using a artistic brush. You’ll finish with the nice background using the Sketch effect and the Gaussian Blur effect. Let’s jump in!
Create a New Document
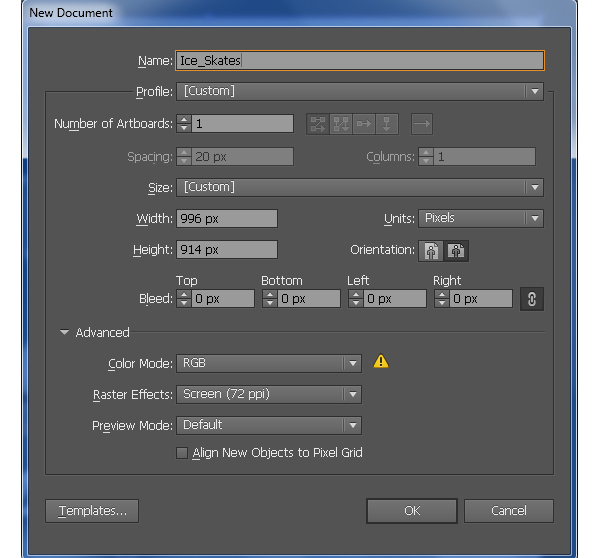
1. Launch Illustrator and then press (Ctrl + N) to create a New document. Select Pixels from the Units drop-down menu, enter 996 in the width box and 914 in the height box then click on the Advanced button. Select RGB, Screen (72ppi) and make sure that the Align New Objects to Pixel Grid box is unchecked before you click OK.
Create the Boot
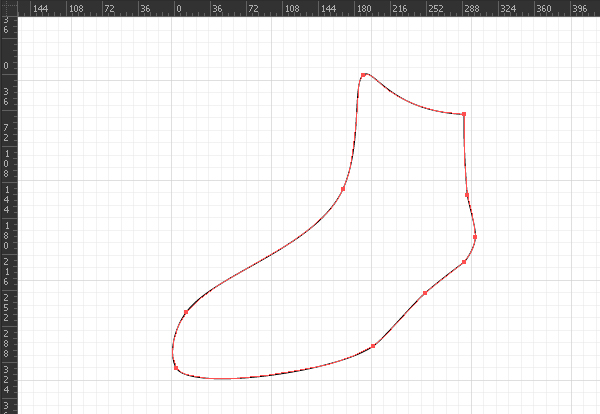
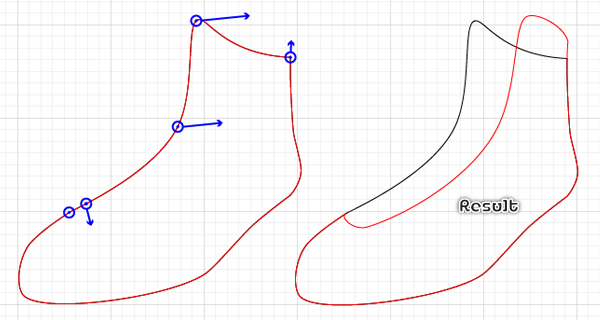
2. Start with drawing an object using the Pen Tool (P) like in the image below.
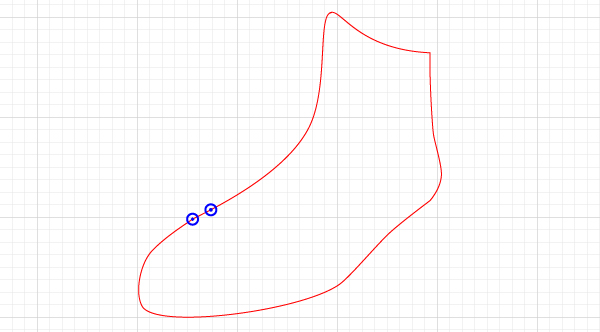
3. Once your object is drawn, duplicate (Ctrl +C, Ctrl +F) it once and then replace the existing stroke color of the copy with red. With the Add Anchor Point Tool (+) add two anchor points in the points highlighted with blue. Next select all anchor points highlighted with blue and move them follow the directions of the arrows. Next with the help of the Convert Anchor Point Tool (Shift +C) adjust the shape of the red object as shown in the third image.
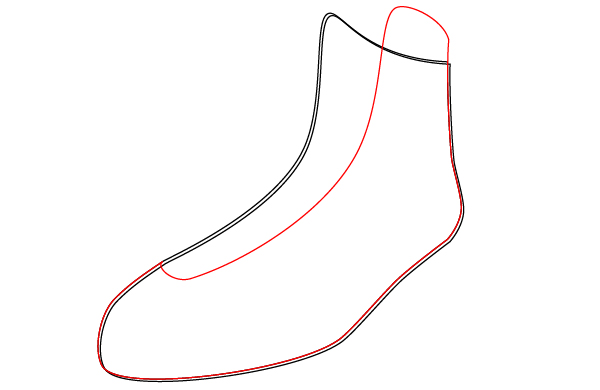
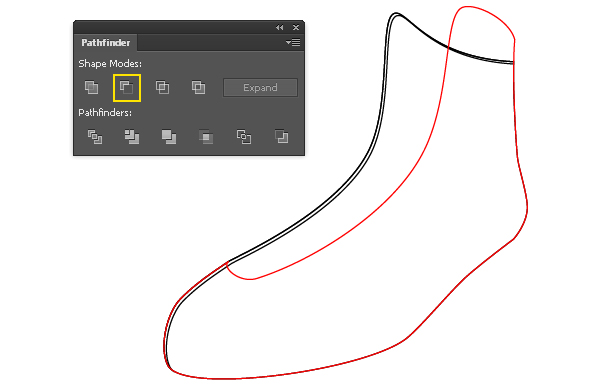
4. Reselect the black object, duplicate it twice (Ctrl +C, Ctrl +F, Ctrl +F) and move a copy 2px down, then move it 2px to the right. Now reselect two black objects created in this step and open the Pathfinder palette (Window > Pathfinder), then click on the Minus Front button.
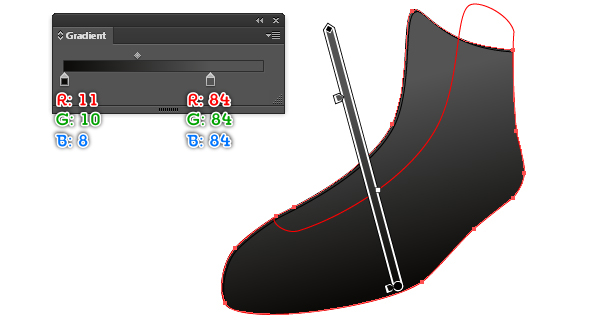
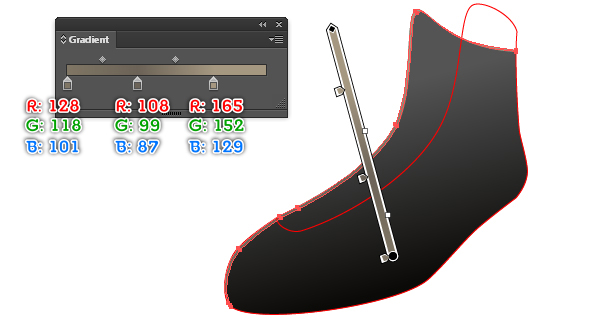
5. Fill two black objects with the linear gradient as shown in the images below.
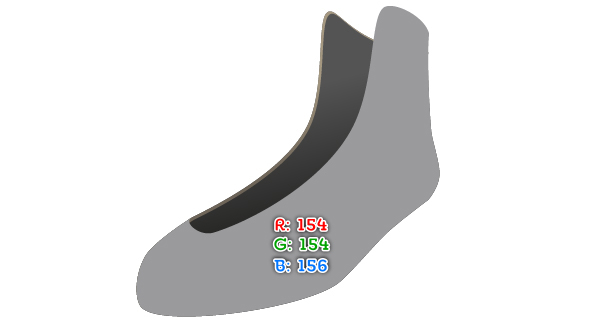
6. Fill the red object with R=154, G=154, B=156.
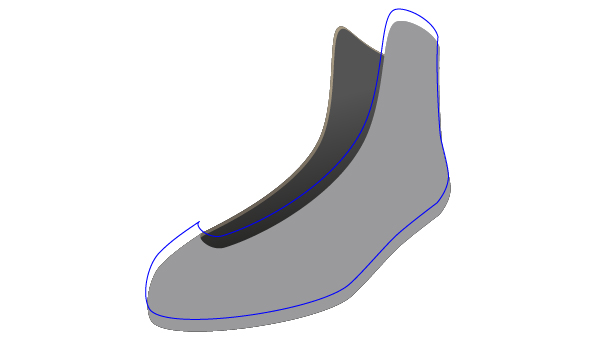
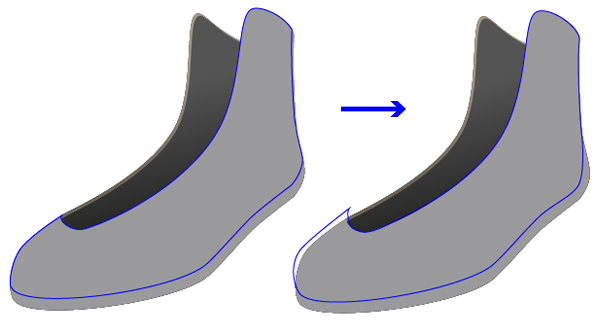
7. Select the shape created in the step 6 and duplicate it once. Keep the copy selected, remove the fill color and add a 1px stroke (blue color), then move this blue object 14px up. Now reselect the shape created in the step 6 again and duplicate it once. Keep the copy selected, hold down the Shift and click on the blue object. Next open the Pathfinder palette (Window > Palette) and click on the Intersect button. Finally with the help of the Direct Selection Tool (A) adjust the shape of this blue object as shown in the final image below.
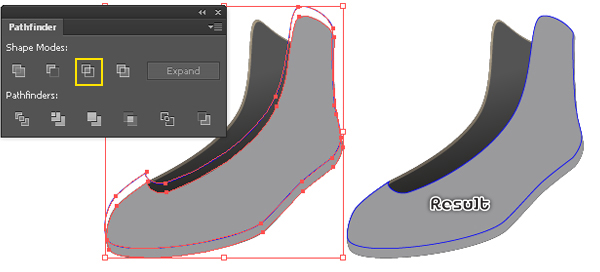
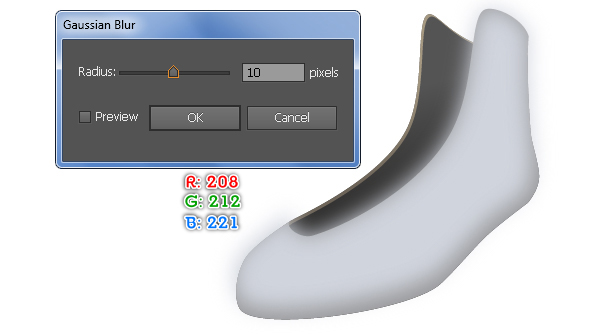
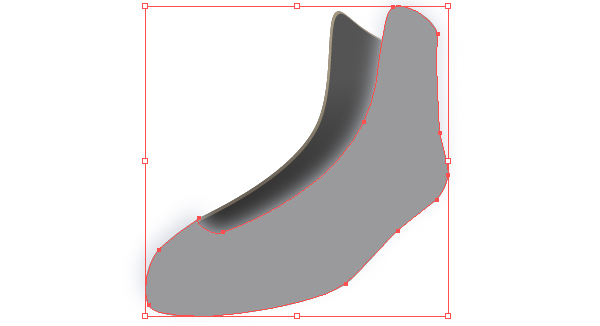
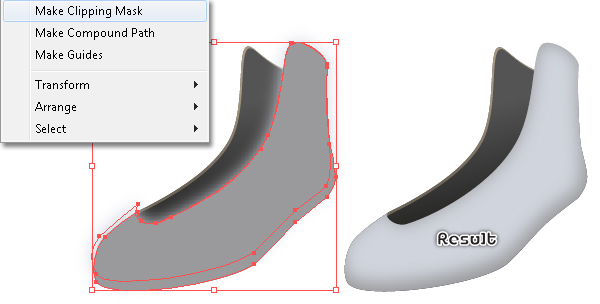
8. Select the blue object created in the step 7, remove the stroke and fill it with R=208, G=212, B=221. Make sure that the resulting shape is still selected, go to the Effect > Blur > Gaussian Blur… Enter a 10px Radius and click OK. Now select the shape created in the step 6, duplicate it once and then bring the copy to front (Ctrl +Shift +Right Square Bracket). Keep the newly created shape selected, hold down the Shift and click on the blurred shape, then go to the Object > Clipping Mask > Make (Ctrl +7).
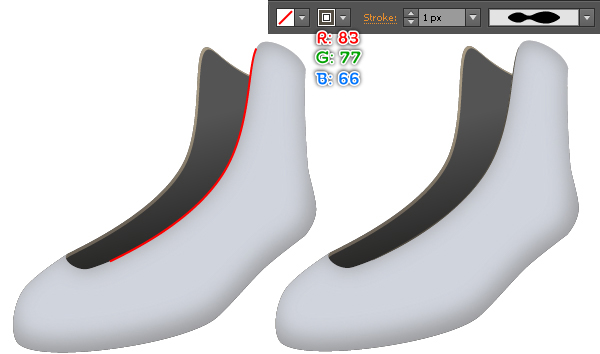
9. To add some details, first draw a curved path as shown below. Next fill this path with none and add a 1px stroke (R=83, G=77, B=66), then apply the Width Profile 2 for the resulting object.
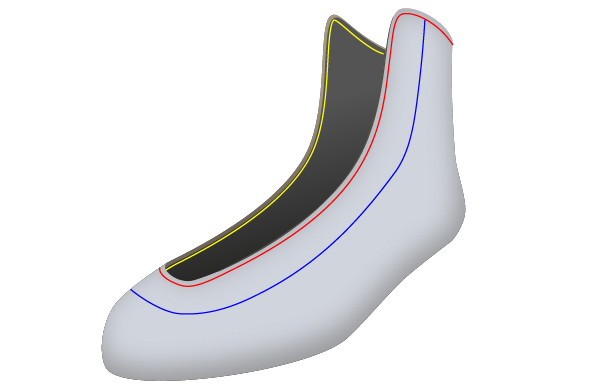
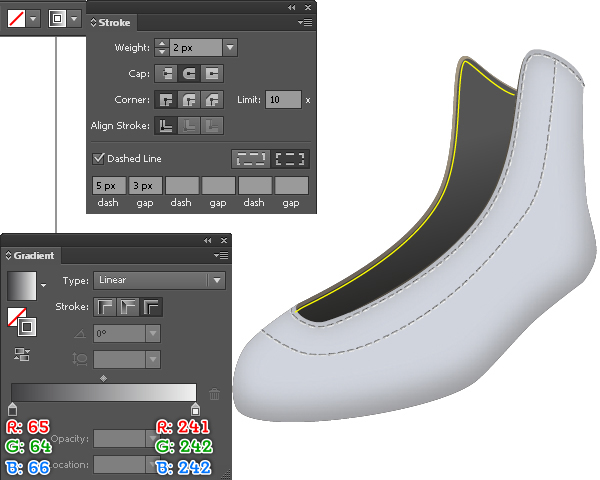
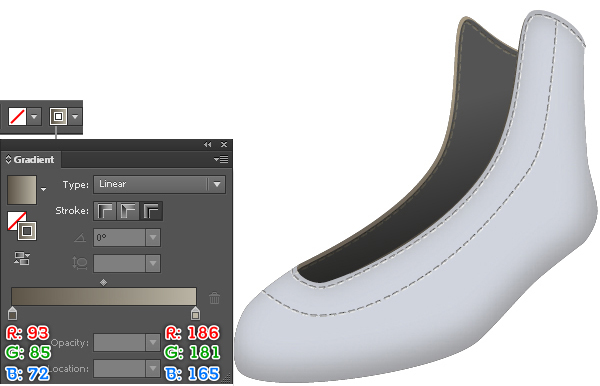
10. With the Pen Tool (P) create three curved paths like you see in the image below. Once your paths are drawn, replace the existing stroke color of the red path and the blue path with the linear gradient across stroke, then change the stroke weight to 2px. Keep the resulting paths are selected and open the Stroke palette (Window > Stroke). In the Stroke dialog box, check the Dashed Line box and enter 5px in the dash box and 3px in the gap box. Now select the yellow path, pick the Eyedropper Tool (I) and click on one of the two dashed paths, then replace the existing stroke color of the resulting path with new linear gradient across stroke as shown in the third image.
11. Continue with the tongue of the boot. Using the Pen Tool (P) create an object as shown in the image below. Now select the shape created in the step 6, duplicate (Ctrl +C, Ctrl +F) it once and then bring the copy to front (Ctrl +Shift +Right Square Bracket). Keep the new shape selected, hold down the Shift and click on the red object, then click on the Minus Front button from the Pathfinder palette.
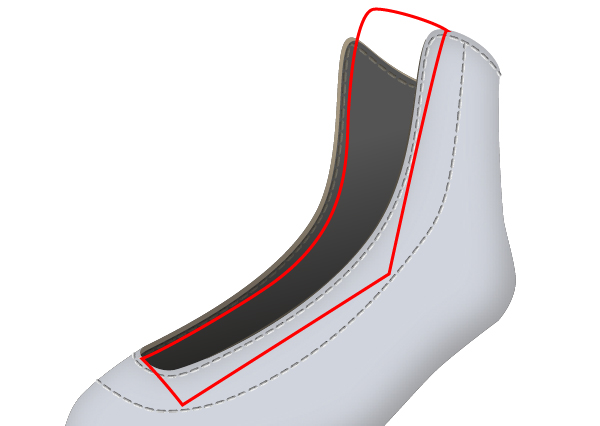
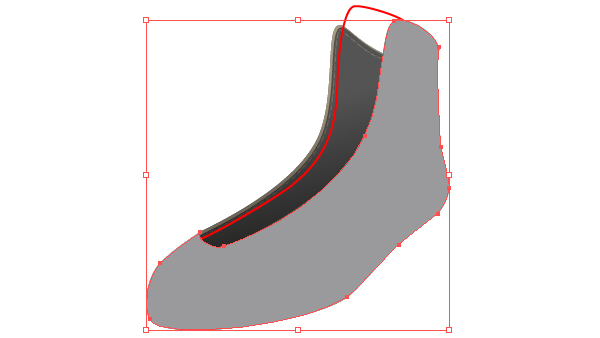
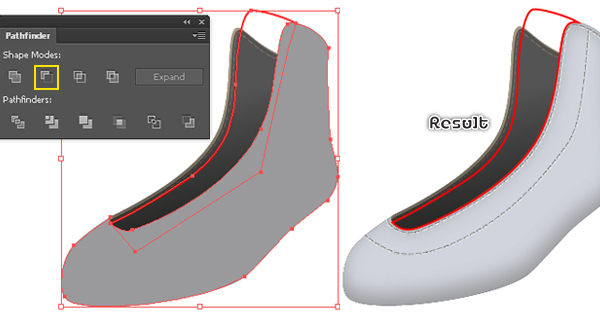
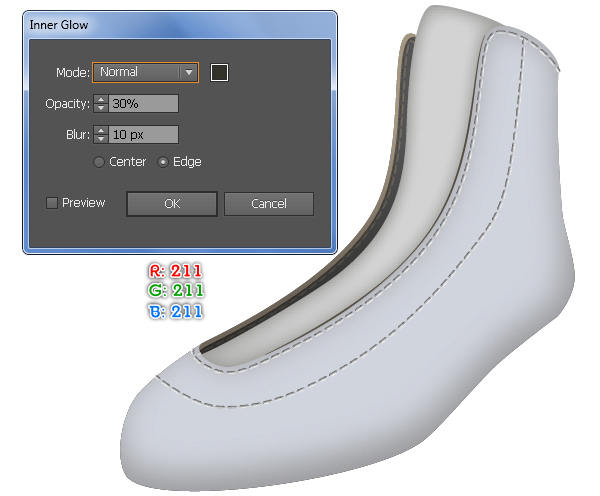
12. Fill the red object with R=211, G=211, B=211 and then go to the Effect > Stylize > Inner Glow…Follow the data as shown below and click OK.
13. It’s time to draw the eyelets. Start with drawing an elippse using the Ellipse Tool (L). Next fill this ellipse with the radial gradient as shown in the second image. Keep the resulting shape selected, go to the Effect > Stylize > Drop Shadow…Follow the data as shown in the third image and click OK. Continue create another ellipse like you see in the fourth image and fill it with R=45, G=39, B=36.
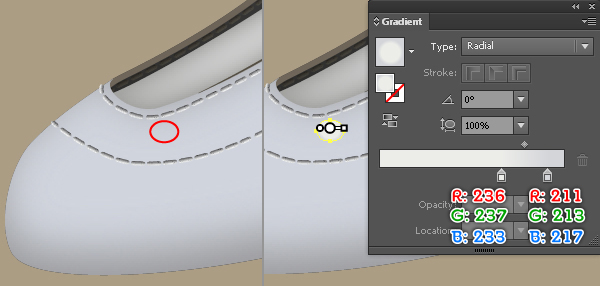
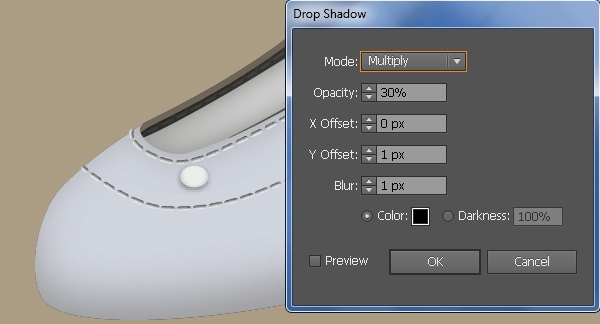
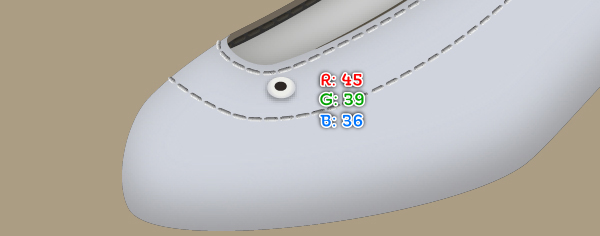
14. Likewise, repeat the same process as the previous steps to draw more eyelets.
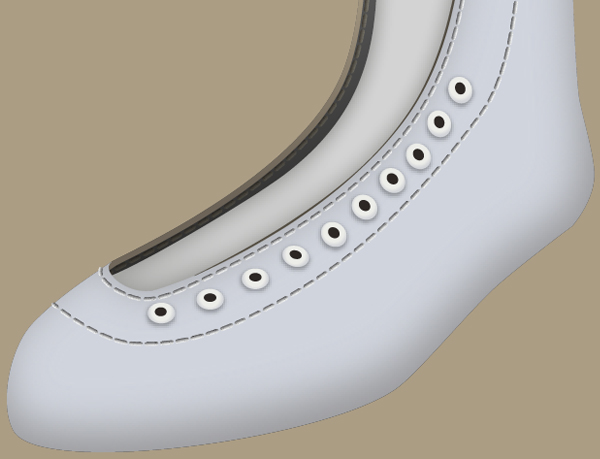
15. Next comes the laces. With the Pen Tool (P) create some curved paths as shown in the images below.
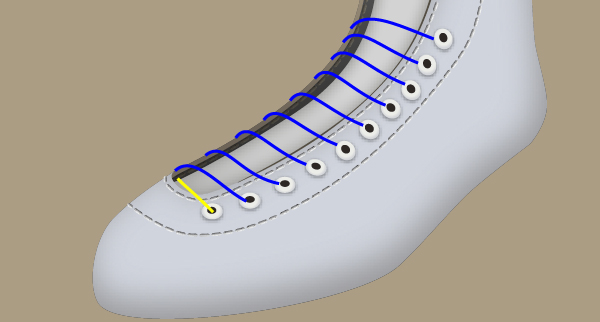
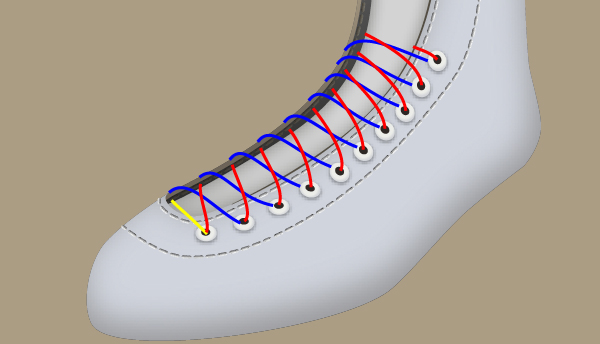
16. Select the blue paths and the yellow path and then replace the existing stroke color of them with the linear gradient across stroke as shown below. Next change the stroke weight of the resulting paths to 5px. Make sure that the resulting paths are still selected, hold down the Shift and click on the shortest path to deselect it, then apply the Width Profile 3 for the remaining paths. Now reselect all paths edited in this step and go to the Effect > Stylize > Drop Shadow… Follow the data as shown in the second image and click OK, then press (Ctrl +Left Square Bracket) some times to hide the resulting paths behind the front of the boot.
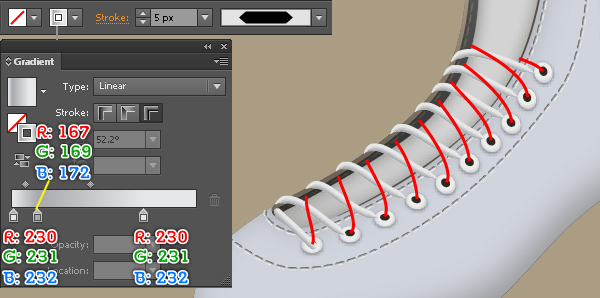
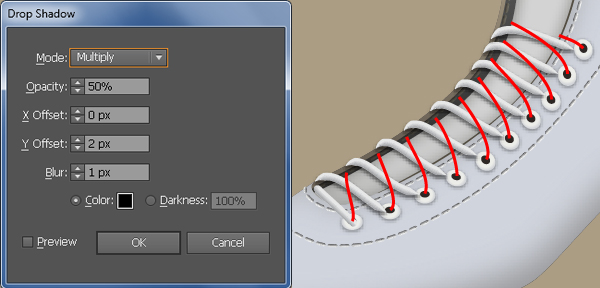
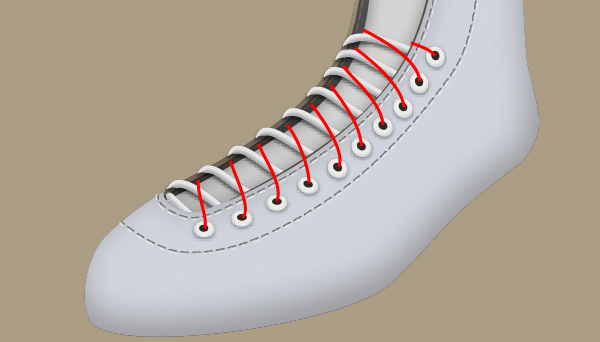
17. Select all the red paths and then replace the existing stroke color of them with the linear gradient across stroke as shown below. Next open the Stroke palette (Window > Stroke) and change the stroke weight of the resulting paths to 5px, then click on the Round Cap button. Make sure that the resulting paths are still selected and go to the Effect > Stylize > Drop Shadow… Use the values as shown in the second image and then click OK.
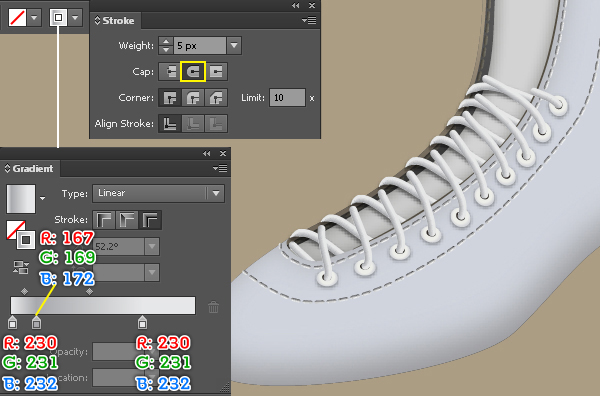
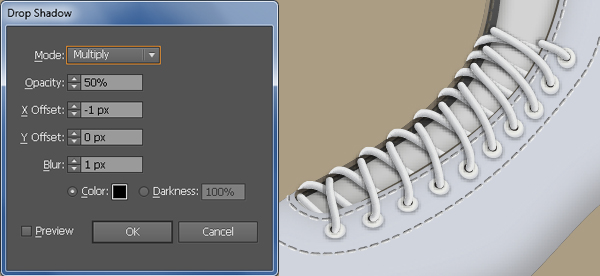
18. Let’s work on creation of hooks on our boot. Pick the Pen Tool (P) and create an object as shown below. Once your object is drawn, fill it with the linear gradient. Next make a copy (Ctrl +C, Ctrl +F) of the resulting shape and move the copy 2px up, then move it 1px to the right. Finally replace the existing color of the new shape with new linear gradient.
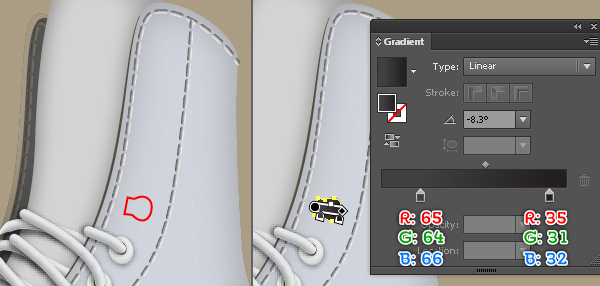
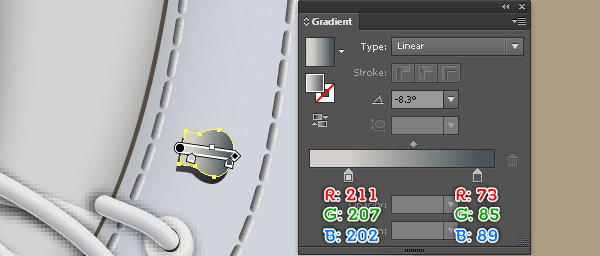
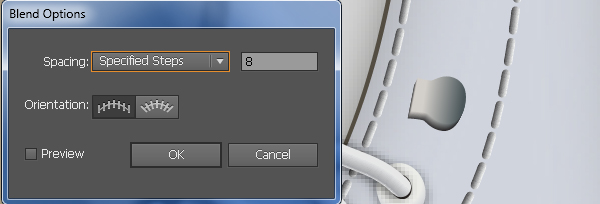
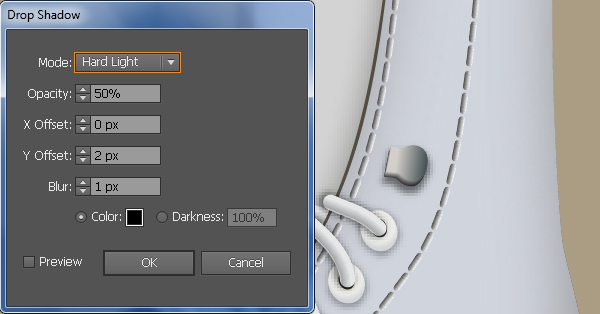
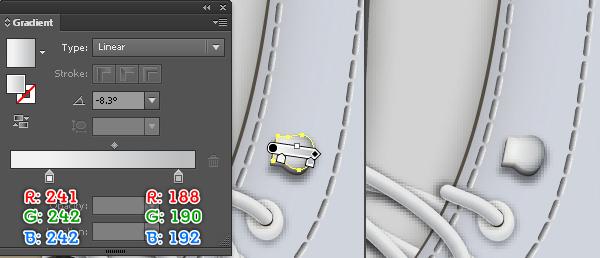
19. Make a copy of the new shape created in the step 18 and then hide (Ctrl +3) the copy. Now reselect two shapes created in the step 18 and go to the Object > Blend > Blend Options… Use the values as shown below and click OK, then go to the Object > Blend > Make (Ctrl +Alt +B). Keep the resulting object selected and go to the Effect > Stylize > Drop Shadow… Enter the values as you see in the second image and click OK. Finally press (Ctrl + Alt +3) to show the shape hidden in the previous step and then replace the existing color of this shape with new linear gradient as shown in the third image.
20. Likewise, repeat the same process as the previous steps to draw more hooks. In the end your boot should look roughly like the second image.
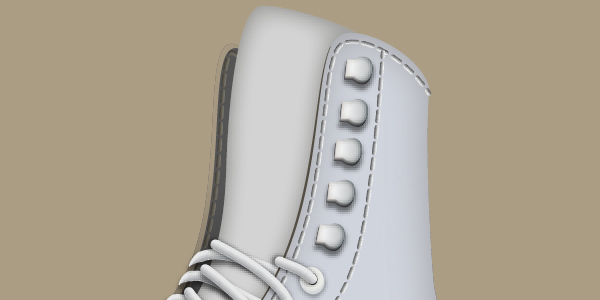
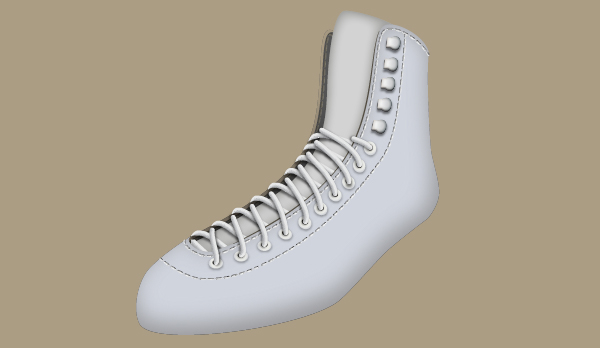
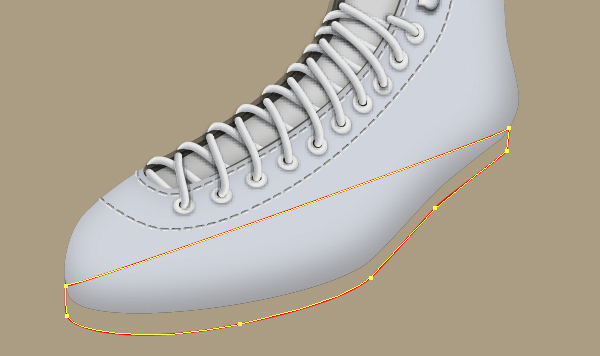
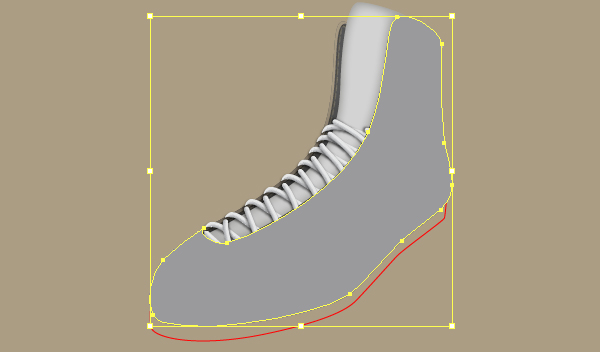
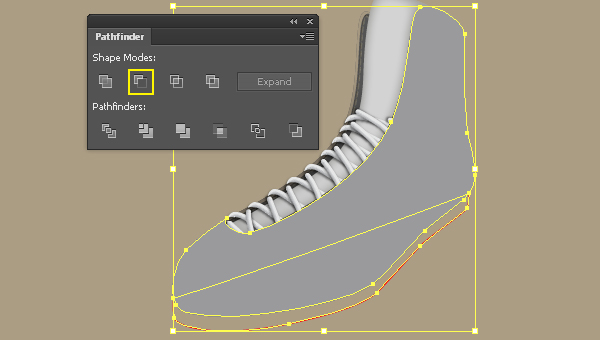
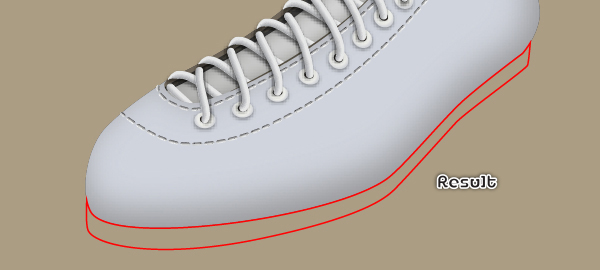
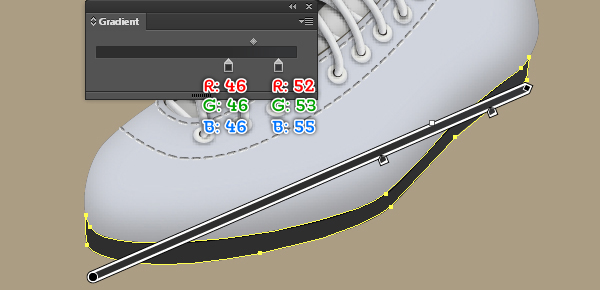
21. It’s time to draw the sole. With the Pen Tool (P) create an object as shown below. Next select the shape created in the step 6, duplicate (Ctrl +C, Ctrl +F) it once and then bring the copy to front (Ctrl +Shift +Right Square Bracket). Make sure that the new shape is still selected, hold down the Shift and click on the red object, then click on the Minus Front button from the Pathfinder palette (Window > Pathfinder). Finally fill the resulting object with the linear gradient like you see in the fifth image below.
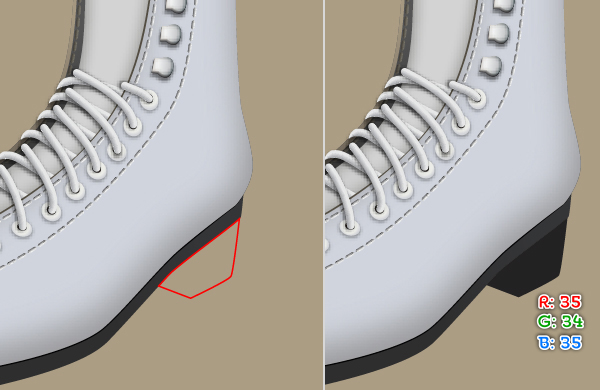
22. Next come the heel. Using the Pen Tool (P) create an object as shown in the image below. Once your object is drawn, fill it with R=35, G=34, B=35.
23. Continue with the Pen Tool (P) create a curved path as shown below. Next reselect the new path and go to the Object > Transform > Move… Enter a 4px in the Vertical box and click Copy, the press (Ctrl +D) seven times to get the results like you see in the second image. Now reselect all newly created paths and replace the existing stroke color of them with the linear gradient within stroke, then apply the Width Profile 3 for the resulting paths.
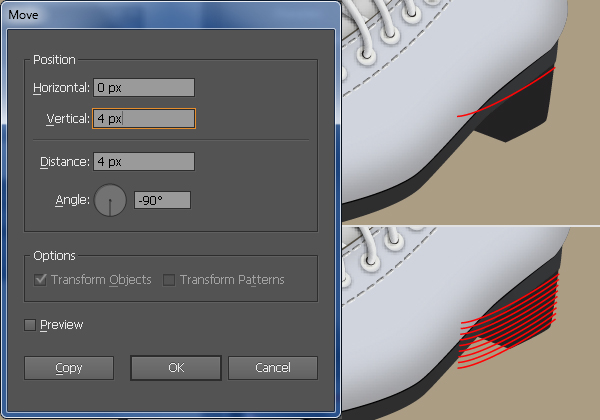
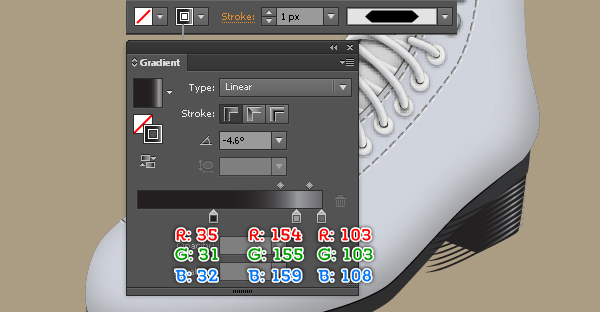
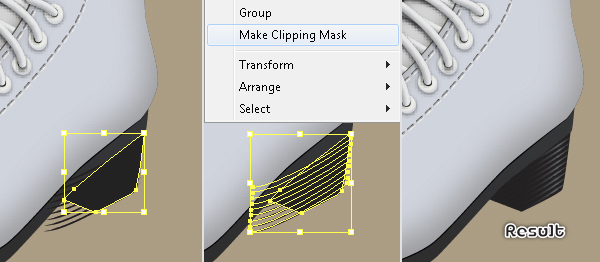
24. Select all paths created in the step 23 and group (Ctrl +G) them. Next select the shape created in the step 22, duplicate it once and then bring the copy to front. Make sure that the new shape is still selected, hold down the Shift and click on the new group created in this step, then go to the Object > Clipping Mask > Make (Ctrl +7).
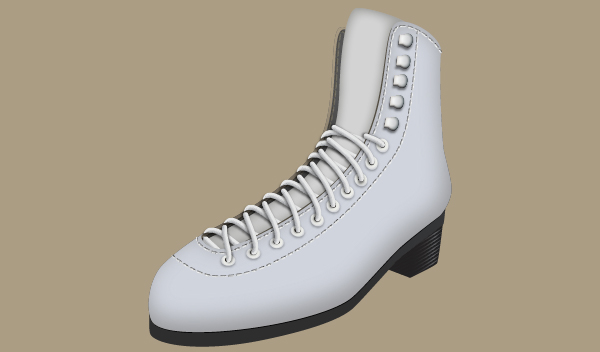
25. At this point your skate should look like in the image below.
Create the Skating Blade
26. Using the Pen Tool (P) create an object as shown below. Next with the help of the Convert Anchor Point Tool (Shift +C) and the Add Anchor Point Tool (+) adjust the shape of the new object as shown in the second image. After you are done adjusting the shape of the object apply a nice linear gradient like you see in the third image. Finally send the resulting shape to back (Ctrl +Shift +Left Square Bracket).
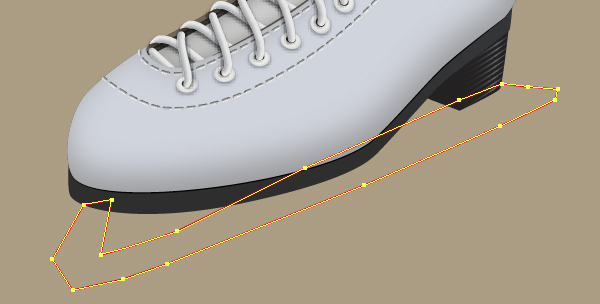
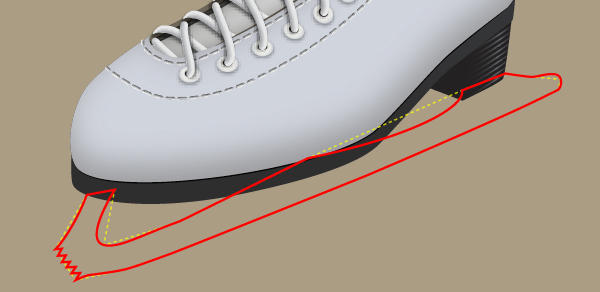
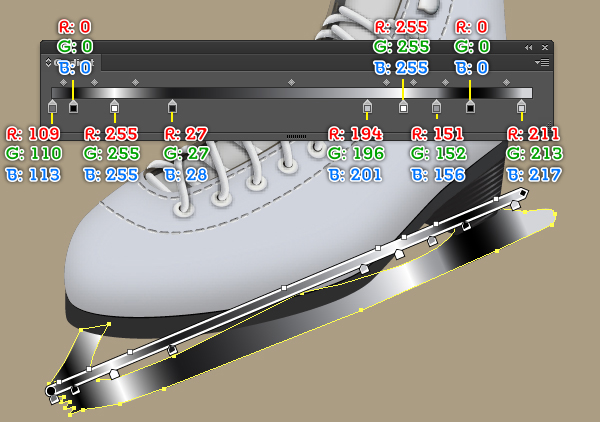
27. Select the new shape created in the step 26, duplicate it once and then move the copy 1px down, then move it 3px to the right. Next make a copy of the newly created shape and then hide the copy. Now reselect two new shapes created in the step 26 and step 27 and then go to the Object > Blend > Blend Options… Follow the data as shown in the second image and click OK.
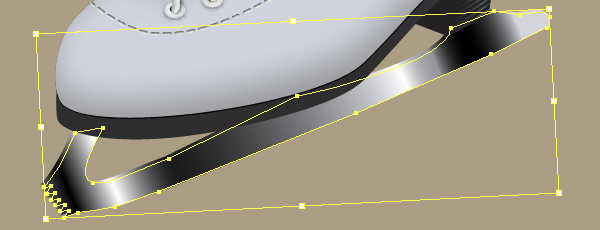
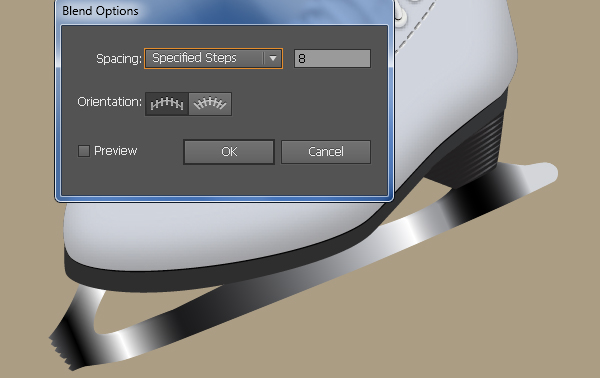
28. Press (Ctrl +Alt +3) to show the shape hidden in the step 27 and then replace the existing color of it with new linear gradient.
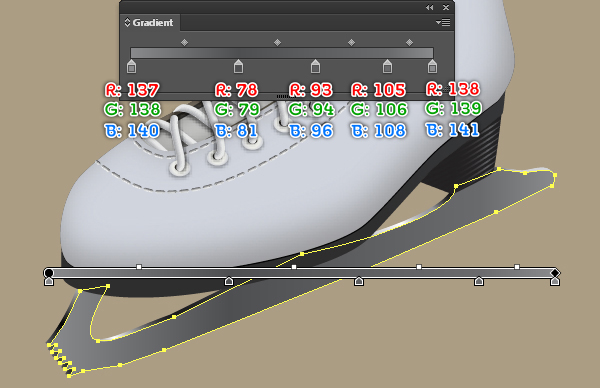
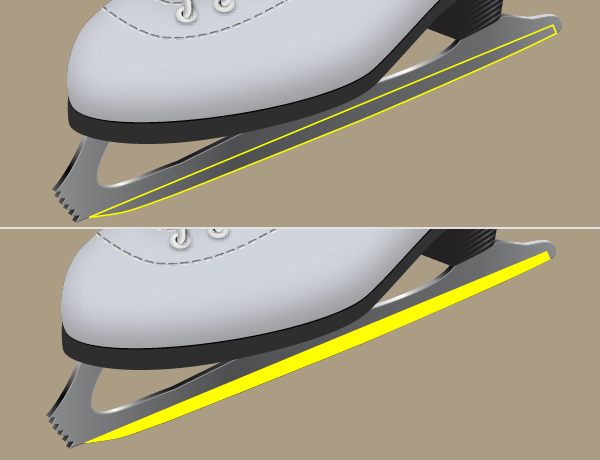
29. Make a copy (Ctrl +C, Ctrl +F) of the new shape created in the step 28 and remove the fill color of the copy, then add a 1px stroke (red color). Now select three anchor points highlighted with yellow and click on the “Cut path at selected anchor points” button from the Properties bar. This make the object becomes three paths.
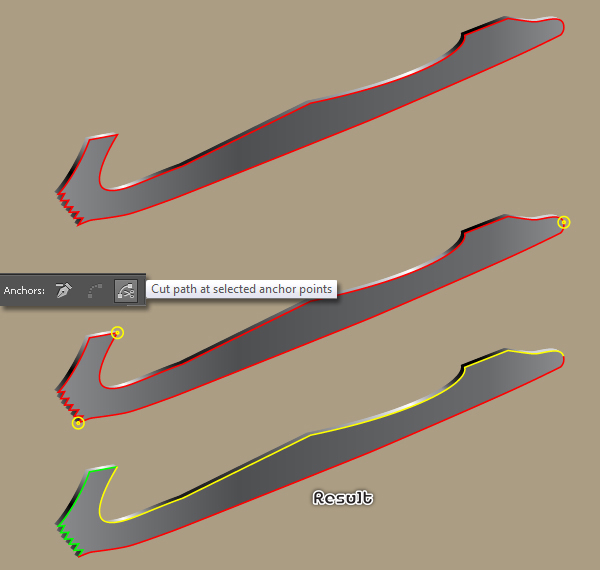
30. Fill the yellow path with none and add a 0.5px stroke (R=149, G=151, B=151), then apply the Width Profile 2 for the resulting path. Next fill the red path with none and add a 0.5px stroke (R=73, G=73, B=75), then apply the Width Profile 3 for the resulting path.
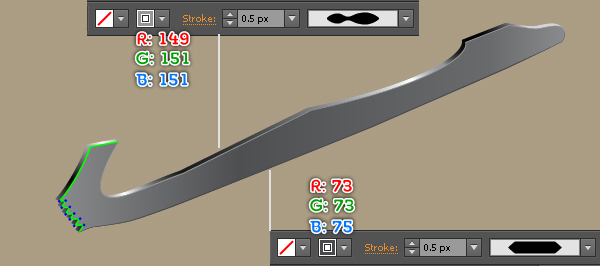
31. Focus on the green path, select ten anchor points highlighted with blue and click on the “Cut path at selected anchor points” button from the Properties bar. Next select five paths like you see in the second image and remove them.
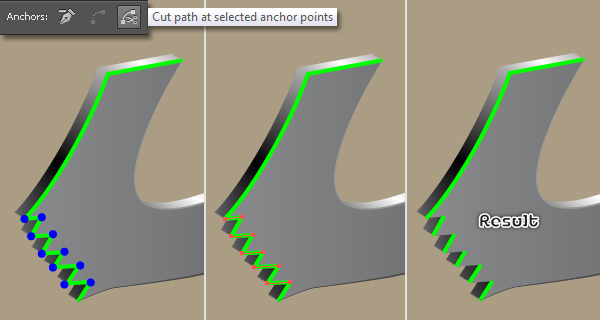
32. Select the longest green path and replace the existing stroke color with R=169, G=171, B=171, then change the stroke weight to 0.5px. Next apply the Width Profile 1 for the resulting path. Finally select remaining green paths and replace the existing stroke color with R=169, G=171, B=171, then change the stroke weight to 0.5px. At this point your skate should look like in the third image below.
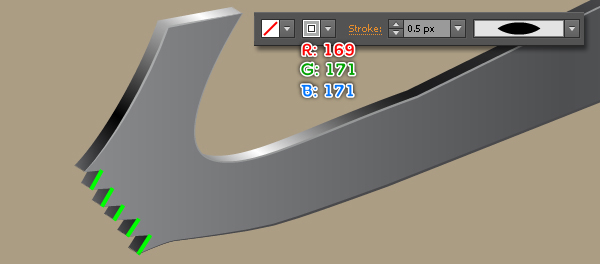
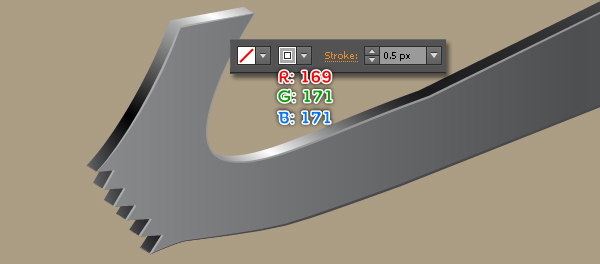
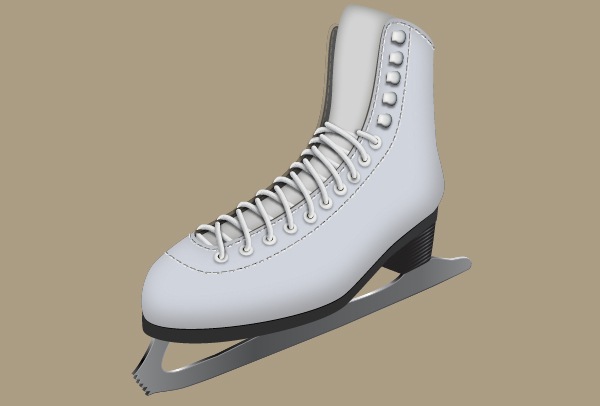
33. To give a more realistic look I’m going to be adding a shadow for the skating blade. First create an object as shown below and then fill this object with yellow color. Keep the resulting shape selected and go to the Effect > Stylize > Drop Shadow… Follow the data like you see in the third image and click OK.
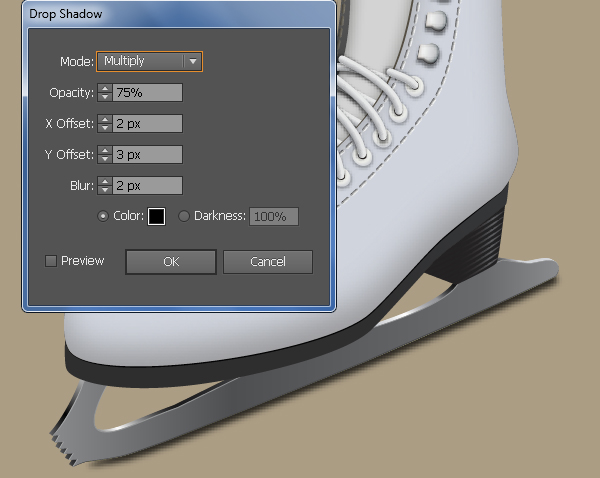
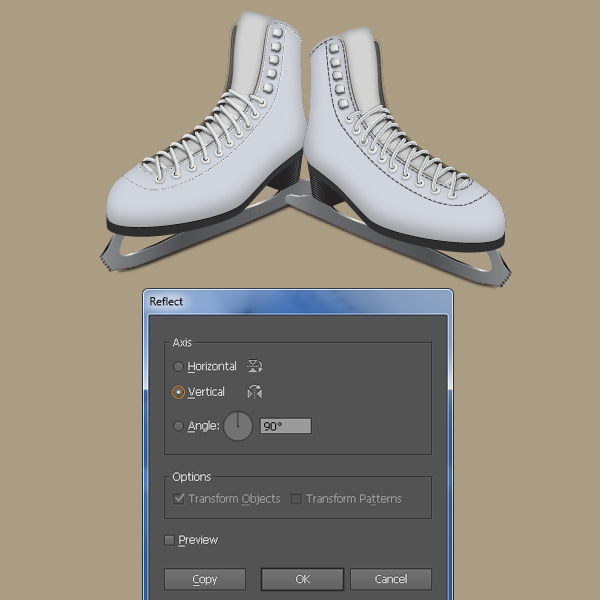
34. We are done with the ice skate for the moment. Now select and group (Ctrl +G) all objects created from beginning step 2 to this time. Make sure that this group is still selected and go to the Object > Transform > Reflect… Check the Vertical and click OK. Finally place the copy to the position as shown below.
Create the Background
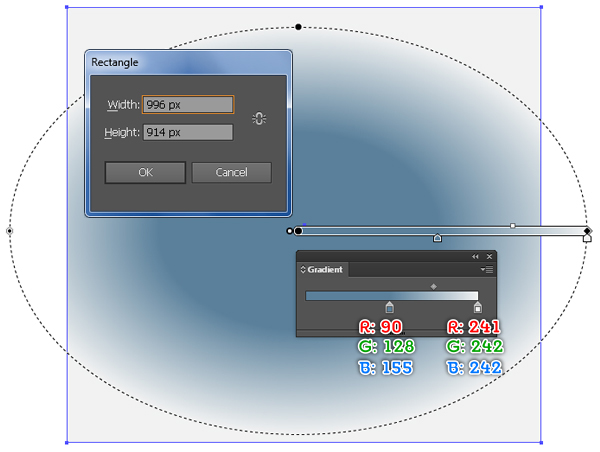
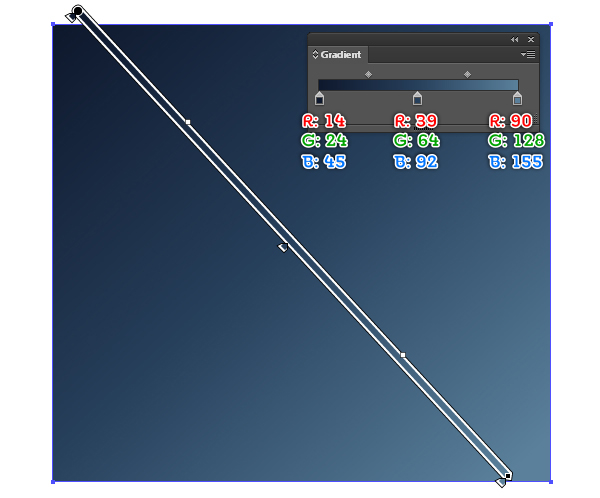
38. Using the Rectangle Tool (M) create a 996 by 914px object. Next fill this rectangle with the radial gradient as shown below.
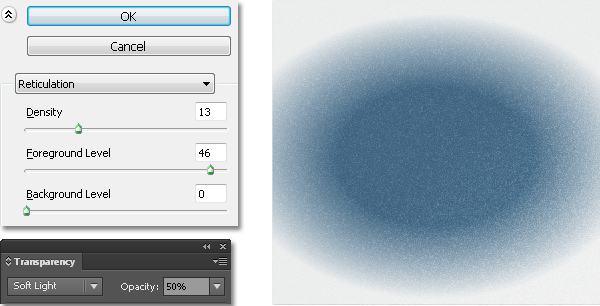
39. Make a copy (Ctrl +C, Ctrl +F) of the newly created shape and then replace the existing color of the copy with a linear gradient. Make sure that the resulting shape is still selected, go to the Effect > Sketch > Reticulation… Follow the data as shown in the second image and click OK. Finally set the Blending Mode of the resulting shape to Soft Light and reduce the Opacity to 50%.
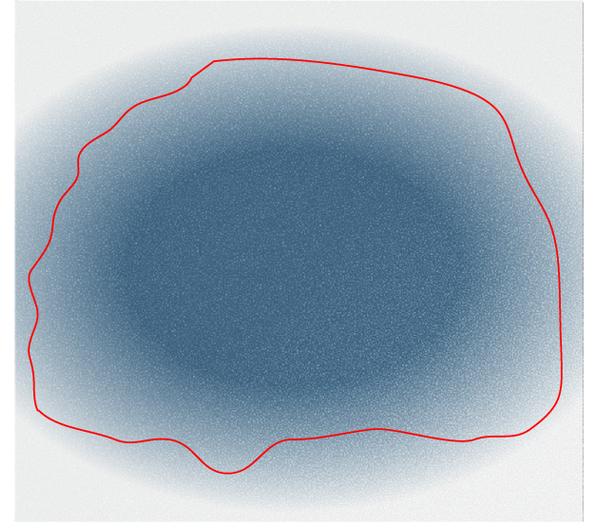
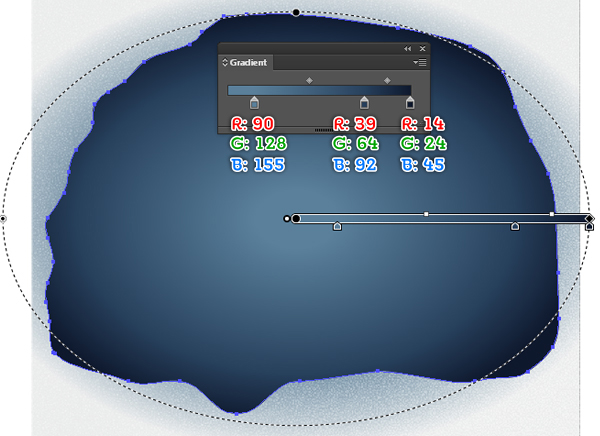
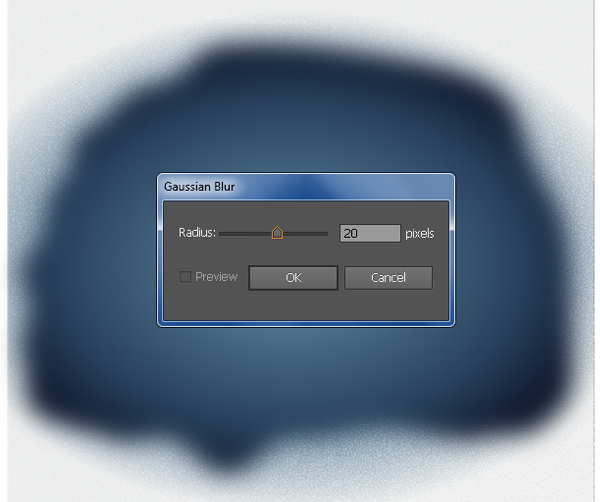
40. Continue create an object and then fill it with the radial gradient like you see in the images below. Keep the resulting shape selected and go to the Effect > Blur > Gaussian Blur… Enter a 20px Radius and click OK.
42. Let’s work on creation of snowflakes. First draw a white ellipe as shown in the image below and then apply a 3px Gaussian Blur effect for this ellipse. Likewise, repeat the same process to draw more snowflakes like you see in the third image.
