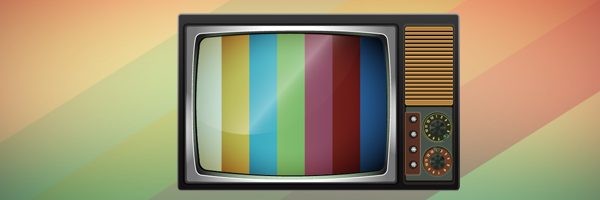
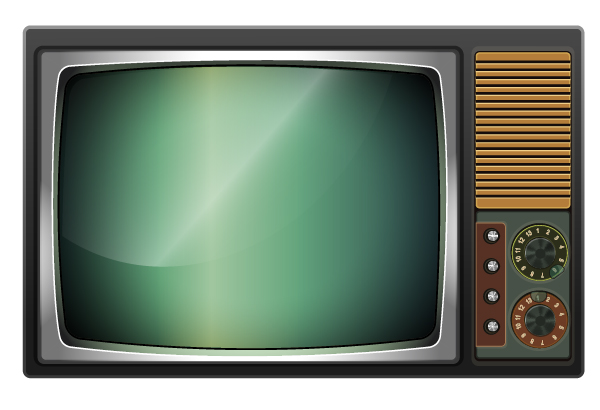
This tutorial is about how to create a Retro Television in Adobe Illustrator. This is for advanced users, but even beginners can learn a lot of new tricks. At the end of this tutorial you will know how to use Gradient Mesh tool, Clipping Masks and many more. Let’s begin.
1. Create a new document
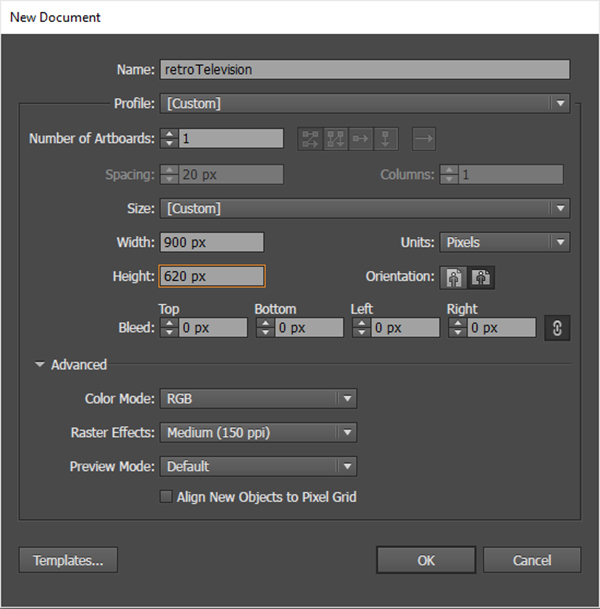
Open up Adobe Illustrator and set up a New Document (ctrl + N). Name your document, select Pixels from the Units drop-down menu, and enter 900 in the Width box and 620 in the Height box. Click on the Advanced button, select RGB from the Color Mode drop-down menu, Screen (150ppi) and before you hit OK make sure that the Align New Objects to Pixel Grid box is unchecked.
2. Draw the TV main body and screen
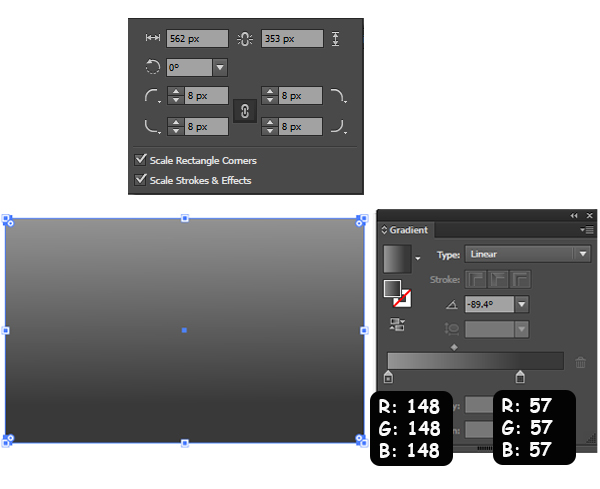
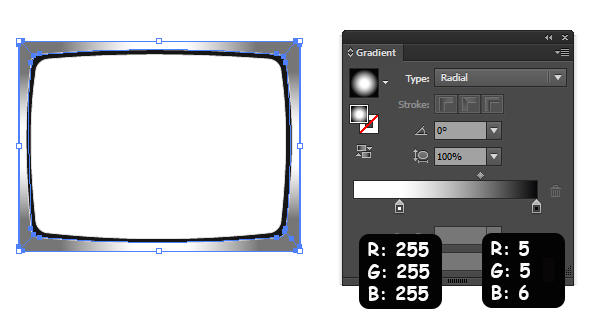
Step 1: For the first step let’s create the main body. Pick the Rounded Rectangle Tool and draw 562 px width and 353 px height rectangle with 8 px Corner Radius. Fill the object with Linear Gradient as shown in the image below.
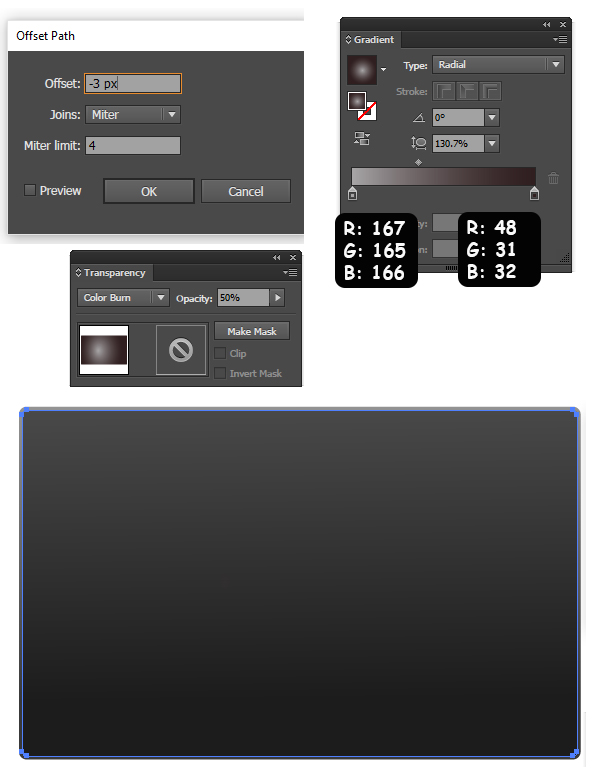
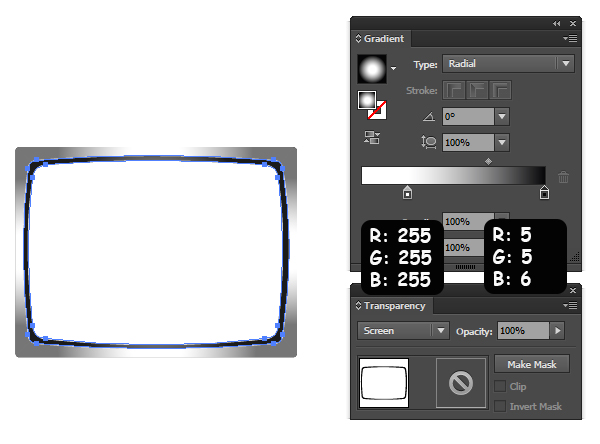
Step 2: Now keep the object selected and go to Object > Path > Offset Path. Set the Offset to -3 px. And hit OK. Fill the new object with Radial Gradient as shown in the image below, set the Blending Mode to Color Burn and the Opacity to 50%.
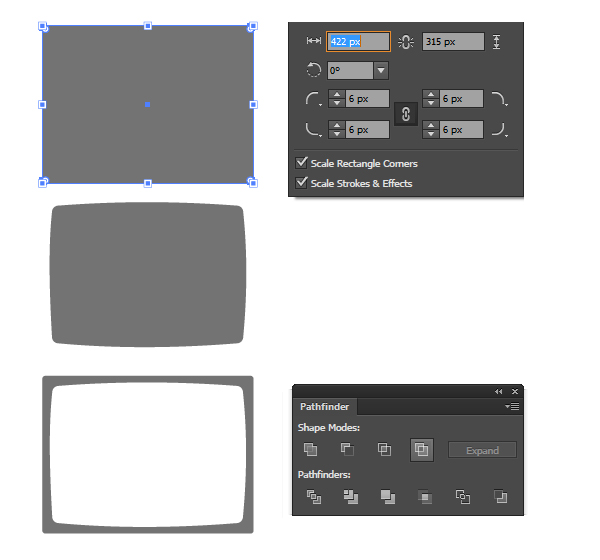
Step 3: Now we are going to create the screen frame. Pick the Rounded Rectangle Tool and draw 422 px width and 315 px height rectangle with 6 px Corner Radius. Set the color to 115,115,115. Copy and paste in front (Ctrl + C, Ctrl + F). Keep the new object selected and go to Object > Path > Offset Path. Set the Offset to -20 px. And hit OK. Copy and paste (Ctrl + C, Ctrl + V) the new object, so we can use it later. Now change the Corner Radius of the new object to 13 px. Then pick the Anchor Point Tool (Shift + C) and round the corners of the shape like you see in the image below. Copy and paste (Ctrl + C, Ctrl + V) that object, we will use it later. Now select the 2 new objects and go to Pathfinder Panel, choose Exclude.
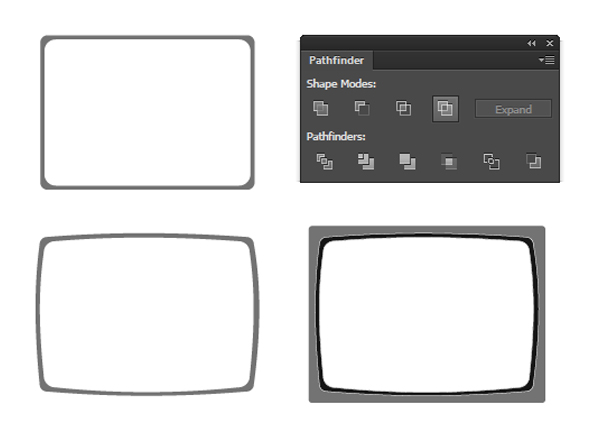
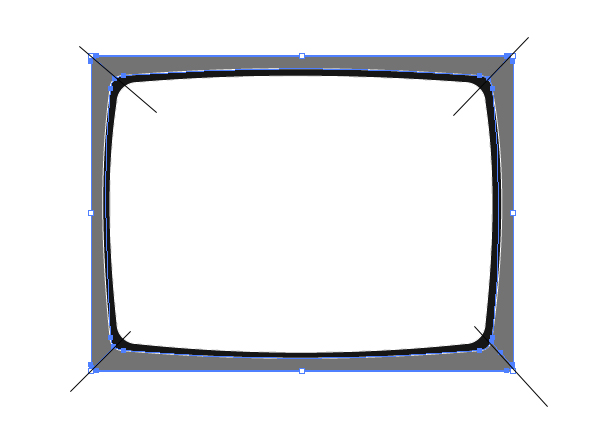
Step 4: Lets add some deepness to the frame. Select the object we copied before and go to Object > Path > Offset Path. Set the Offset to -7 px. And hit OK. Select both objects and go to Pathfinder Panel, choose Exclude. Again with the help of Anchor Point Tool (Shift + C) round the corners of the new shape as shown in the image below. Set its color to 22,22,22, the stroke color to white and the stroke size to 1 px. Place that object with the frame like in the image below.
Step 5: Copy and paste in front (Ctrl + C, Ctrl + F) the main frame shape and pick the Knife Tool. Cut the shape as shown in the image below.
Step 6: In this step we will add Radial Gradient to the 4 pieces we made in the step 5. To do that please see the image below. Also apply Screen Blending Mode to all 4 pieces with 100% opacity. Please notice that the gradient is the same for all the 4 pieces.
Step 7: Now lets add Radial Gradient to the next shape we have with the frame. Also apply Screen Blending Mode with 100% opacity.
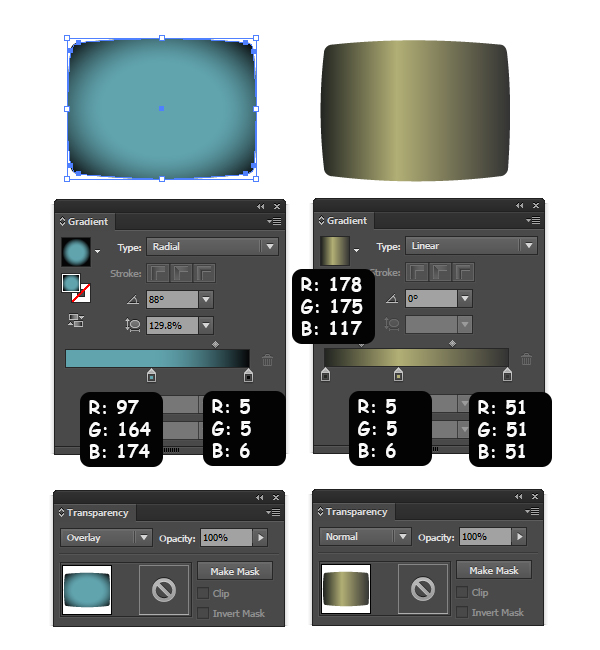
Step 8: Let’s create the screen. In the Step 3 we copied the shape with rounded corners. So, select it set the color to black and copy and paste in front (Ctrl + C, Ctrl + F) 2 times. Fill the new shapes with gradient as shown in the image below. And for the first one set the Blending Mode to Overlay. For both of them the Opacity is 100%.
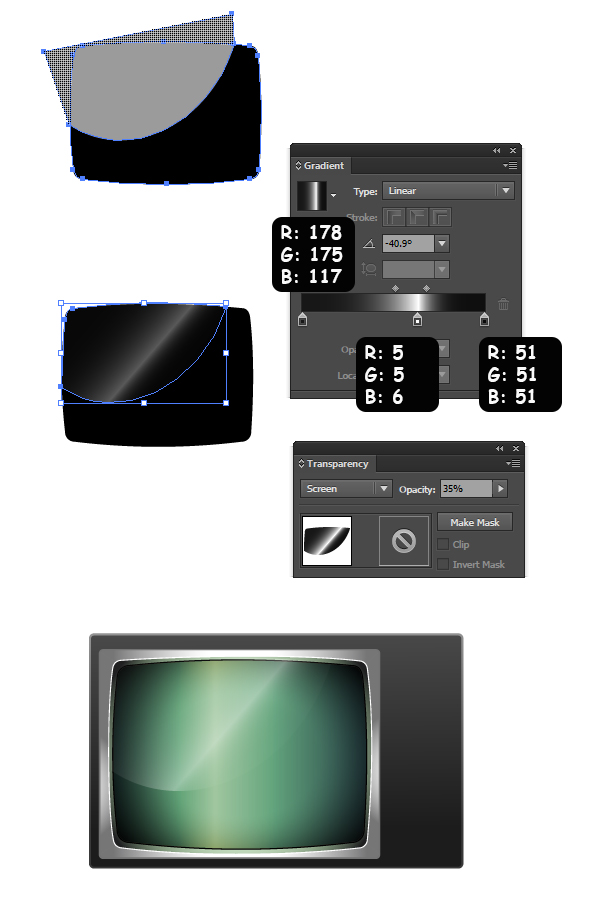
Step 8: OK, now place all the 3 shapes together with this order: black > green gradient > blue gradient. One more thing, we need to add a little shine on the screen. To do that take the Pen tool (P) and draw a shape like in the image you see, then select that and the black shape, pick the Shape Builder Tool (Shift + M), hold down the Alt key and remove the unnecessary part. After getting the right shape fill it with Linear Gradient (see in the image), set the Blending Mode to Screen and the Opacity to 35%. Now group them all and see the result with everything together.
3. Draw different types of buttons and other things for our retro television
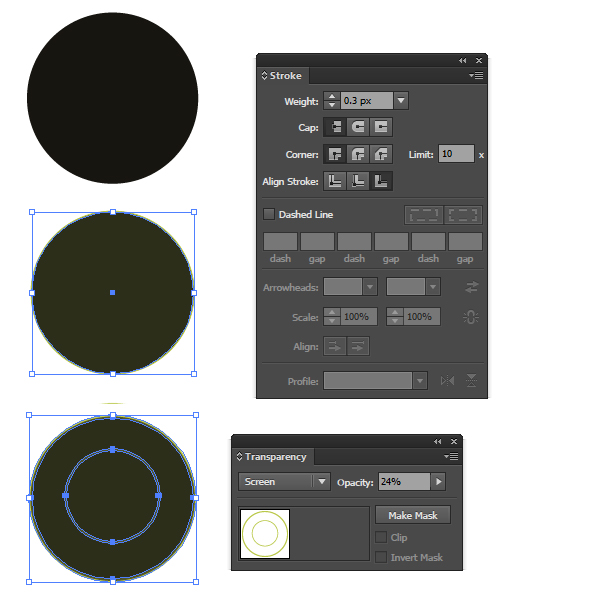
Step 1: For this step pick the Ellipse Tool (L) and draw a circle with 57 px width and 57 px height. Set the color of it to 23,21,16, no stroke. Again draw a circle with 54 px width and 54 px height. Set the color of it to 44,46,26, the stroke color to 186,200,73, the stroke size to 0.3 px and Align Stroke to Outside. Now copy that object and set the fill color to None (/), the stroke size to 1 px and Align Stroke to Outside. Keep that object selected and go to Object > Expand Appearance. Set the Blending Mode to Screen and the Opacity to 24%. Copy and paste in front (Ctrl + C, Ctrl + F). Size it down to 31 px width and height.
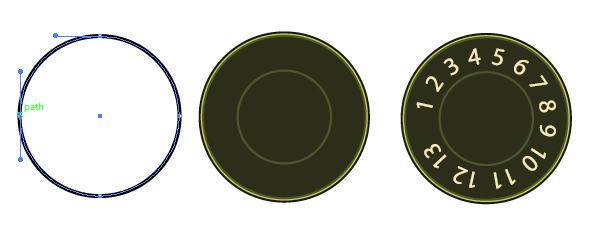
Step 2: In this step we are going to add numbers on the circle. So draw a circle with 40 px width and 40 px height, set the fill color to None (/), the stroke color to black. Now pick the Scissors Tool (C) and make a cut on the left side of the circle. Now pick the Type Tool (T) and click on the path (depending from where you want to start your text click there, in this case click on the left side of the path). Type from 1 to 13 and put double spaces between each number. Make sure the text size is 9 px. Go to Object > Expand… Set the fill and stroke color of it to 247,232,183 and the stroke size to 0.2 px. You can size down a little bit to best fit on the green circle.
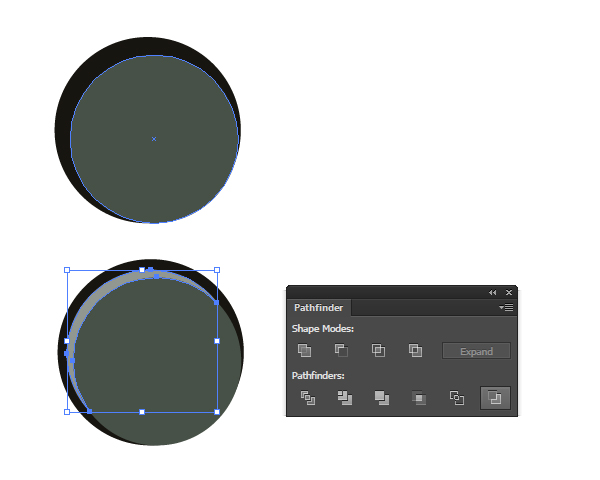
Step 3: Draw a circle with 31 px width and 31 px height. Set the color of it to 23,21,16, no stroke. Again draw a circle with 28 px width and 28 px height. Set the color of it to 71,81,71, no stroke. Copy and paste in front (Ctrl + C, Ctrl + F) the new object 2 times and then move one of the copied object just a little bit up an left. Select both objects and go to Pathfinder Panel, choose Minus Back. Set the fill color of the new object to 145,151,145.
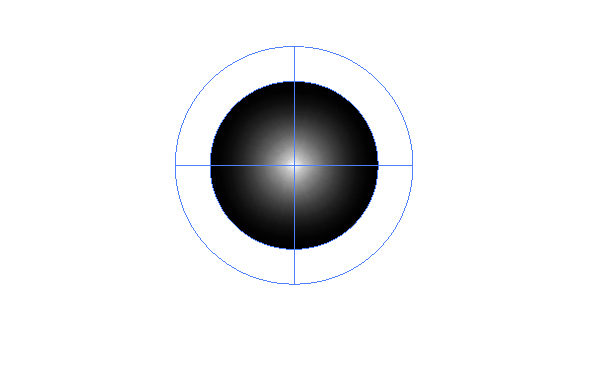
Step 4: In this step we will create a Radial Mesh. Draw a circle with 31 px width and 31 px height. Fill it with Radial Gradient as shown in the image below. Then go to Object > Expand… . In the Expand Dialog Box select Fill and Gradient Mesh. Hit OK.
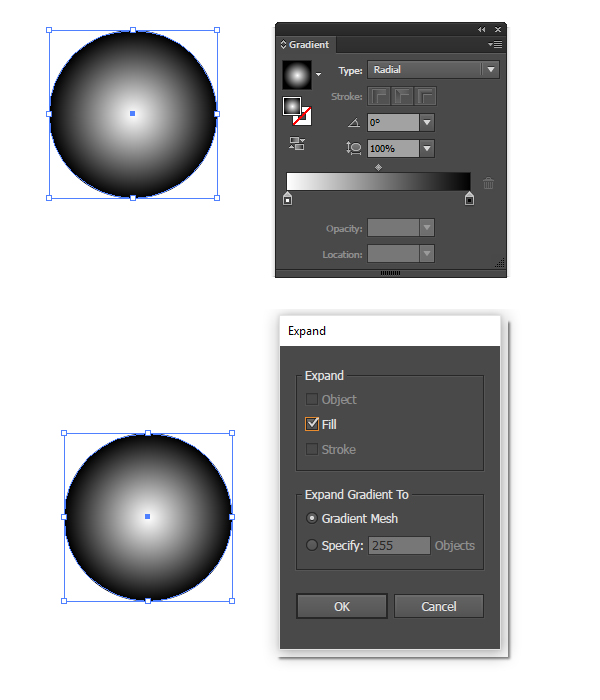
Step 5: Your circle will look like in the image below.
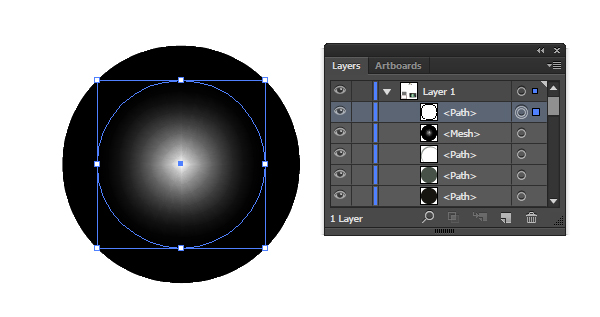
Step 6: Now there is a Clipping Mask on it. So go to Object > Clipping Mask > Release (Alt + Ctrl + 7). Select the group and Ungroup it (Shift + Ctrl + G). After ungrouping delete the unfilled path.
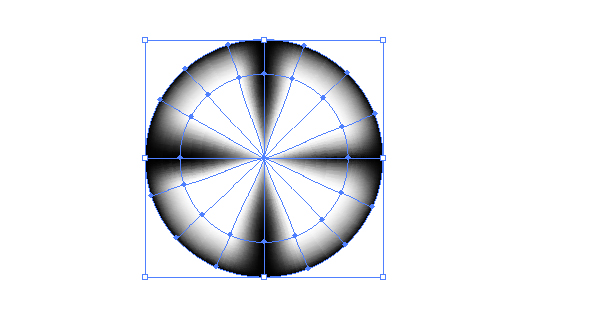
Step 7: Finally our Gradient Mesh is ready. We will add some points on it with the help of Mesh Tool (U). Ok, pick the Mesh Tool (U) and add points as shown in the image below.
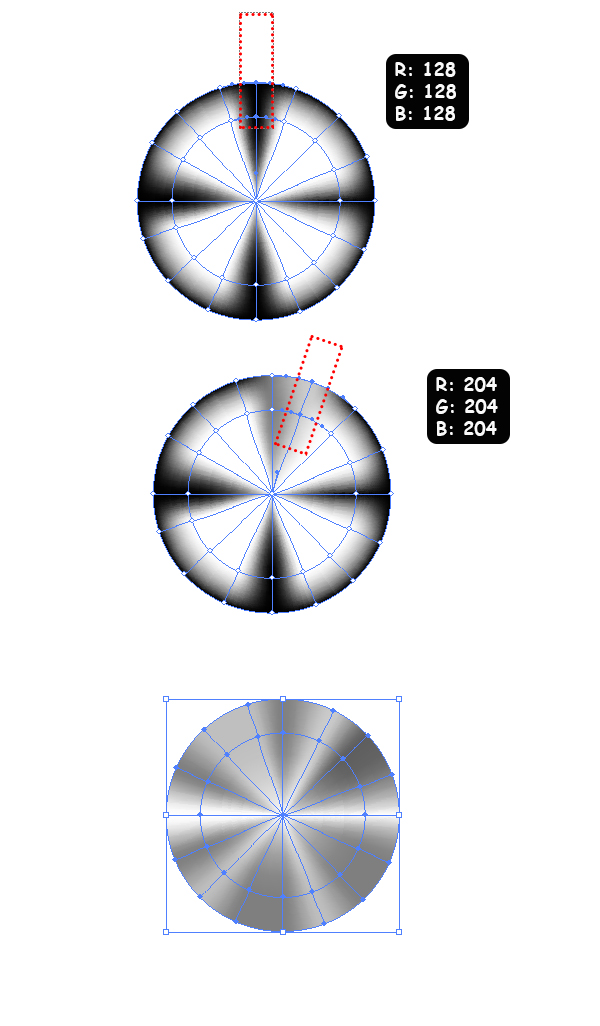
Step 8: In this step we will add colors to the points. As you see each line has 2 points. With the help of Direct Selection Tool (A) select the 2 Points for each line and fill the color as shown in the image below. You can play with the colors as you like, i am just going to show you 2 examples and the final result. Here it is.
Step 9: Set the Blending Mode of the Gradient Mesh to Multiply. Size it down and place on the button we created before.

Step 10: You can add some more details to the button, reuse the objects to create different kind of buttons and add some shadows and shine. So here i am showing with what i came up.

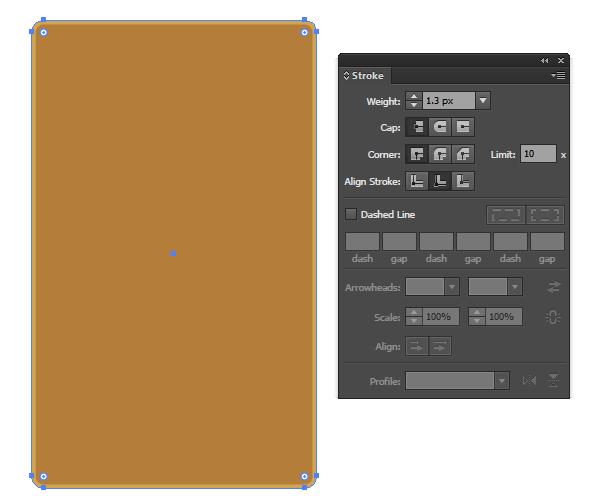
Step 11: Let’s create the next element for our retro television. Pick the Rounded Rectangle Tool and draw 95 px width and 156 px height rectangle with 4 px Corner Radius. Set the fill color to 180,125,58, the stroke color to 208,165,80, the stroke size to 1.3 px and Align Stroke to Inside.
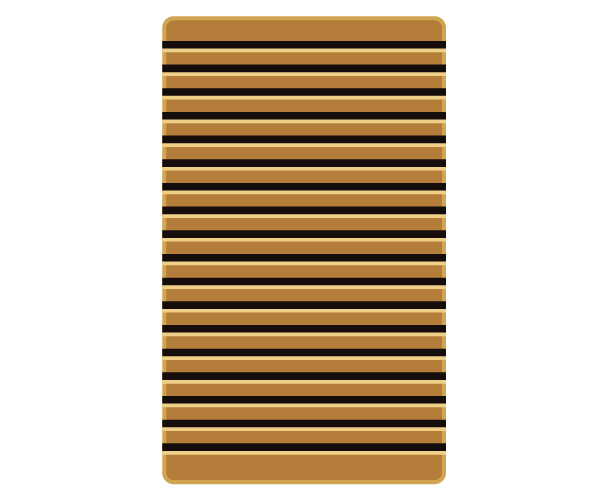
Step 12: Now draw a Rectangle. Set the width to 95 px and height to 3 px. Set the fill color to 21,13,12, no stroke. Copy it several times and group them. Now copy and paste in front (Ctrl + C, Ctrl + F) that group and move it down a little bit. Change its color to 239,207135. Place it all together as shown in the image below.
Step 13: Let’s place them all together. to see the result. of course you can add some shadow behind the details after putting them on the main body of television.
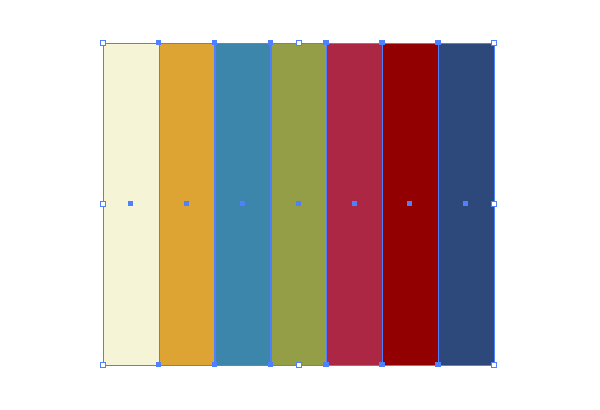
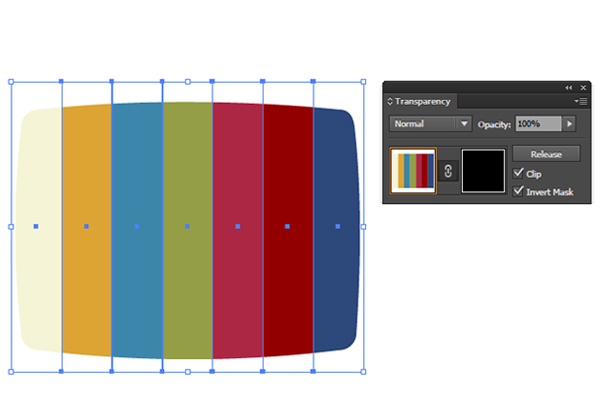
Step 13: And for the final touch lets add color lines on the screen. To do that draw 7 rectangles with 56 px width and 320 px height. Set the fill colors to (245, 244, 214), (221, 164, 52), (60, 134, 170), (148, 158, 70), (172, 39, 67), (146, 0, 1), (45, 72, 123). Group them.
Step 14: We are going to make a Clipping Mask. For that lets copy the black shape of the screen and make the mask. Select the colored lines group and the black shape and go to Transparency Panel. Select Make Mask. Make sure that you have checked the Clip and Invert Mask. After that place the colored lines right after the blue gradient shape of the screen. And set the opacity to 76%. You may have to go inside the screen group to do that.
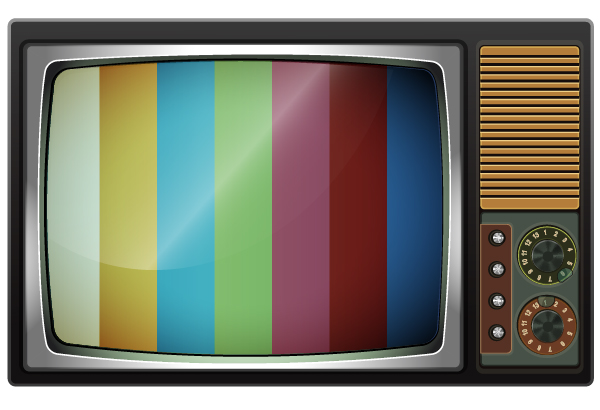
We finished 🙂 It was long and I guess hard tutorial, but I hope I will see Your versions of retro televisions. Thank you all!