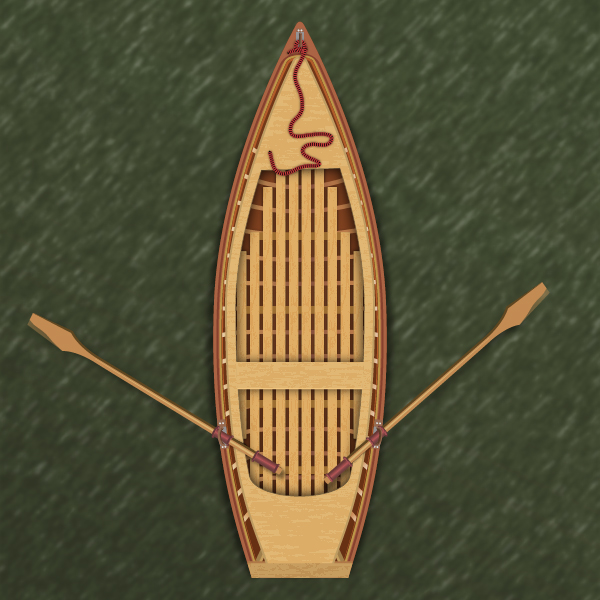
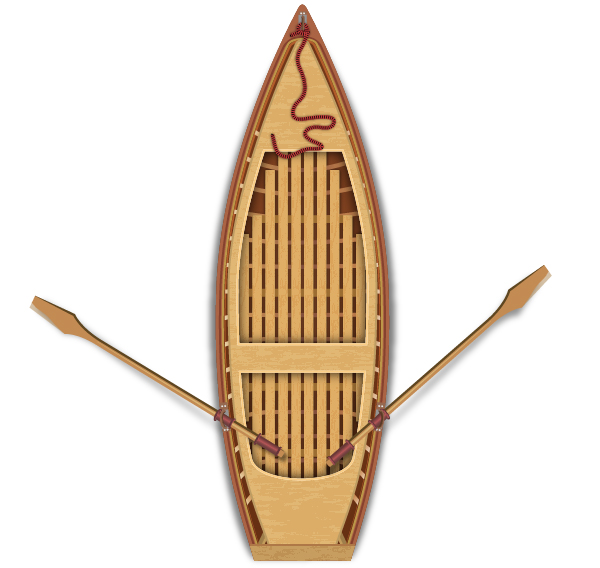
In this tutorial you will learn how to create a Yawl illustration in Adobe Illustrator. You’ll start by creating main shapes of the yawl using some basic tools (Pen, Rectangle…) and a basic blend, along with some Transform, Offset Path and Pathfinder. Next, using the Appearance and Stroke palettes and some basic masking techniques, you will add a few more subtle details for the yawl. Finally, you’ll learn how to create a nice, subtly textured background by using some effects. Take a deep inhale and let’s start!
Create a New Document
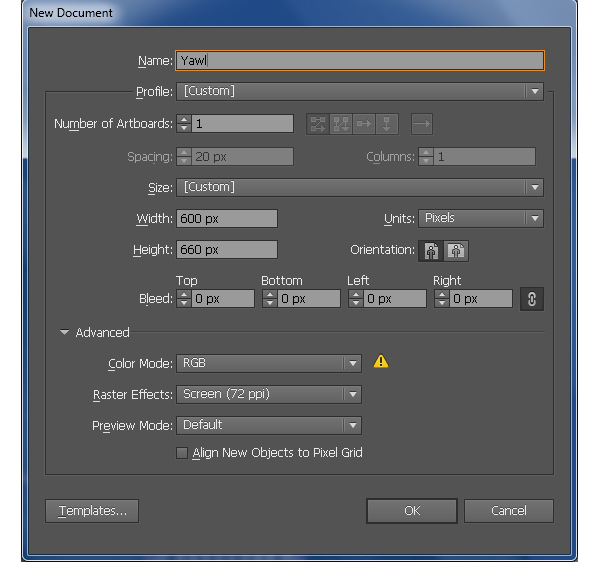
1. Launch Illustrator and then press (Ctrl + N) to create a New document. Select Pixels from the Units drop-down menu, enter 600 in the width box and 660 in the height box then click on the Advanced button. Select RGB, Screen (72ppi) and make sure that the Align New Objects to Pixel Grid box is unchecked before you click OK.
Create the Main Shapes
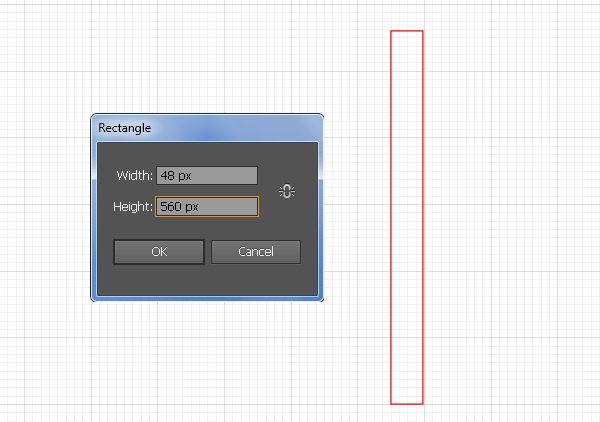
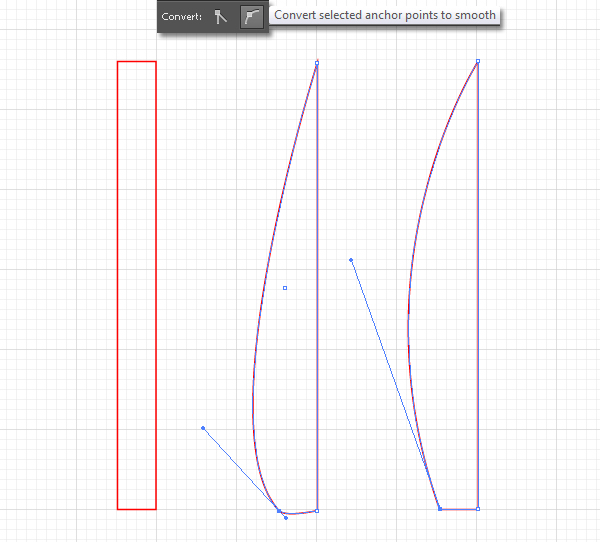
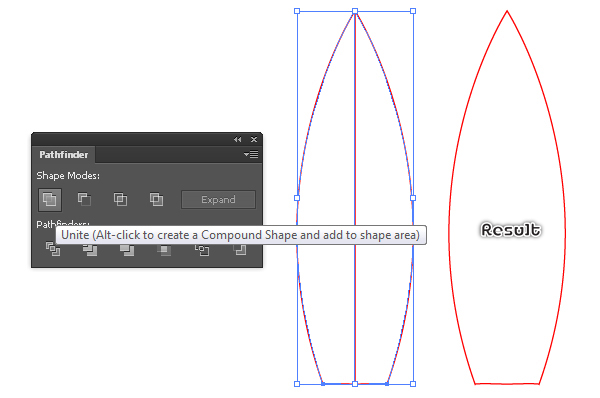
2. Start with drawing a 48 by 560px object using the Rectangle Tool (M). Next select the top-left anchor point of the newly created rectangle and remove it. Now select the bottom-left anchor point of the resulting object and click on the ” Convert selected anchor points to smooth” button from the Properties bar. With the help of the Convert Anchor Point Tool (Shift +C), reduce to zero the bottom-right handle of the bottom-left anchor point. Next click on the remaining handle and move it up to get the result like you see in the fourth image.
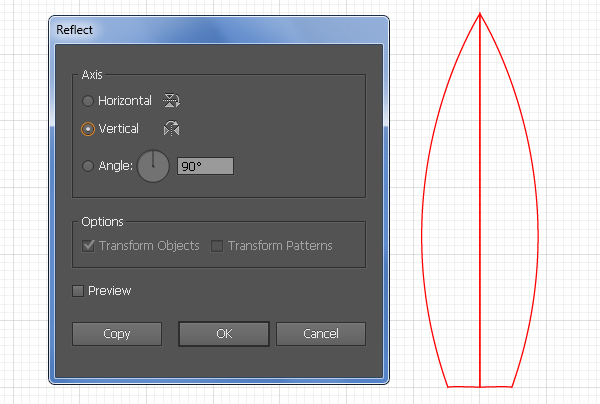
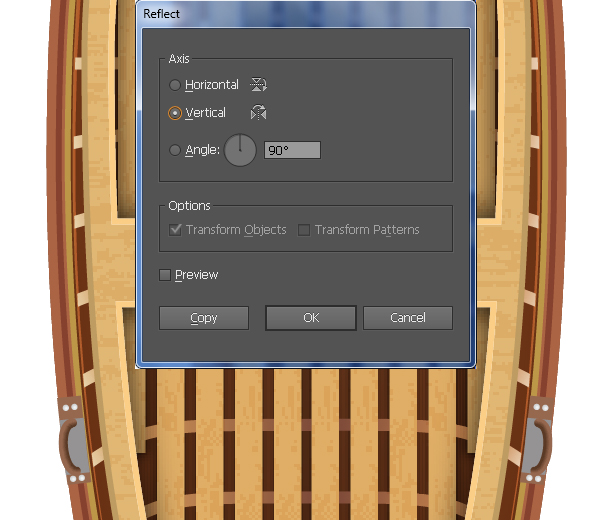
3. Let’s create the mirror image for the right side. Select the newly created object and go to the Object > Transform > Reflect. Set the Axis to Vertical and then click Copy. Drag the copy we have just created to the right. Don’t forget to hold the Shift key on the keyboard for straight dragging. Next reselect two new objects, open the Pathfinder palette (Window > Pathfinder) and click on the Unite button.
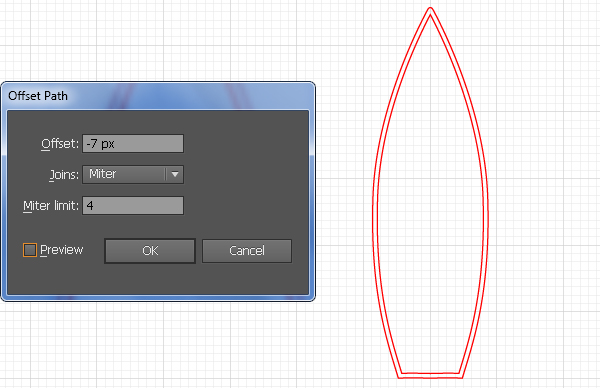
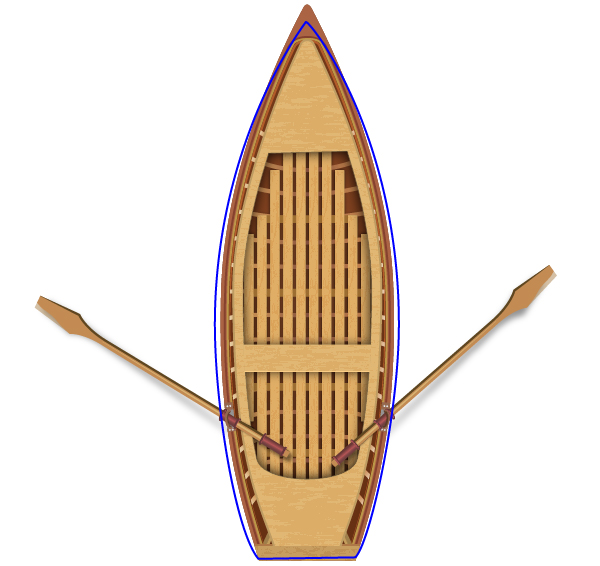
4. Make sure that the new object created in the step 3 is still selected, pick the Add Anchor Point Tool (+) and add two anchor points highlighted with green, then remove the anchor point highlighted with black. Next reselect the resulting object and go to the Object > Path > Offset Path… Enter a -7px Offset and click OK.
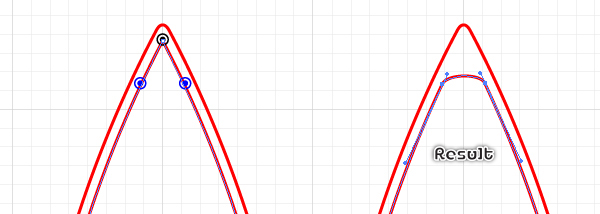
5. Make sure that the new object created in the step 4 is still selected, add two anchor points highlighted with blue and then remove the anchor point highlighted with black. Next adjust the handles of the two newly added anchor points to get the result as shown in the second image below.
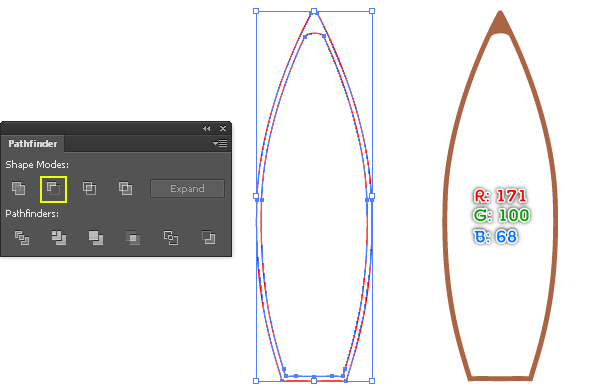
6. Make a copy (Ctrl +C, Ctrl +F) of the two newly created objects and then hide (Ctrl +3) the copies. Now reselect two remaining objects and open the Pathfinder palette (Window > Pathfinder), then click on the Minus Front button. Next fill the resulting object with R=171, G=100, B=68 and remove the stroke.
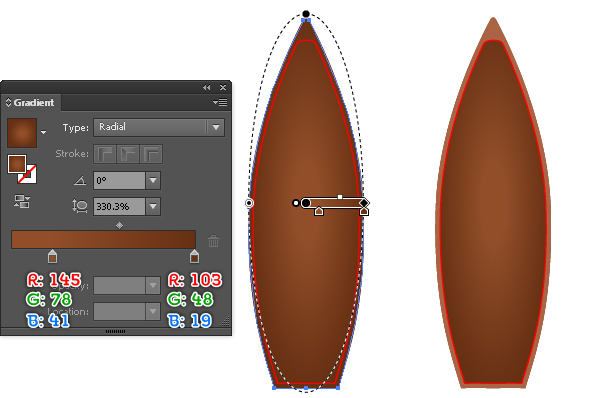
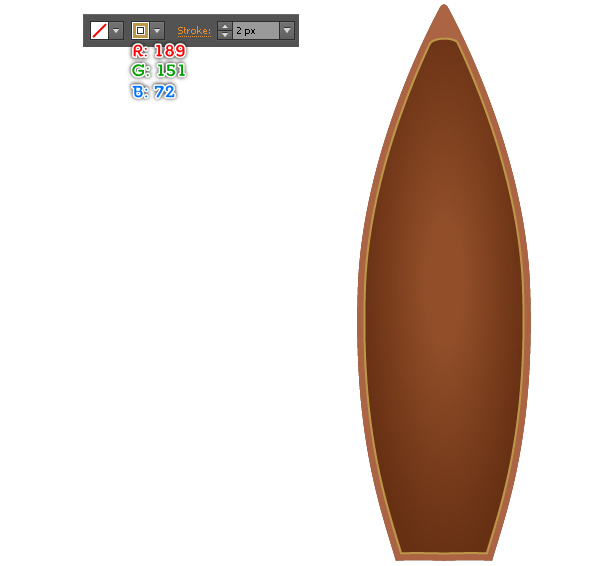
7. Press (Ctrl +Alt +3) to show two objects hidden in the previous step. Fill the bigger object with the radial gradient as shown below and remove the stroke. Next replace the existing stroke color of the remaining object with R=189, G=151, B=72 and change the stroke weight to 2px.
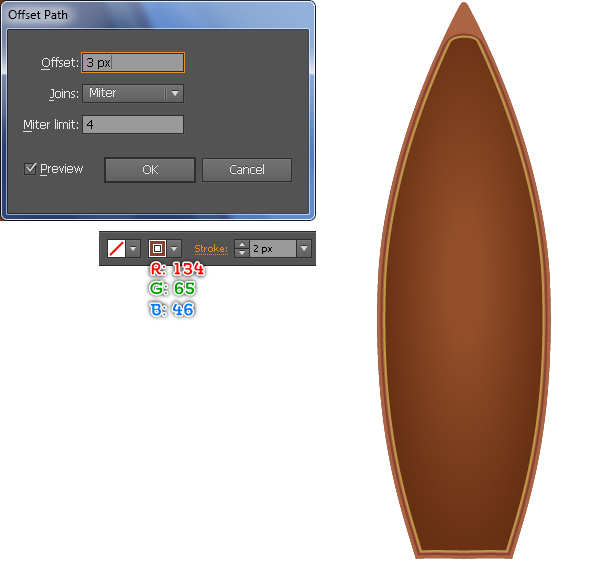
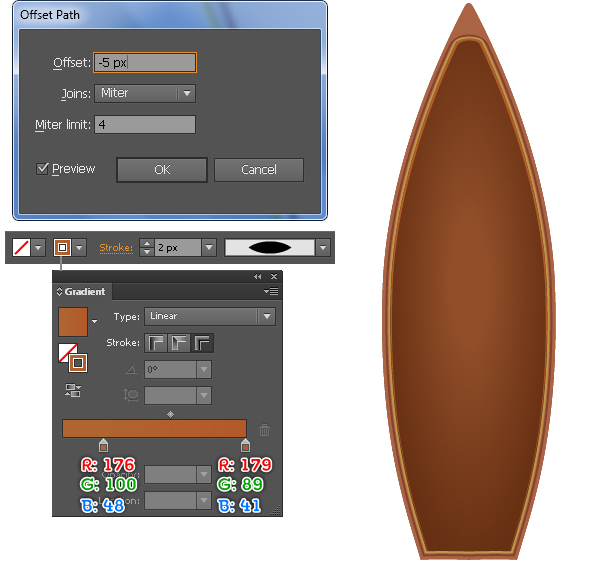
8. Make sure that the new object created in the step 7 is still selected and go to the Object > Path > Offset Path… Enter a 3px Offset and click OK, then replace the existing stroke color of the newly created object with R=134, G=65, B=46. Keep the resulting object selected and go to the Object > Path > Offset Path… Enter a -5px Offset and click OK, then replace the existing stroke color of the newly created object with the linear gradient across stroke as shown in the second image below. Next apply the Width Profile 1 for the resulting object.
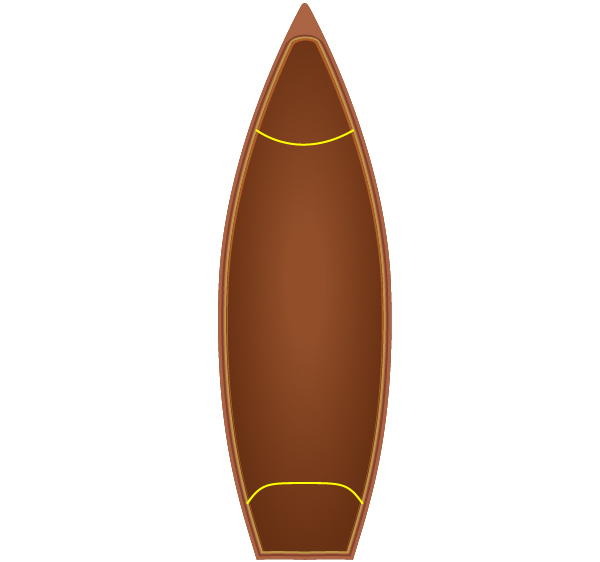
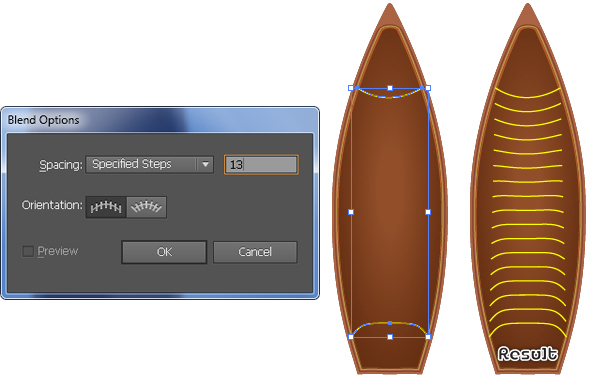
9. With the Pen Tool (P) create two curved paths like you see in the image below. Once your paths are drawn, reselect them and go to the Object > Blend > Blend Options… Follow the data as shown in the second image and click OK, then go to the Object > Expand… Click OK when the Expand dialog box appear and then go to the Object > Ungroup (Ctrl +Shift +G).
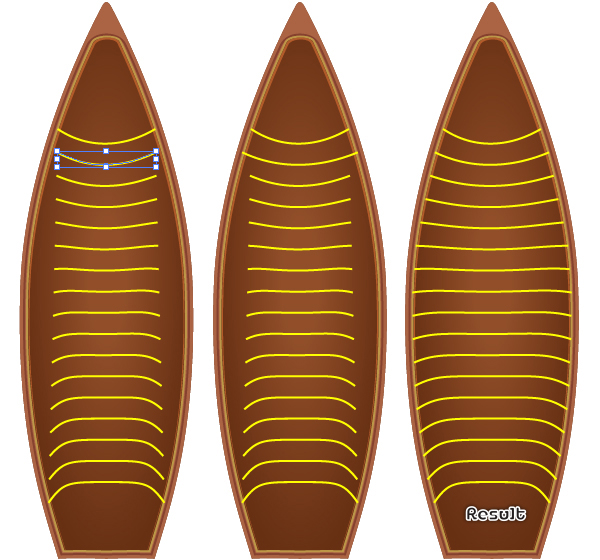
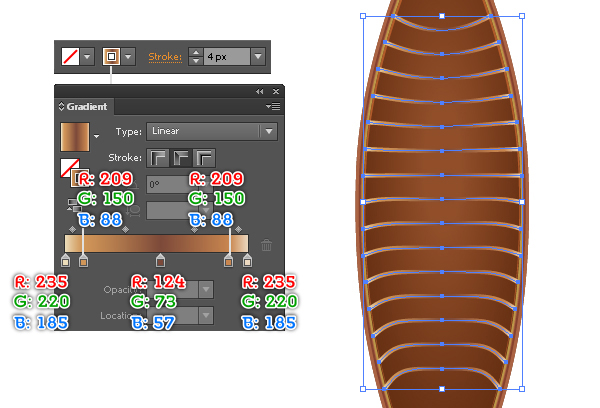
10. Use the Selection Tool (V) along with the Alt key to scale newly created paths enlarges them horizontally. In the end these paths should look roughly like the third image. Now reselect all newly created paths and add a 4px stroke (apply the linear gradient belong stroke).
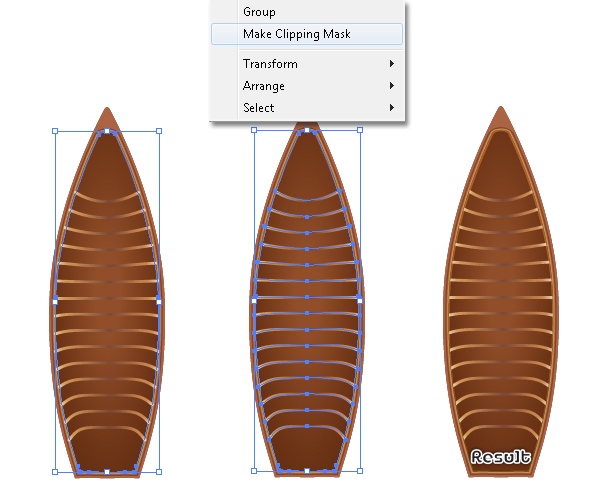
11. Select the smaller object created in the step 8, duplicate (Ctrl +C, Ctrl +F) it once and bring the copy to front (Ctrl +Shift +Right Square Bracket). Keep the new object selected, hold down the Shift, click on the new group created in the step 10 and go to the Object > Clipping Mask > Make (Ctrl +7).
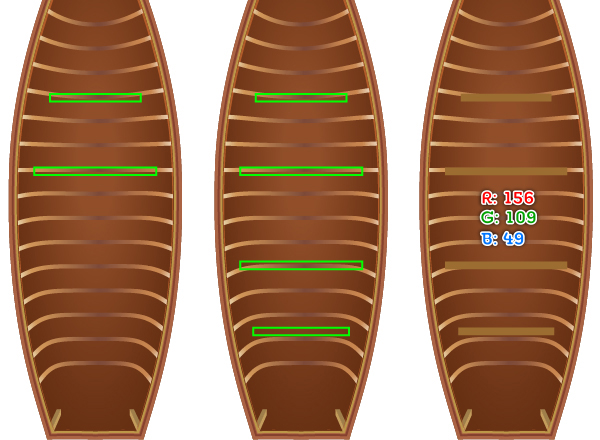
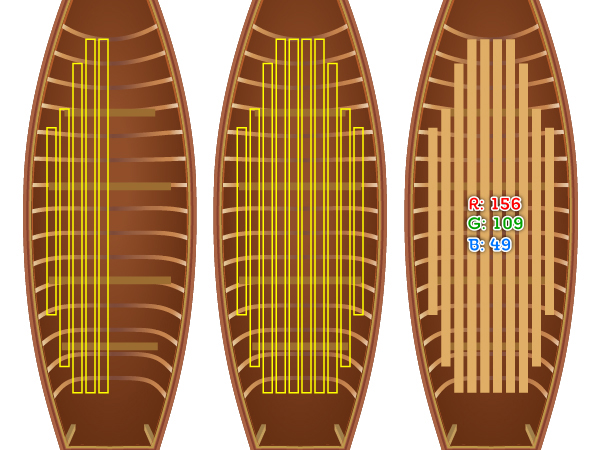
12. Pick the Rectangle Tool (M) and create two objects with dimensions: 90 by 8px and 122 by 8px, then place these rectangles to the positions as shown in the first image. Now select the two newly created rectangles and go to the Object > Transform > Reflect. Set the Axis to Horizontal and then click Copy. Next drag the copy we have just created down. Don’t forget to hold the Shift key on the keyboard for straight dragging. Finally fill four newly created rectangles with R=156, G=109, B=49.
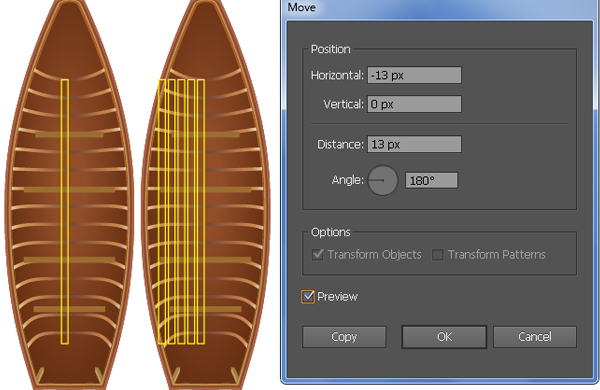
13. Keep working with the Rectangle Tool (M) create a 9 by 354px object and place it to the position as shown in the first image. Reselect the new rectangle and go to the Object > Transform > Move… Follow the data as shown below and click Copy, then press (Ctrl +D) twice times to get the result like you see in the second image.
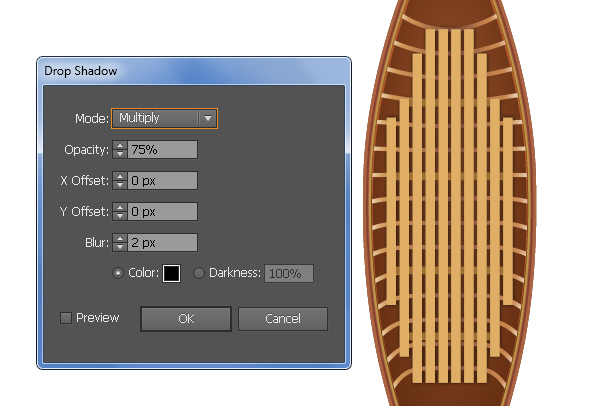
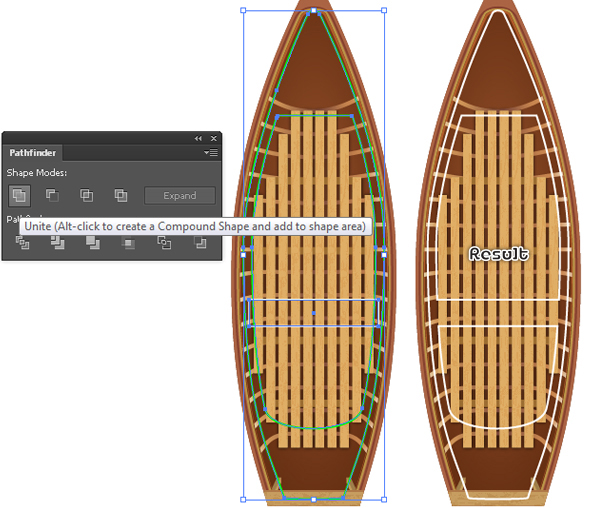
14. Change the height of the new rectangles like you see in the first image. Now select all five newly created rectangles and go to the Object > Transform > Reflect. Set the Axis to Vertical and then click Copy. Drag the copies we have just created to the right. Don’t forget to hold the Shift key on the keyboard for straight dragging. Next select all yellow rectangles, remove the strokes and fill them with R=156, G=109, B=49. Keep the resulting shapes selected and go to the Effect > Stylize > Drop Shadow… Follow the data as shown in the fourth image and click OK.
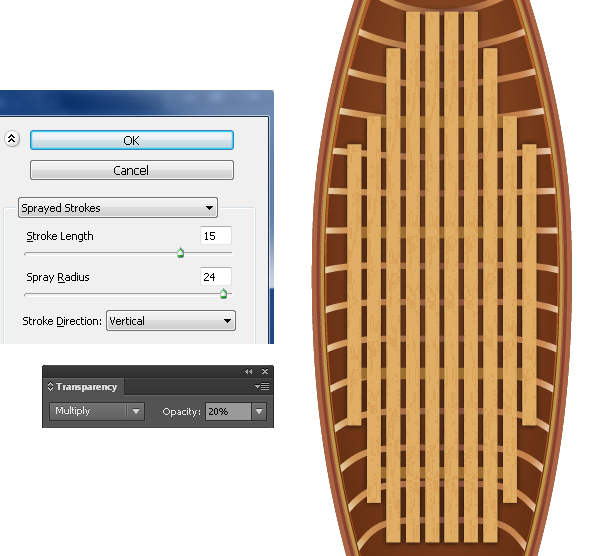
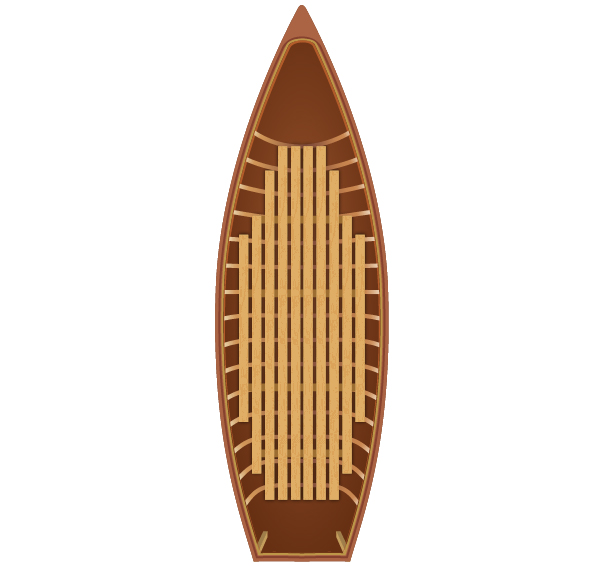
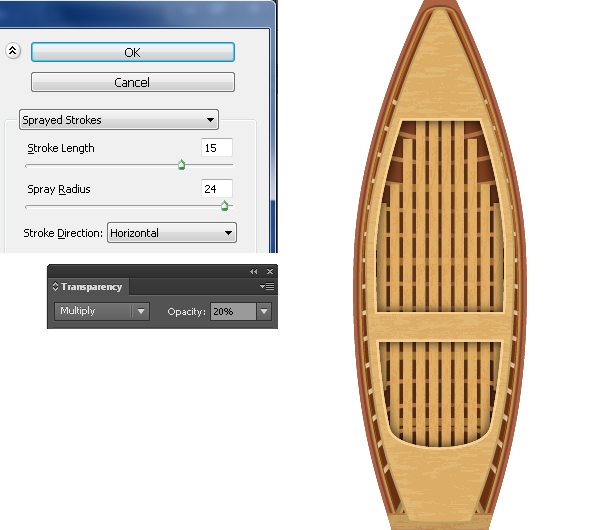
15. Reselect ten rectangles created in the step 14, duplicte (Ctrl +C, Ctrl +F) them once and open the Appearance palette (Window > Appearance), then remove the Drop Shadow section. Keep the resulting shapes selected and go to the Effect > Brush Strokes > Sprayed Strokes… Follow the data as shown below and click OK. Finally set the Blending Mode of the resulting shapes to Multiply and reduce the Opacity to 20%. In the end your yawl should look roughly like the second image.
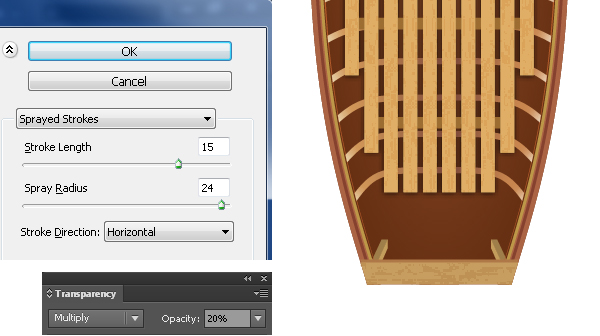
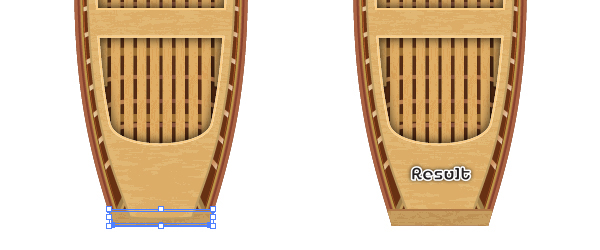
16. With the Pen Tool (P) create a green object as shown below and then fill it with R=199, G=157, B=96. Make a copy of the new shape and replace the existing color of the copy with R=175, G=120, B=71, then send the resulting shape backward (Ctrl +Left Square Bracket). Now reselect the shape created in second image of this step, duplicate it once and then go to the Effect > Brush Strokes > Sprayed Strokes… Follow the data as shown in the fourth image and click OK. Next change the Blending Mode of the resulting shape to Multiply and lower the Opacity to 20%.
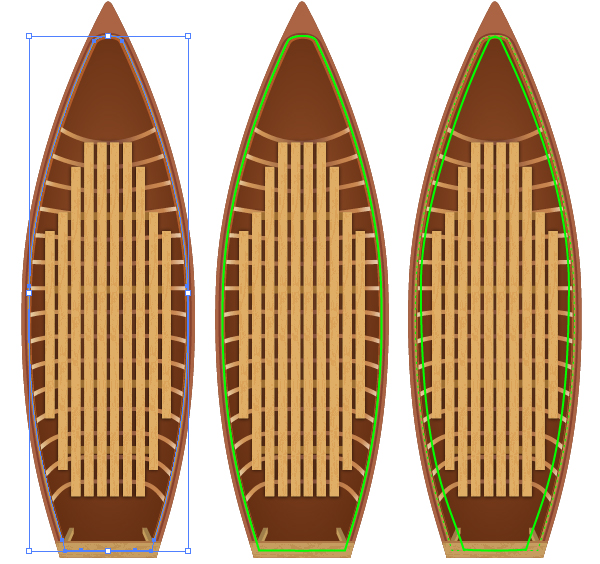
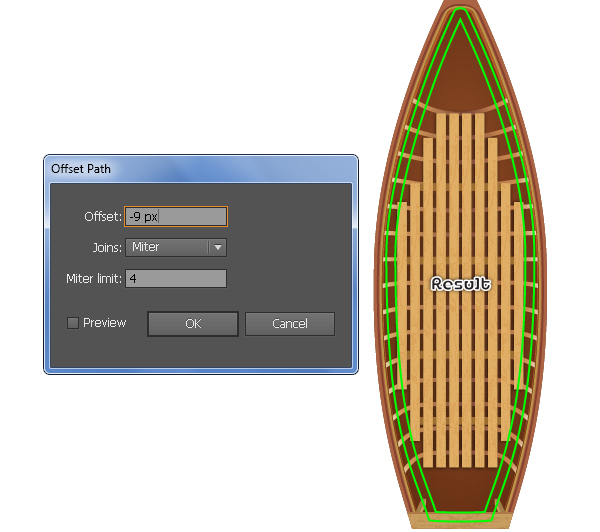
17. Reselect the object created in first image of the step 8, duplicate it once and then replace the existing stroke color of the copy with green. Next use the Selection Tool (V) along with the Alt key to scale newly created paths reduces it horizontally. In the end this object should look roughly like the third image. Next reselect the green object and go to the Object > Path > Offset Path… Enter a -9px Offset and then click OK.
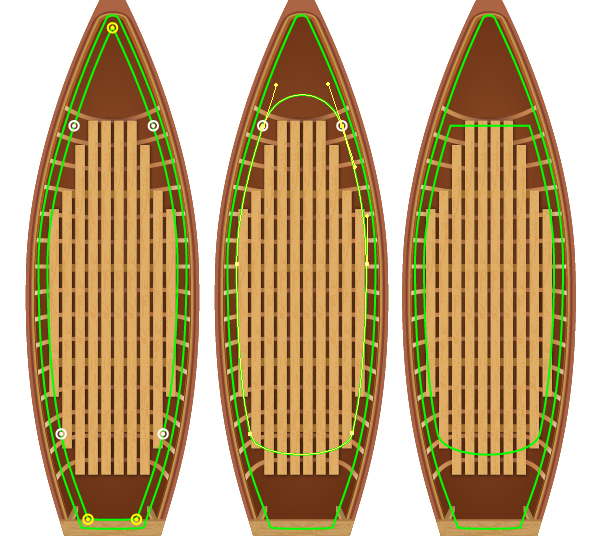
18. Select the smaller green object, pick the Add Anchor Points Tool (+) and add four anchor points highlighted with white, then remove three anchor points highlighted with yellow. Next reduce to zero the top handles of the two top anchor points of the resulting object.
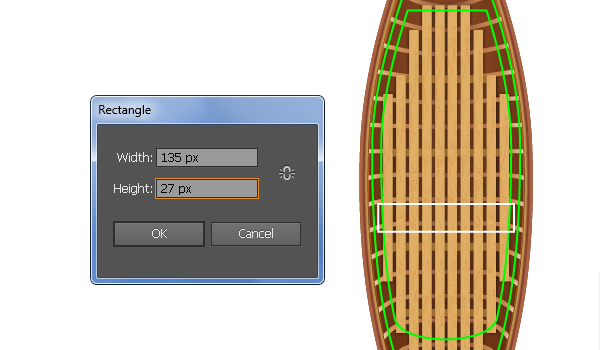
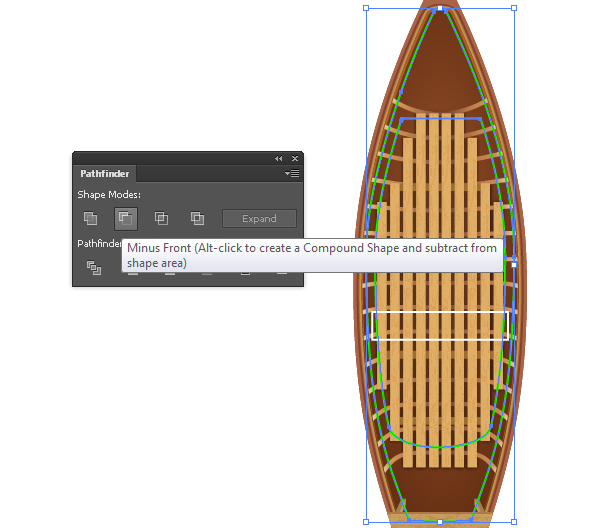
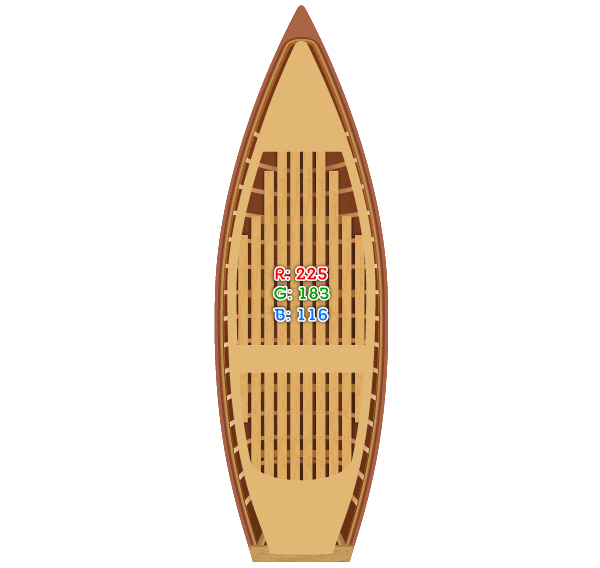
19. Draw a 135 by 27px object with the Rectangle Tool (M) and then place this rectangle to the position like in the image. Next select the smaller green object, duplicate (Ctrl +C, Ctrl +F) it once and then hide (Ctrl +3) the copy. Now reselect two green objects again, open the Pathfinder palette (Window > Pathfinder) and click on the Minus Front button. Keep the resulting object selected, hold down the Shift, click on the white rectangle and click on the Unite button from the Pathfinder palette. Next make a copy (Ctrl +C, Ctrl +F) the resulting object and then hide (Ctrl +3) the copy. Finally select the white object and fill it with R=225, G=185, B=116, then remove the stroke.
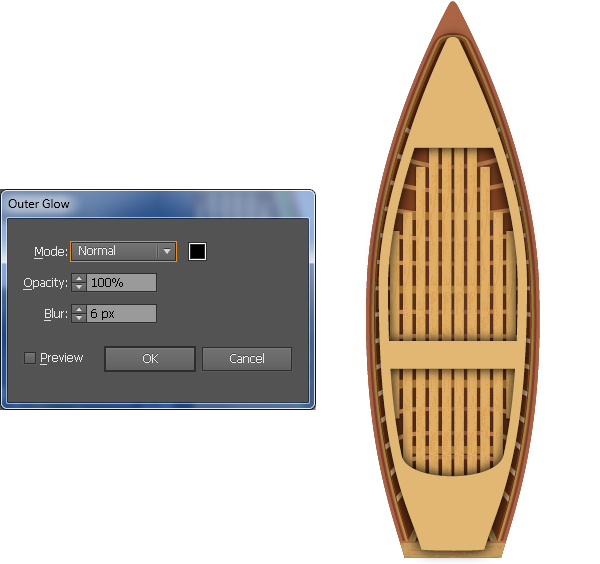
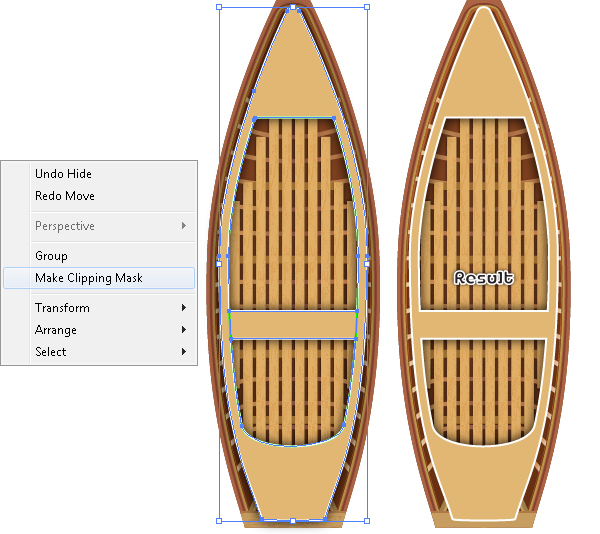
20. Reselect the new shape created in the step 19, duplicate it once and then go to the Effect > Stylize > Outer Glow… Follow the data as shown below and click OK. Now press (Ctrl +Alt +3) to shown all shapes hidden in the previous steps. Next select the green object and the new shape with the Outer Glow effect, then go to the Object > Clipping Mask > Make (Ctrl +7).
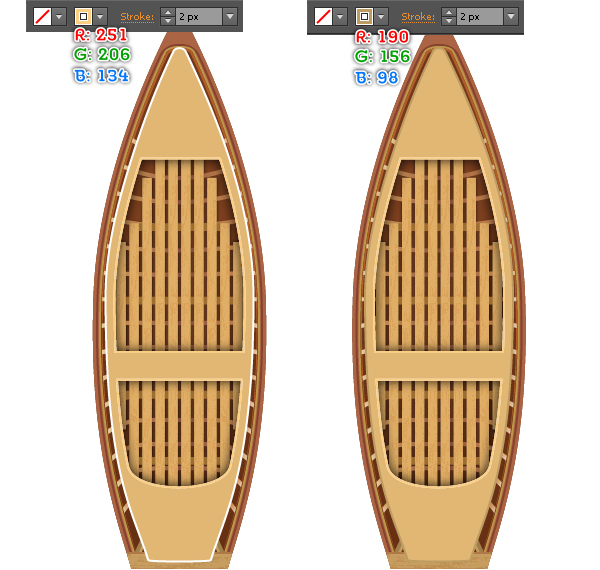
21. Select the white object and go to the Object > Compound Path > Release (Ctrl +Shift +Alt +8). Reselect the smaller white object and replace the existing stroke color with R=251, G=206, B=134, then change the stroke weight to 2px. Next reselect the remaining white object and replace the existing stroke color with R=190, G=156, B=98, then change the stroke weight to 2px.
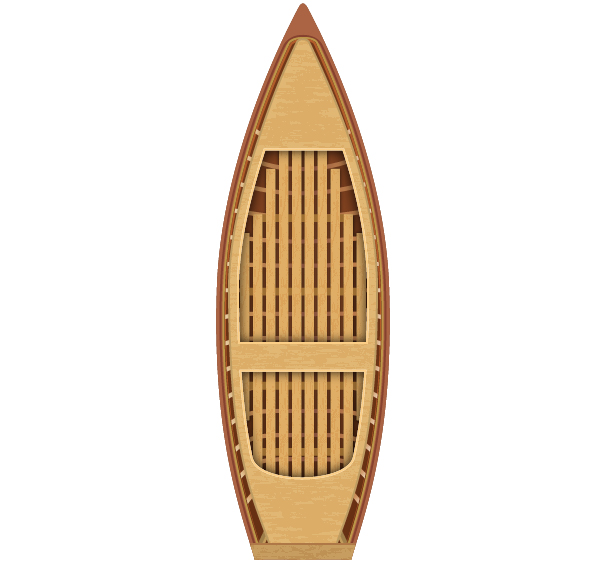
22. Reselect the shape created in the step 19, duplicate it once and then go to the Effect > Brush Strokes > Sprayed Strokes… Follow the data as shown in the fourth image and click OK. Next change the Blending Mode of the resulting shape to Multiply and lower the Opacity to 20%. Select all shapes created in the step 16 and bring them to front (Ctrl +Shift +Right Square Bracket). At this point your yawl should look like the final image shown.
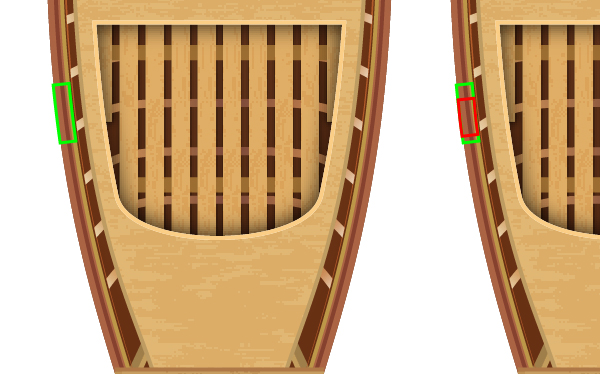
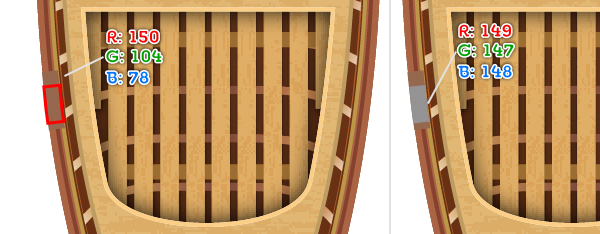
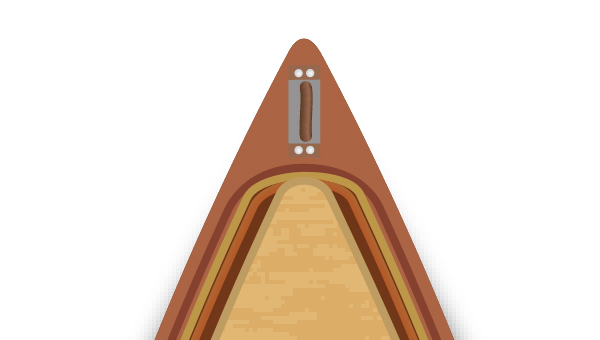
23. With the help of the Pen Tool (P) create two objects as shown below. Once your objects are drawn, fill the green object with R=150, G=104, B=78 and remove the stroke. Next fill the red object with R=149, G=147, B=148 and remove the stroke.
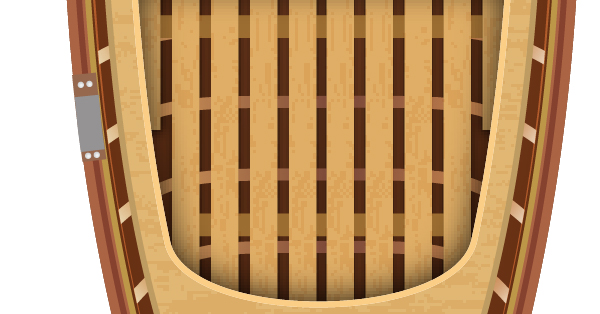
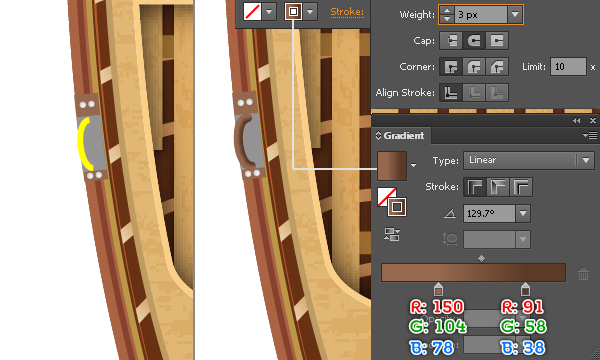
24. Using the Ellipse Tool (L) create four white shapes and place them to the positions as shown in the picture below. Next pick the Pen Tool (P) and use this tool to create a curved path like you see in the second image. Reselect the newly created path and add a 3px stroke (apply the linear gradient across stroke). Keep the resulting path selected, open the Stroke palette (Window > Stroke) and set the values like you see in the third image.
25. Select objects created from beginning step 23 to this time and go to Object > Transform > Reflect. Check the Vertical box then click the Copy button. Next drag the copies to the right and place them as shown in the image below.
Create the Oars
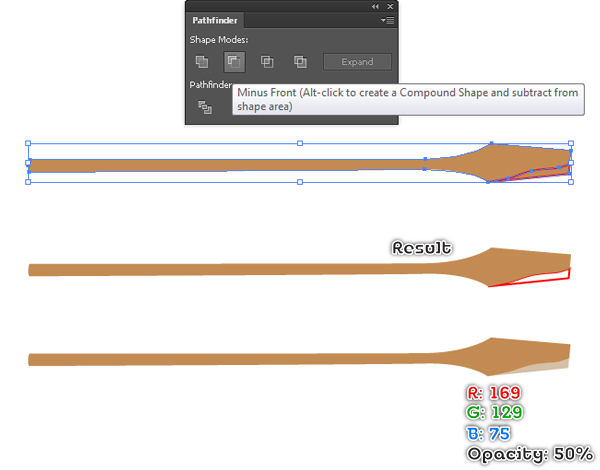
26. With the Pen Tool (P) create an object as shown below. Once your object is drawn, fill it with R=195, G=139, B=83 and remove the stroke. Continue with the Pen Tool (P) create an object like you see in the third image. Make a copy (Ctrl +C, Ctrl +F) of the new object and then hide (Ctrl +3) the copy. Now reselect two new objects created in this step, open the Pathfinder palette (Window > Pathfinder) and click on the Minus Front button. Next press (Ctrl +Alt +3) to show the object hidden in this step and fill it with R=169, G=129, B=75, then reduce the Opacity of the resulting shape to 50%.
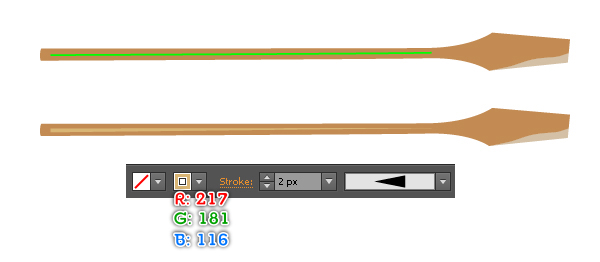
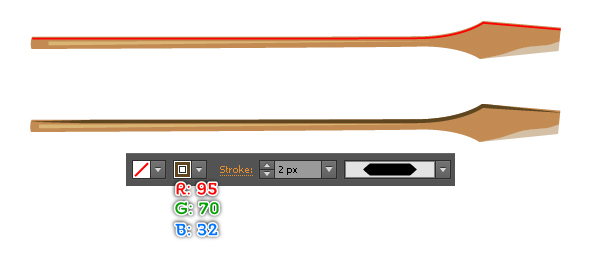
27. To add some details, first use the Line Segment Tool (\) create a horizontal line, with a 2px stroke (R=217, G=181, B=116) and no fill, then apply the Width Profile 4 for the resulting object. Next with the Pen Tool (P) create a curved path like you see in the third image. Once your path is drawn, fill it with none and add a 2px stroke (R=95, G=70, B=32), then apply the Width Profile 3 for the resulting path.
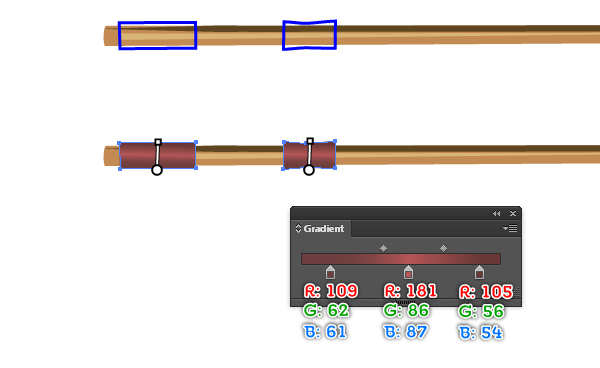
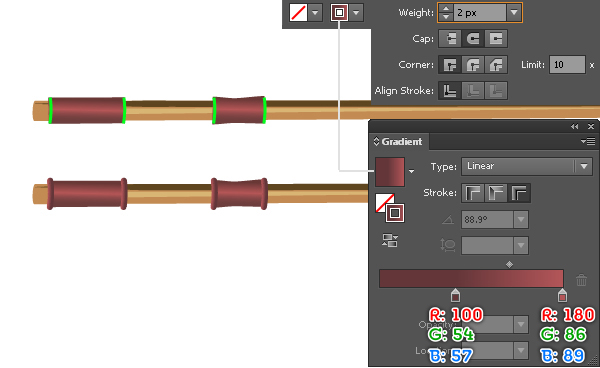
28. Create two objects and then fill them with a linear gradient as shown in the images below. Continue create four curved paths like you see in the third image. Reselect the newly created paths and add a 2px stroke (apply the linear gradient across stroke). Keep the resulting paths selected, open the Stroke palette (Window > Stroke) and set the values like you see in the fourth image.
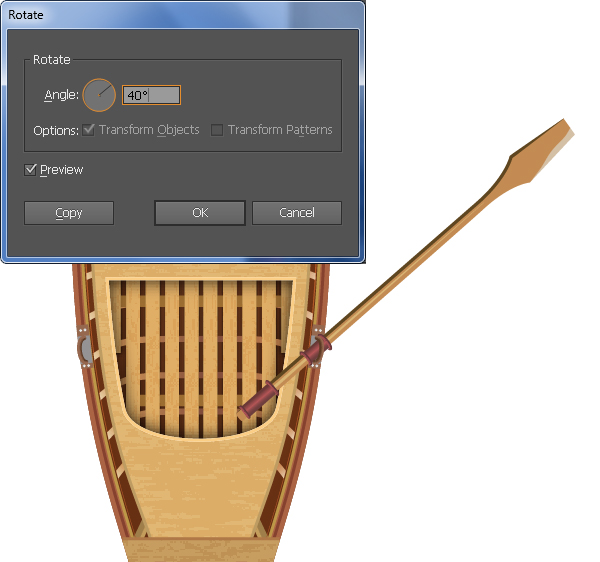
29. Select and group (Ctrl + G) all objects created from beginning step 26 to this time, then go to the Object > Transform > Rotate… Enter a 40 degrees Angle and click OK. Next place the “Right_Oar” group to the correct position as shown in the image below.
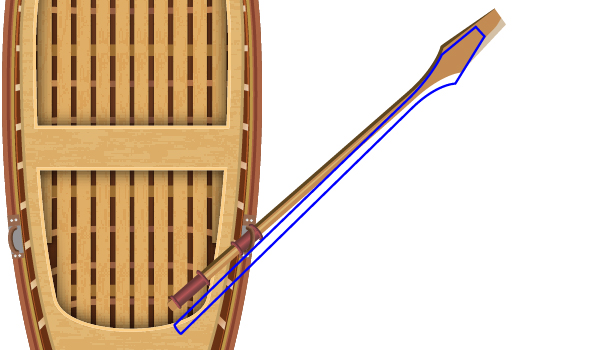
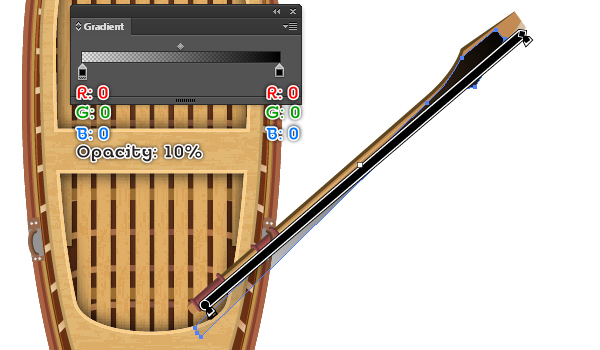
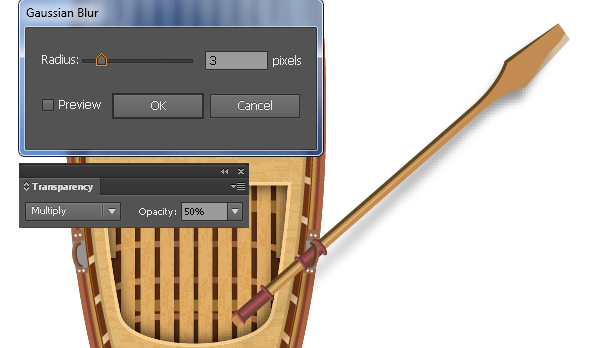
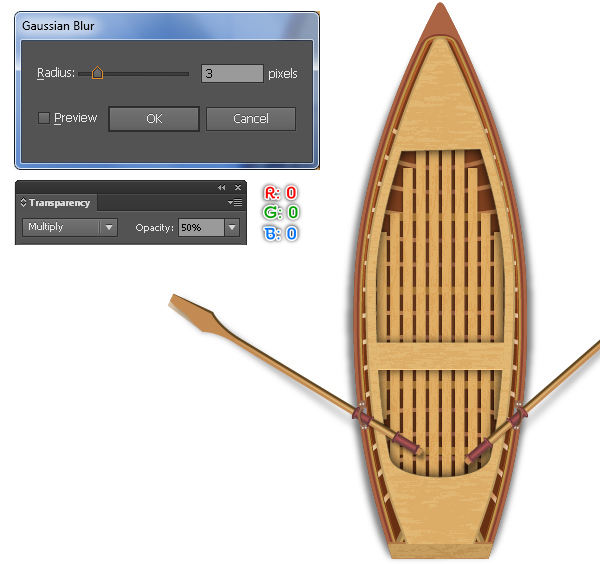
30. To give a more realistic look I’m going to be adding some shadows on the “Right_Oar” group. With the Pen Tool (P) create an object as shown below. Once your object is drawn, fill it with the linear gradient like you see in the second image. Next apply a 3px Gaussian Blur effect for the resulting shape then set it to Blending Mode Multiply and reduce the Opacity to 50%. Finally send the resulting shape to back (Ctrl +Shift +Left Square Bracket).
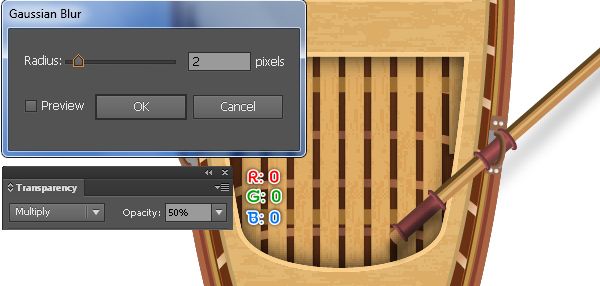
31. Continue create another object like you see in the image below. Fill this object with R=0, G=0, B=0 and then apply a 2px Gaussian Blur effect for the resulting shape. Next change the Blending Mode to Multiply and lower the Opacity to 50%. Finally hide the resulting shape behind the “Right_Oar” group.
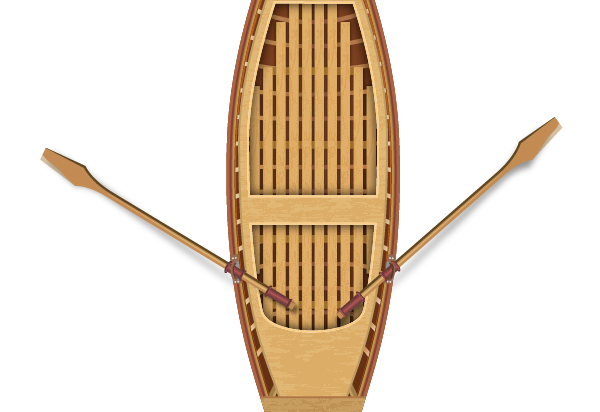
32. Now select the “Right_Oar” group and the shadows of it and go to the Object > Transform > Reflect… Check the Vertical box then click on the Copy button. Next rotate the copies an angle of about 10 degrees and then place them as shown in the image below.
33. We are going to start making shadows for the yawl to give it more of a 3D look. First create an object using the Pen Tool (P) like in the image below. Once your object is drawn, fill it with R=0, G=0, B=0. Next apply a 3px Gaussian Blur effect for the resulting shape then set it to Blending Mode Multiply and reduce the Opacity to 50%. Finally press (Ctrl +Shift +Left Square Bracket) to hide the resulting shape behind the yawl.
34. Repeat the same process as the step 23 and the step 24 to draw objects like you see in the image below.
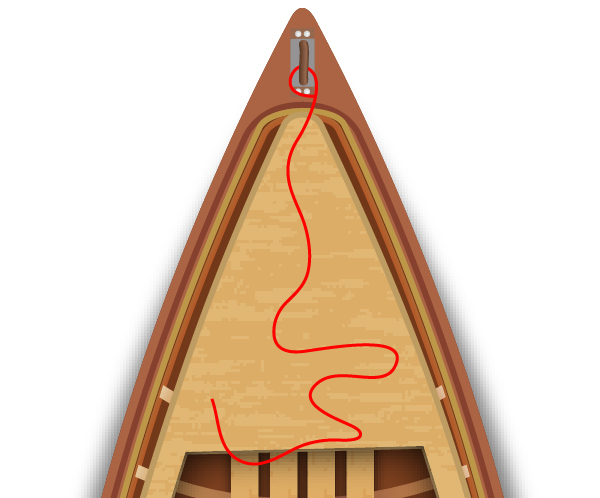
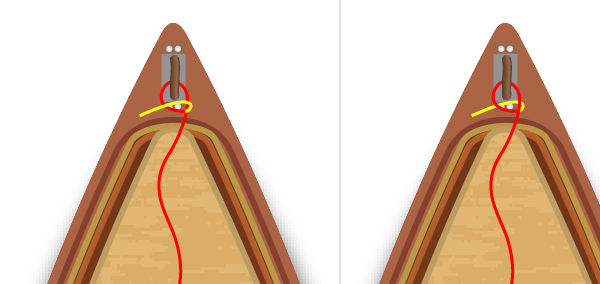
35. With the Pencil Tool (N) create a red curved path as shown below. Continue create another path like you see in the second image and then hide this path behind the red path.
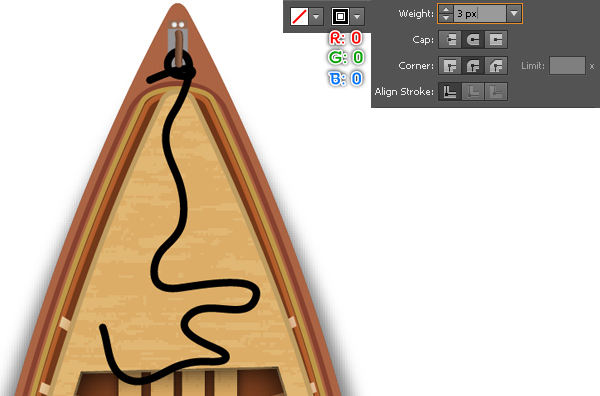
36. Reselect two newly created paths, replace the existing stroke color of them with R=0, G=0, B=0 and change the stroke weight to 3px. Keep the resulting paths selected, open the stroke palette (Window > Stroke) and set the values like you see in the image below.
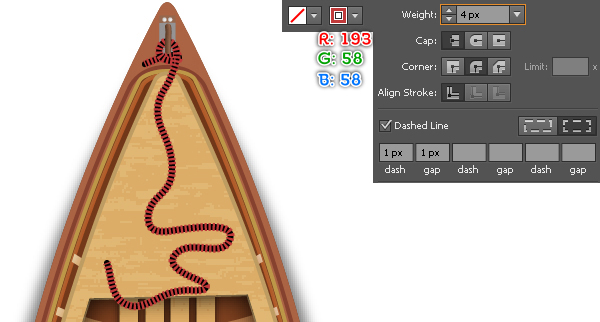
37. Make a copy (Ctrl +C, Ctrl +F) of the two new paths and replace the existing stroke color of the copies with R=193, G=58, B=58, then change the stroke weight to 4px. Keep the resulting paths selected, open the Stroke palette (Window > Stroke) and check the Dashed Line box. Enter 1px in the dash box and 1px in the gap box.
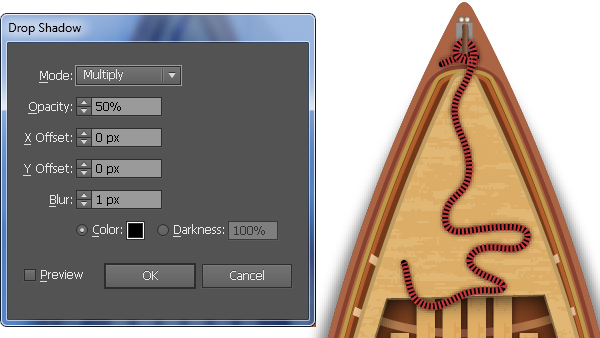
38. Now reselect two paths created in the step 36 and go to the Effect > Stylize > Drop Shadow… Follow the data as shown below and then click OK. Now select and group (Ctrl + G) all shapes created from beginning step 2 to this time. At this point, the yawl is ready and looks like you see in the second image.
Create a Background
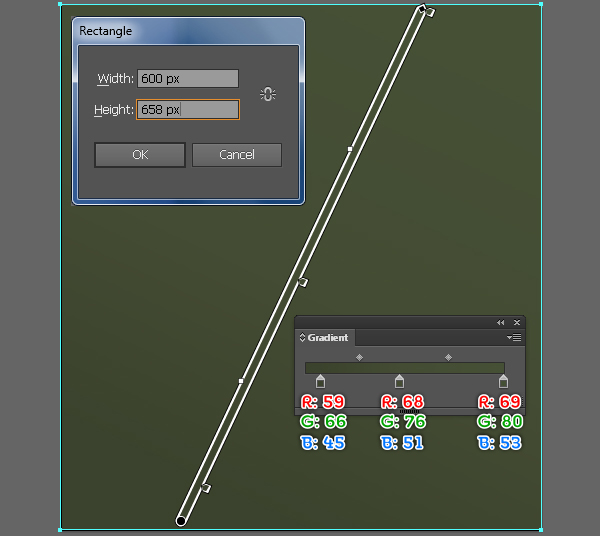
39. With the help of the Rectangle Tool (M) create a 600 by 658px object. Next fill this rectangle with the linear gradient as shown below.
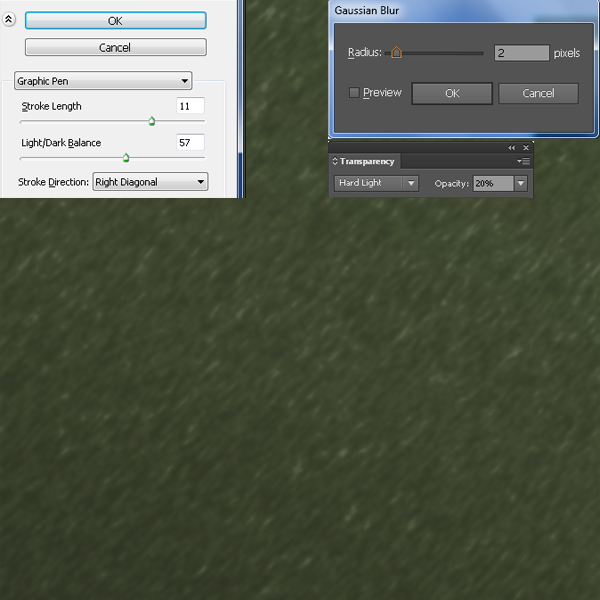
40. Reselect the newly created rectangle and duplicate (Ctrl +C, Ctrl +F) it once, then go to the Effect > Sketch > Graphic Pen… Follow the data as shown below and click OK. Next apply a 2px Gaussian Blur effect for the resulting shape then set it to Blending Mode Hard Light and reduce the Opacity to 20%.
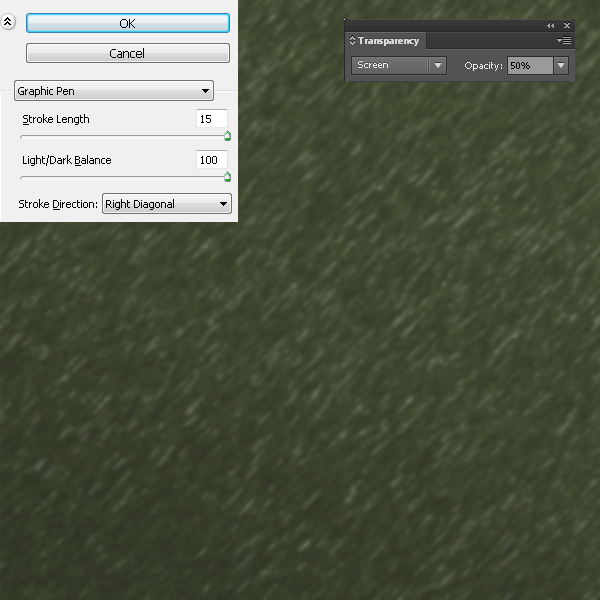
41. Make a copy (Ctrl +C, Ctrl +F) of the new shape created in the step 40 and open the Appearance palette (Window > Appearance), then click on the Graphic Pen section. In the Graphic Pen box, follow the data as shown below and click OK. Make sure that the resulting shape is still selected, change the Blending Mode to Screen and change the Opacity to 50%. Now the last thing to do is place the “Yawl” group to the newly created background.
And We’re Done!
