Follow this tutorial and learn how to create a filming accessory, a clapperboard in Adobe Illustrator. You will learn to use basic tools, 3D effects, gradients and blending modes. So let’s look at the creating process!
1. Create a New document. Enter 500px in the width and height boxes then click on the Advanced button. Select CMYK color mode, Screen (72ppi) and make sure that the “Align New Objects to Pixel Grid” box is unchecked before your click OK.
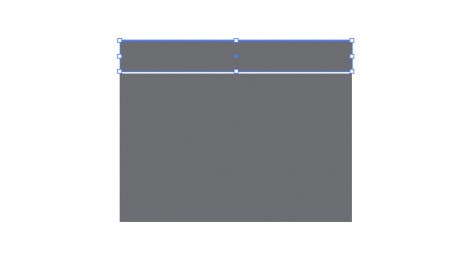
2. Create a rectangle with the Rectangle Tool (M). Set the size to 295px width and 190px height. Fill it with a color. Duplicate the rectangle by copying (Ctrl + C) and placing in front (Ctrl + F). Set its height to 40px. Move the second rectangle up with the arrow keys.
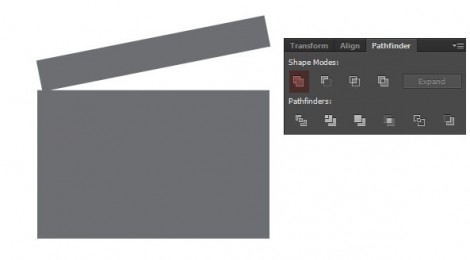
3. While the second object is selected go to Object -> Transform -> Rotate and set the angle to 10°. Move it up with the arrow keys until only the bottom left corner connects with the first rectangle. Select both shapes and select Unite on the Window -> Pathfinder Panel.
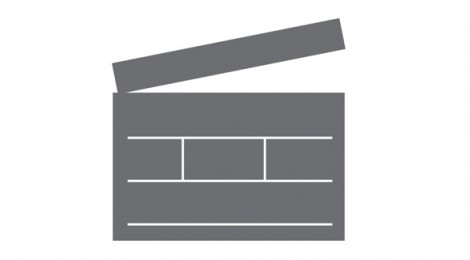
4. Use the Pen Tool (P) to draw the surface of the clapperboard. Set the line wheight to 3pt or 5pt as you like it. Select all the lines, go to Object -> Expand.
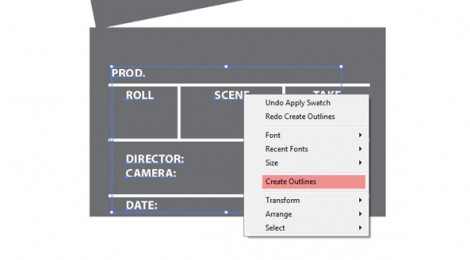
5. Place text too. Convert the text to outlines, so the text will remain as you created, even if someone doesn’t have the font you’ve used. Check the text carefully, because you can’t edit after you convert it to curves.
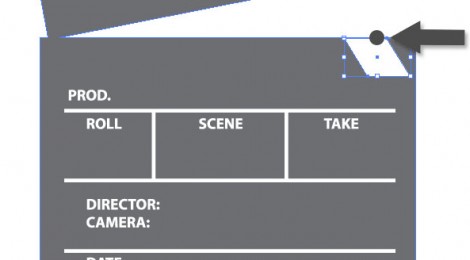
6. Create a rectangle. Press E key to transform the rectangle. Grab the top center point of the rectangle and while pressing Ctrl + Shift move it to left. You should get an object as you see on the image below.
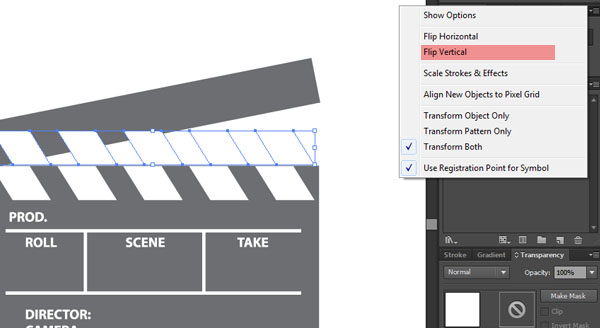
7. Duplicate this object by moving to the left with the mouse while pressing Alt + Shift. Press Ctrl + D to create other copies. When you’re done, select the copies and duplicate once again. On the Transform panels option select Flip Vertical. Go to Object -> Transform -> Rotate and set the angle to 10°. Align to the upper part of the clapperboard with the mouse or arrow keys.
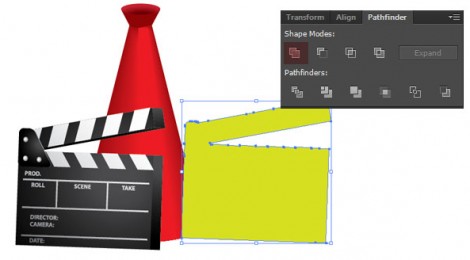
8. Create a rectangle. Place and resize as needed as you see on the image bellow (the green one). With the Direct Selection Tool (A) select the top right point of the rectangle. Move it with the mouse to the left. If it is okay, you can move it away, for later use.
9. Select the lines, text and every object form the surface of the clapperboard. Group them and drag the group to the Symbols Panel (Window -> Symbols Panel). On the Symbol Option window you can give a name to the new symbol, select Graphic as Symbol Type and press OK. You can now delete the original group because you have it already on the Symbol Panel.
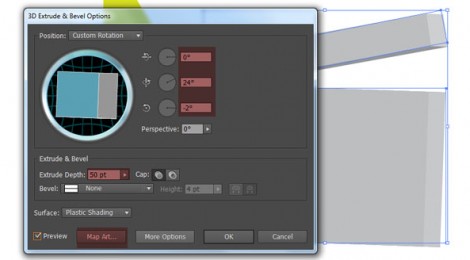
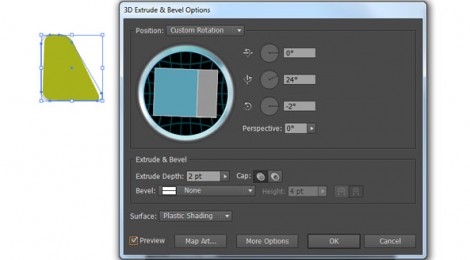
10. Select the clapperboard and go to the Effects -> 3D -> Extrude & Bevel. Use the settings you see on the image bellow.
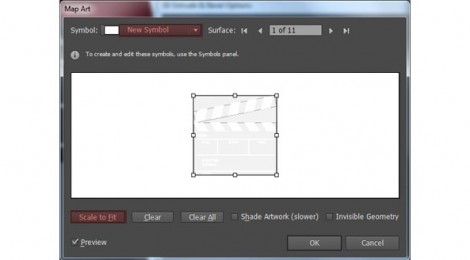
11. Press Map Art in the 3D Extrude Options window and select from the drop-down menu the group you added to the Symbols Panel. Press the Scale to Fit button from the bottom of the window then press OK. Go to Object -> Expand Appearance then Object -> Ungroup. Keep ungrouping until you have separate objects (the Ungroup option is inactive). Select the front side of the clapperboard, press Right Mouse Button and select Release Clipping Mask.
12. Select the object you put away for later use. Go to Effect -> Stylize -> Round Corner. Set the Radius to 10 then press OK. Now go to the Effect -> 3D ->Extrude & Bevel. Use the same settings as before but in this case set the Depth to 2pt. Go to Object -> Expand Appearance then Object -> Ungroup. Keep ungrouping until you have separate objects (the Ungroup option is inactive). Place over the clapperboard to its place.
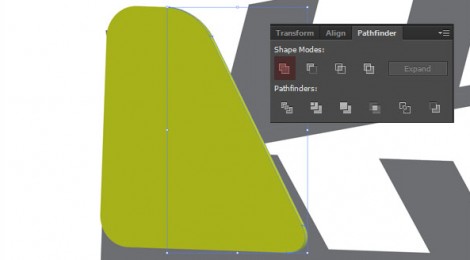
13. Select the three elements from the side of the 3d object and unite them (Window -> Pathfinder Panel).
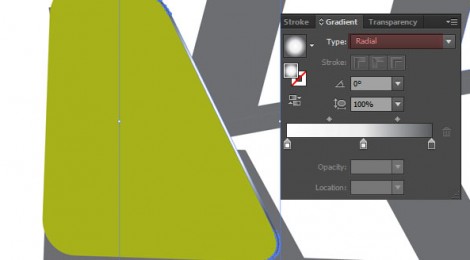
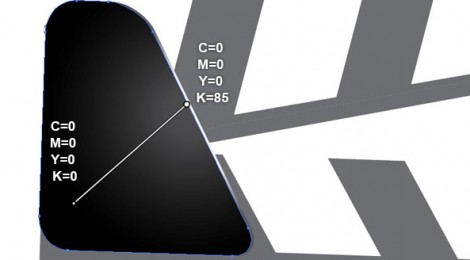
14. Fill it with a radial gradient from white to black.
15. To color the clapperboard with the same color select the clapperboard press I (Eyedropper Tool) and click to the target object to copy the color. You can edit the gradient direction and placement by using the Gradient Tool (G).
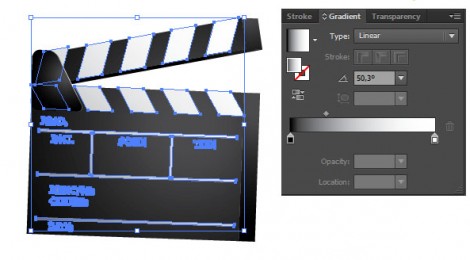
 16. Select all the white elements and fill them with a linear gradient from white to gray.
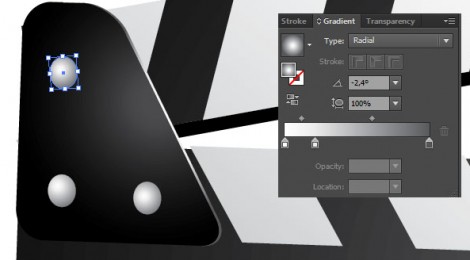
17. Create three ellipses with the Ellipse Tool (L), fill them with a radial gradient from white to gray and place them to the clapperboard.
That’s it! You’re done!
[wp_ad_camp_2]
Let’s complete the picture with an old school red megaphone!
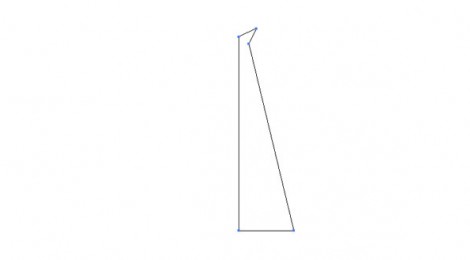
18. With the Pen Tool (P) draw an object like the one on the image bellow. Just place a couple of points and make sure to close the path by placing the last point over the first one.
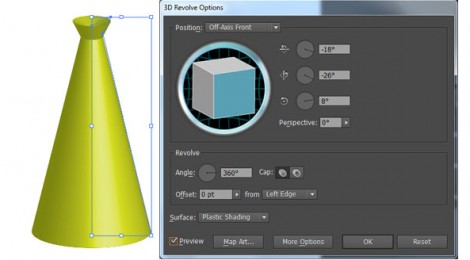
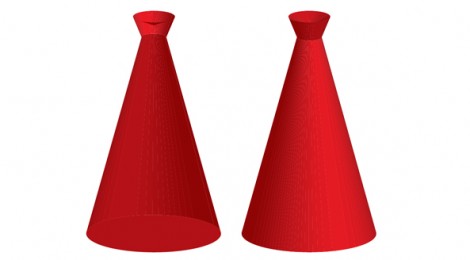
19. Go to Effects -> 3D -> Revolve. Use these settings:
20. Fill the object with a nice red color. Go to Object -> Expand Appearance then Object -> Ungroup. Keep ungrouping until you have separate objects (the Ungroup option is inactive). Click to the visible parts while pressing Shift key(3 or 4 elements) and move them with the arrow keys. You can delete the remaining parts(on the left side) they are no longer needed. With this step you keep a clean and simple structure of your file.
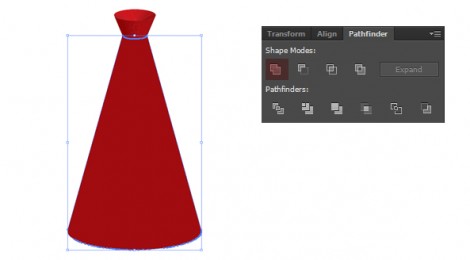
21. Select the bottom part of the megaphone and press Unite on the Pathfinder Panel.
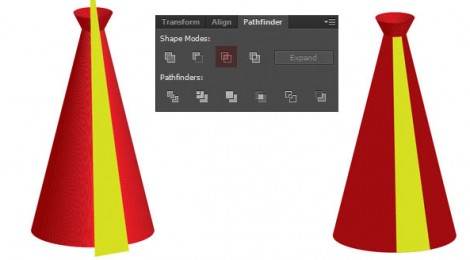
22. Repeat this step with the other parts too. Draw a new object with the Pen Tool. This will be the light ray on the megaphone’s surface. On the image it has green color.
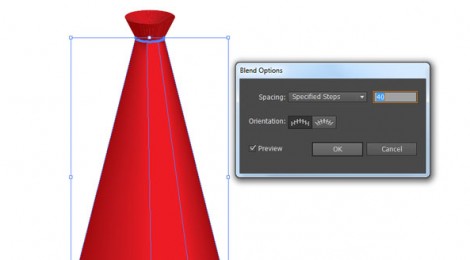
23. Select the bottom part of the megaphone and copy it (Ctrl + C). Shift + select the green object and press Intersect on the Pathfinder Panel. Press Ctrl+B to place it behind the green object. Change the green color to red. Select the two bottom objects and press Ctrl + Alt + B to blend. Go to Object -> Blend -> Blend options. Set the spacing to Specified Steps from the drop-down list and set 40 as the steps number.
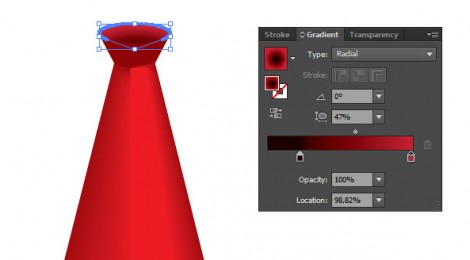
24. Select top object and fill it with a radial gradient from red to black. With the Gradient Tool (G) you can edit the gradient center and direction.
25. You can now place the clapperboard near the megaphone. It is almost done but something is missing. That’s right, the shadows! With shadows the image will have a more realistic feeling.
26. Duplicate the clapperboard and the megaphone (Ctrl + C and Ctrl + V). Select the second clapperboard and press Unite on the Pathfinder Panel. Repeat this step on the second megaphone too. Now you have the shapes for the shadow, you just need to align them properly.
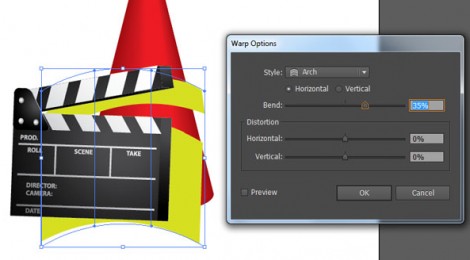
27. Place the clapperboard shadow behind the clapperboard (Ctrl + X, select the clapperboard then Ctrl + B). Go to Object -> Envelope Distort -> Make it with Warp and use the setting as you see on the image bellow, click OK. Go to Object -> Expand, press OK.
28. Select the megaphone’s shadow and place over the megaphone. If you need, arrange the shape forward or backward (Ctrl + [ or Ctrl + ]). You should see something like this:
29. Select the two shadow shapes and Intersect them (Pathfinder Panel).
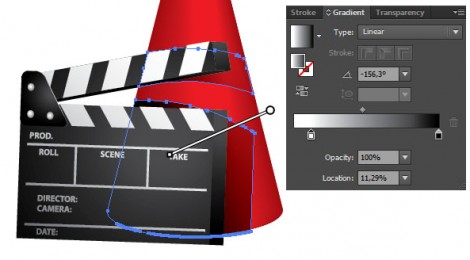
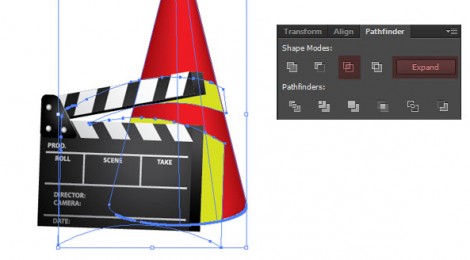 30. Fill the resulted shape with a gradient from white to black. On the Window -> Transparency Panel set the blending mode to Multiply.
31. After you set the gradient’s direction you will get this. Now you’re really done!
You can download the vector file to use in your works and projects.
If you want to see more great and useful tutorials
please support Us by Liking our Page or follow us on Twitter!


