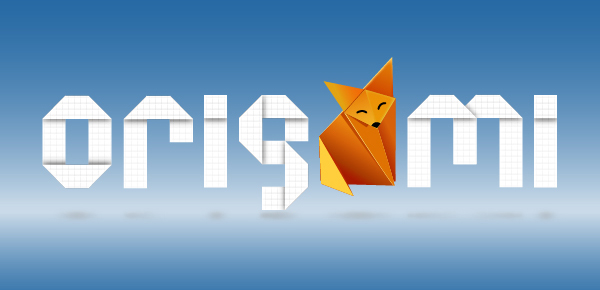
In this tutorial you will learn how to create an origami text effect in adobe illustrator. For starters you will learn how to create the letters using the rectangle tool along with the Align and the Pathfinder palettes. Moving on, you will learn how to create an origami style vector fox using the pen tool along with a bunch of linear gradients. Finally, you will learn how to create a nice background for your artwork. So let’s begin!
Create a New Document
1. Launch Illustrator and then press (Ctrl + N) to create a New document. Select Pixels from the Units drop-down menu, enter 640 in the width box and 690 in the height box then click on the Advanced button. Select RGB, Screen (72ppi) and make sure that the Align New Objects to Pixel Grid box is unchecked before you click OK.

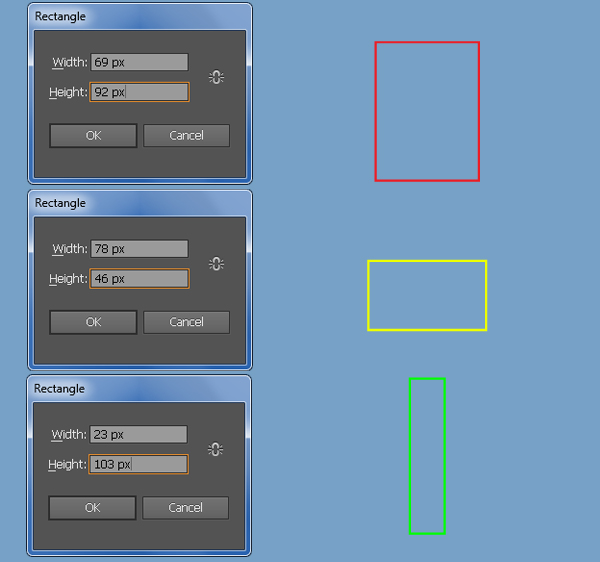
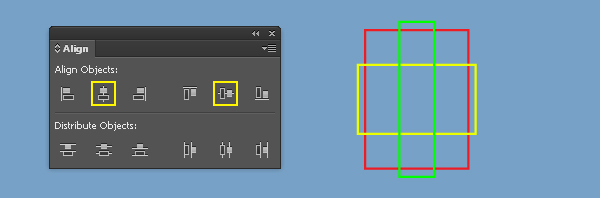
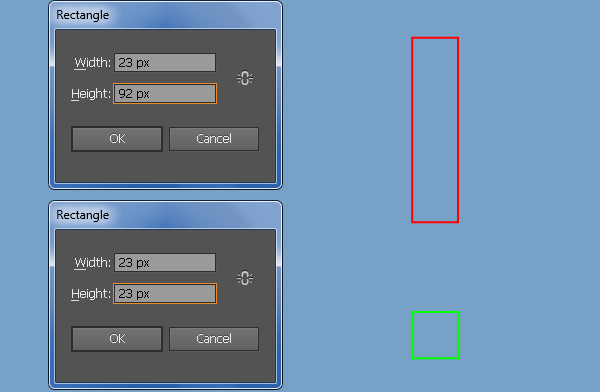
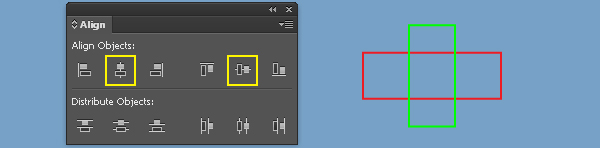
2. To begin, we will pick the Rectangle Tool (M) and create three rectangles with dimensions: 69 by 92px, 78 by 46px and 23 by 103px. Next reselect these newly created rectangles, open the Align palette (Window > Align) and click on the Horizontal Align Center button, then click on the Vertical Align Center button.
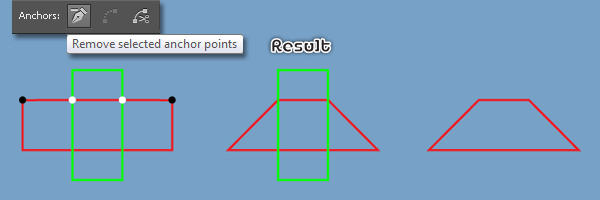
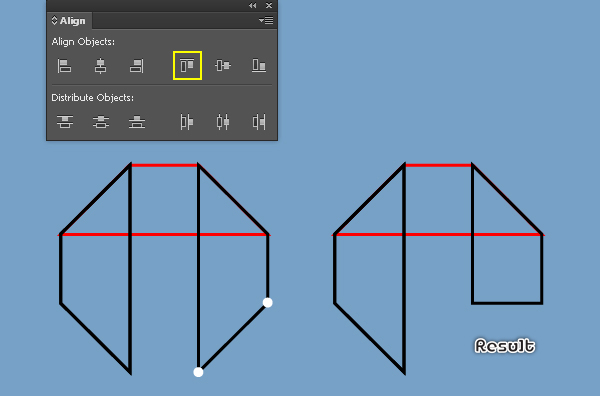
3. The first letter we are going to create is the letter “O”. Select three new rectangles created in the step 2, duplicate (Ctrl +C, Ctrl +F) them once and then place the copies to the new positions. Now reselect the red rectangle, pick the Add Anchor Point Tool (+) and click on eight points highlighted with white. Next select four anchor points highlighted with black and remove them.
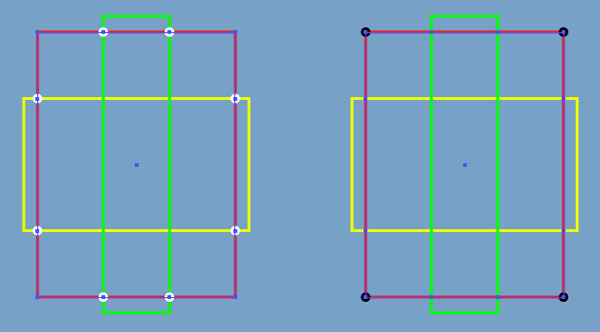
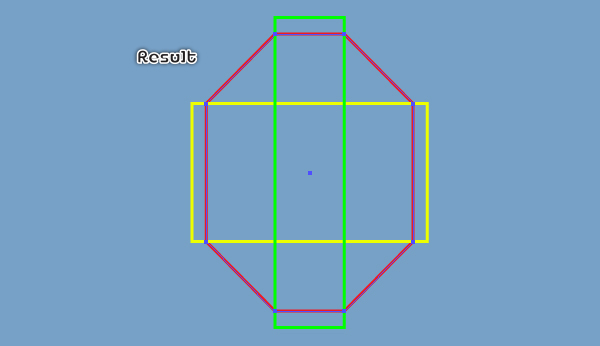
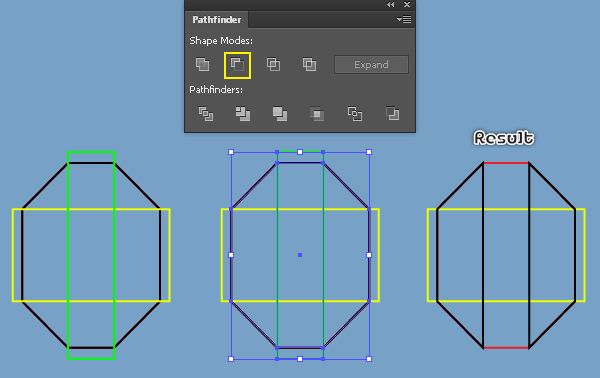
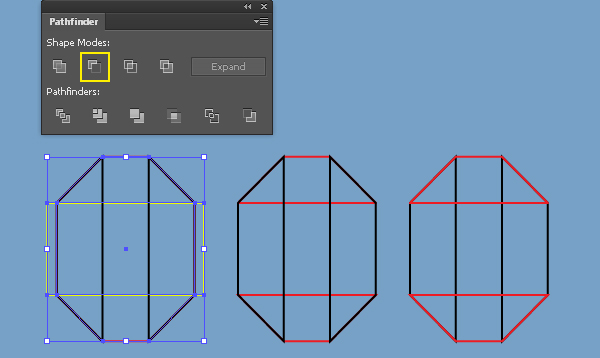
4. Make a copy (Ctrl +C, Ctrl +F) of the red object and then replace the stroke color of the copy with black. Make sure that the black object is still selected, hold down the Shift and click on the green rectangle. Next open the Pathfinder palette (Window > Pathfinder) and click on the Minus Front button, then ungroup (Ctrl +Shift +G) the resulting object. Now select the red and the yellow rectangles and click on the Minus Front button from the Pathfinder palette, then ungroup the resulting object. Finally select and bring two red objects to front (Ctrl +Shift +Right Square Bracket).
5. Next come the letter “R”. Select three new rectangles created in the step 2, duplicate (Ctrl +C, Ctrl +F) them once and then place the copies to the new positions. Now reselect the red rectangle, pick the Add Anchor Point Tool (+) and click on four points highlighted with white. Next select two anchor points highlighted with black and remove them.
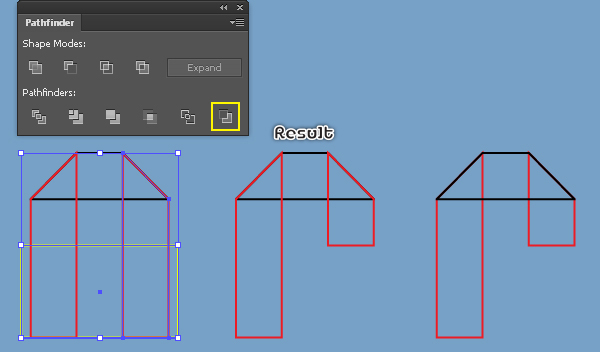
6. Make a copy (Ctrl +C, Ctrl +F) of the red and the yellow rectangles, then replace the existing stroke color of the red copy with black. Keep the black object selected, hold down the Shift and click on a yellow rectangle. Next open Pathfinder palette (Window > Pathfinder) and click on the Minus Front button, then ungroup the resulting object. Now select the red and the green rectangles and click on the Minus Front button from the Pathfinder palette, then ungroup the resulting object. Finally select and remove the black rectangle.
7. Select the yellow rectangle, hold down the Shift and click on the right red object. Next release the Shift and click on the yellow rectangle again (to fixed its position). Then open the Align palette (Window > Align) and click on the Vertical Align Bottom button. Now reselect the yellow rectangle and the right red object, then click on the Minus Back button. Finally select the black object and bring it to front (Ctrl +Shift +Right Square Bracket).
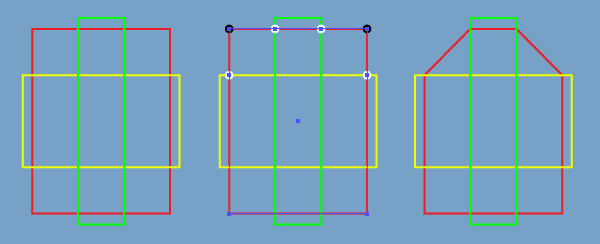
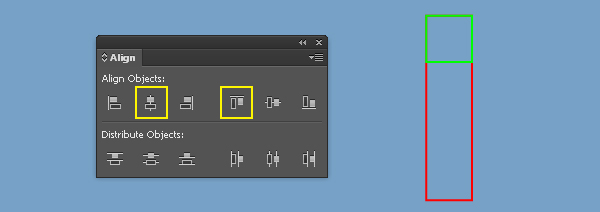
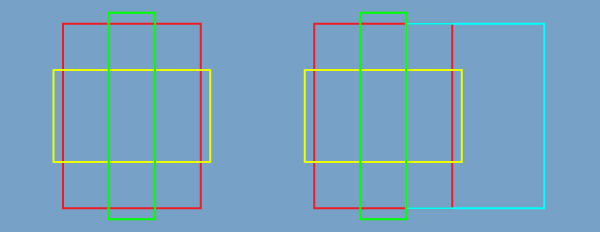
8. It’s time to draw the letter “I”. Pick the Rectangle Tool (M) and create two rectangles with dimensions: 23 by 92px and 23 by 23px. Reselect two newly created rectangles, open the Align palette (Window > Align) and click on the Horizontal Align Center button, then click on the Vertical Align Top button.
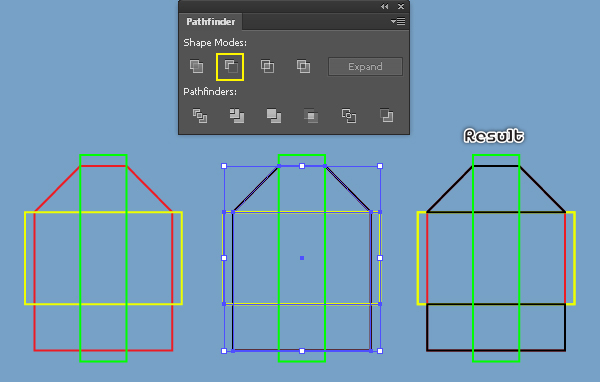
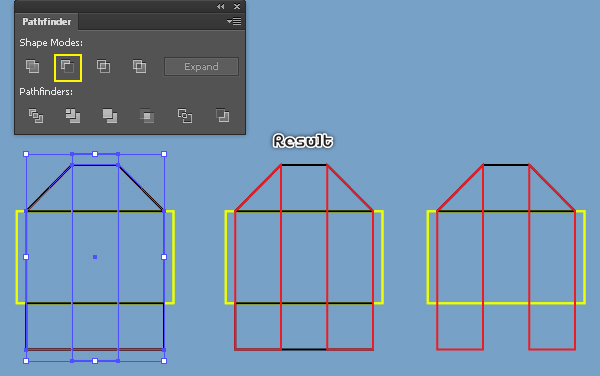
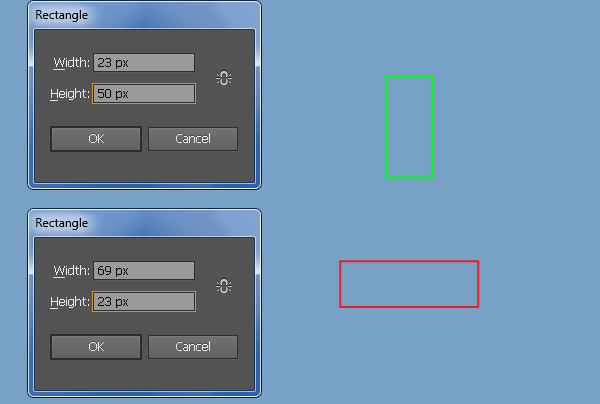
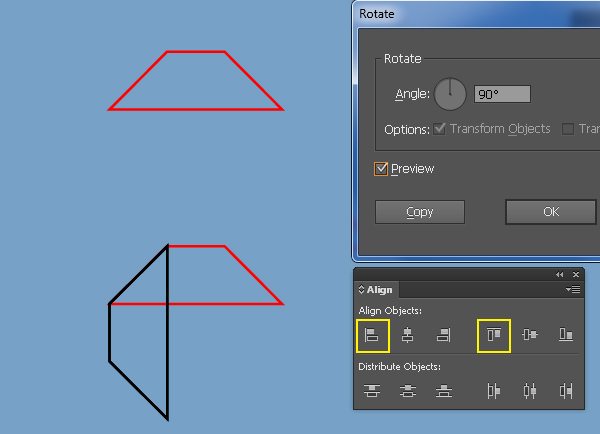
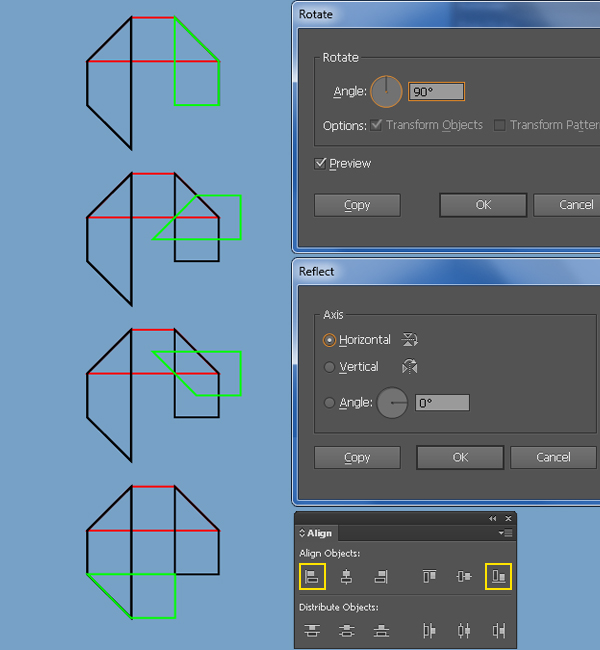
9. Let’s work on creation of the letter “G”. With the Rectangle Tool (M) create two rectangles with dimensions: 23 by 50px and 69 by 23px. Select two newly created rectangles, open the Align palette (Window > Align) and click on the Horizontal Align Center button, then click on the Vertical Align Center button. Reselect the red rectangle, pick the Add Anchor Point Tool (+) and click on the two points highlighted with white. Next select two anchor point highlighted with black and remove them. Finally select and remove the green rectangle.
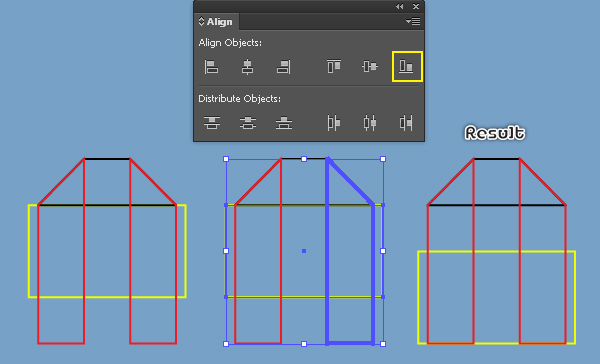
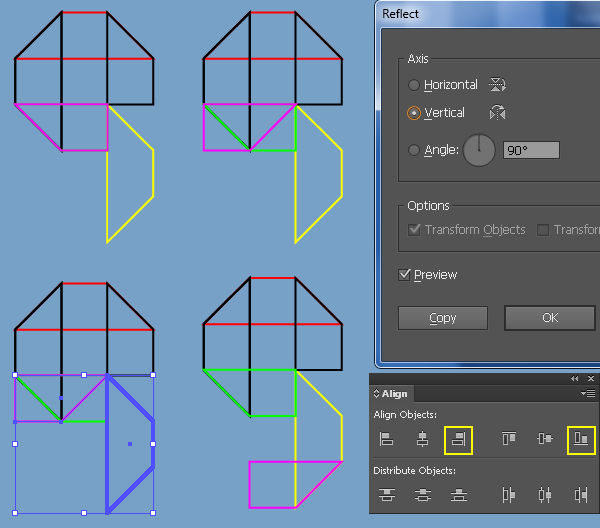
10. Select the red object created in the step 9 and go to the Object > Transform > Rotate… Enter a 90 degrees Angle and click Copy, then replace the existing stroke color of the copy with black. Reselect two newly created objects, open the Align palette (Window > Align) and click on the Horizontal Align Left button, then click on the Vertical Align Top button.
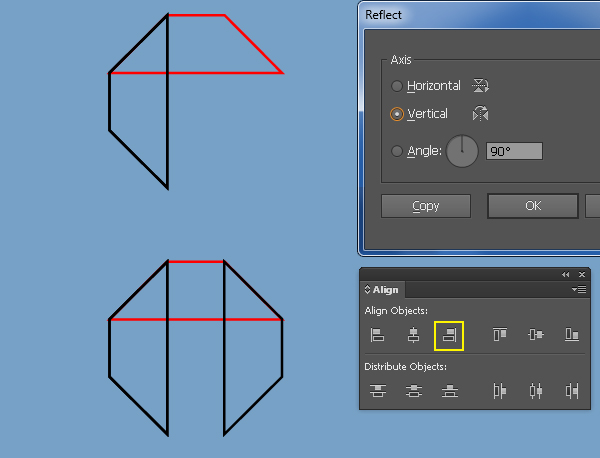
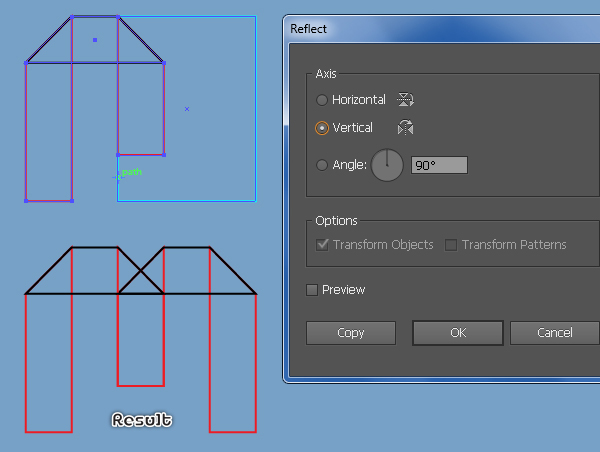
11. Select the black object created in the step 10 and go to the Object > Transform > Reflect… Check the Vertical and click Copy. Keep the new object selected, hold down the Shift and click on the red object. Next release the Shift and click on the red object again (to fixed its position), then click on the Horizontal Align Right button from the Align palette. Now select two anchor points highlighted with white of the new black object and then click on the Vertical Align Top button.
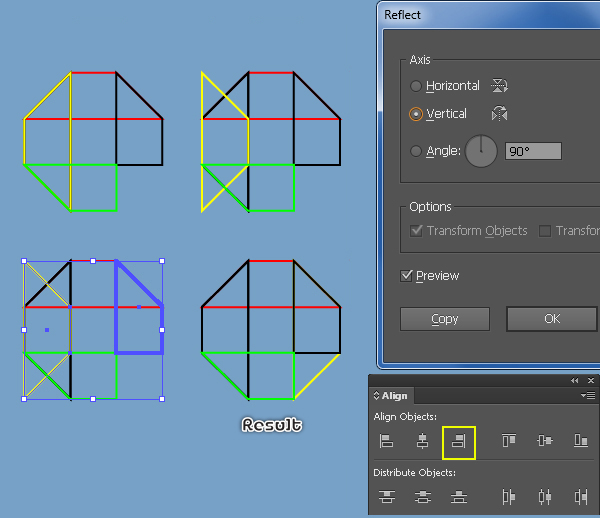
12. Make a copy (Ctrl +C, Ctrl +F) of the black object created in the step 11 and replace the existing stroke color of the copy with green. Make sure that the green object is still selected and go to the Object > Transform > Rotate… Enter a 90 degrees Angle and click OK, then go to the Object > Transform > Reflect… Check the Horizontal and click OK. Keep the resulting object selected, hold down the Shift and click on the black object created in the step 10. Release the Shift and click on the black object created in the step 10 again. Next click on the Horizontal Align Left button from the Align palette and then click on the Vertical Align Bottom button.
13. Make a copy of the black object created in the step 10 and replace the existing stroke color of the copy with yellow. Make sure that the green object is still selected and go to the Object > Transform > Reflect… Check the Vertical and click OK. Keep the resulting object selected, hold down the Shift and click on the black object created in the step 11. Release the Shift and click on the black object created in the step 11 again. Next click on the Horizontal Align Right button from the Align palette. Next select the yellow and the green objects, then fixed the position of the green object. Finally click on the Vertical Align Top button form the Align palette.
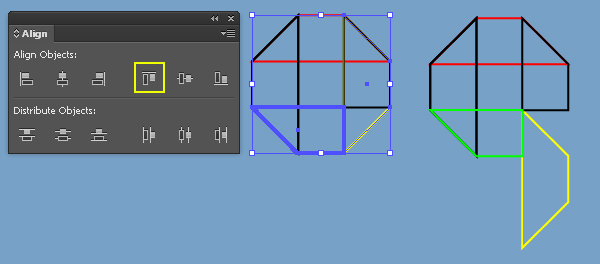
14. Make a copy of the green object and replace the existing stroke color of the copy with magenta. Make sure that the magenta object is still selected and go to the Object > Transform > Reflect… Check the Vertical and click OK. Keep the resulting object selected, hold down the Shift and click on the yellow object. Release the Shift and click on the yellow object again. Next click on the Horizontal Align Right button from the Align palette and then click on the Vertical Align Bottom button. Finally select the red, the left black and the yellow objects and bring them to front (Ctrl +Shift +Right Square Bracket).
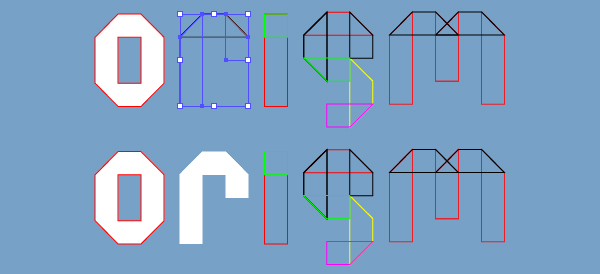
15. Next come the letter “M”. Select three new rectangles created in the step 2, duplicate (Ctrl +C, Ctrl +F) them once and then place the copies to the new positions. Now reselect the red rectangle, duplicate it once and replace the existing stroke color of the copy with turquoise, then move it 46px to the right. Reselect the red rectangle again and make a copy of it, then replace the existing stroke color with black. Next pick the Add Anchor Point Tool (+) and click on four points highlighted with white, then remove four anchor points highlighted with red.

16. Select the red object and the green object, open the Pathfinder palette (Window > Pathfinder) and click on the Minus Front button, then ungroup (Ctrl +Shift +G) the resulting object. Next select two bottom anchor points of the right red object and move them 23px up. Finally select the black object and bring it to front (Ctrl +Shift +Right Square Bracket).
17. Select the two red objects and the black object, pick the Reflect Tool and hold down the Alt, then click on the left side of the turquoise rectangle. In the Reflect box, check the Vertical and click Copy, then send the copies to back (Ctrl +Shift +Left Square Bracket).
18. Place the letters to the positions as shown below.
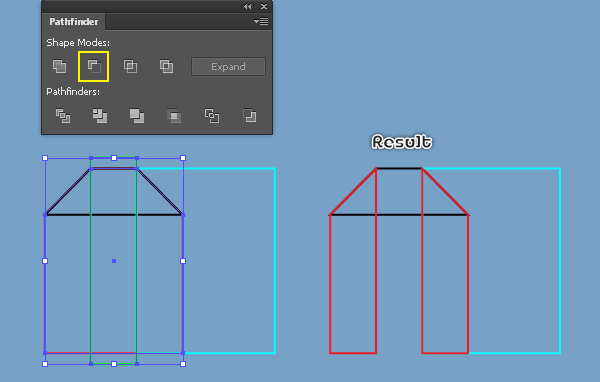
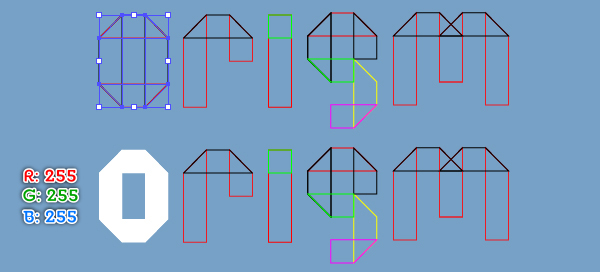
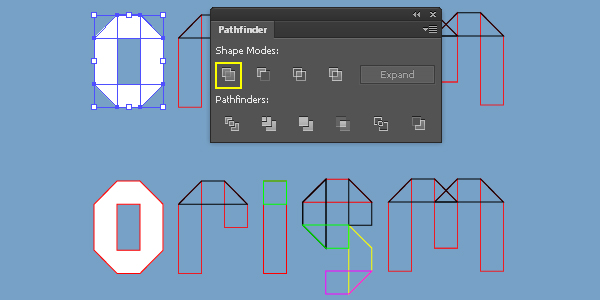
19. Select all objects of the letter “O”, fill them with R=255, G=255, B=255 and remove the stroke of them. Make sure that all shapes of the letter “O” are still selected, duplicate (Ctrl +C, Ctrl +F) them once, then open the Pathfinder palette (Window > Pathfinder) and click on the Unite button. Next remove the fill color of the resulting shape and then add a 1px stroke (red color).
20. Next come the letter “R”. Select all objects of the letter “R” fill them with R=255, G=255, B=255 and remove the stroke of them. Keep the all shapes of the letter “R” are still selected, duplicate (Ctrl +C, Ctrl +F) them once, then open the Pathfinder palette (Window > Pathfinder) and click on the Unite button. Next remove the fill color of the resulting shape and then add a 1px stroke (red color).
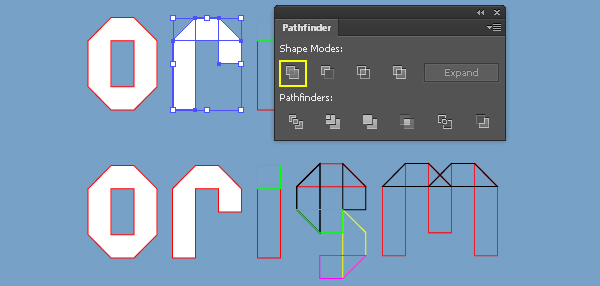
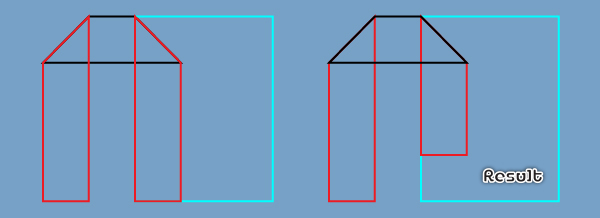
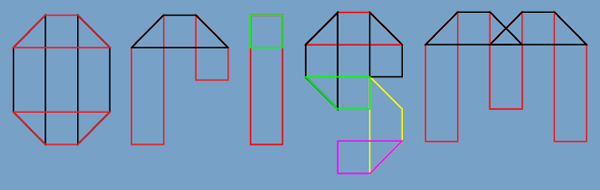
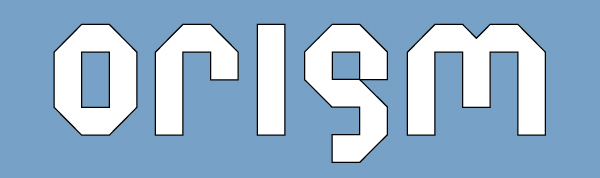
21. Repeat the same techniques for the remaining three letters. In the end your letters should look like the image shown.

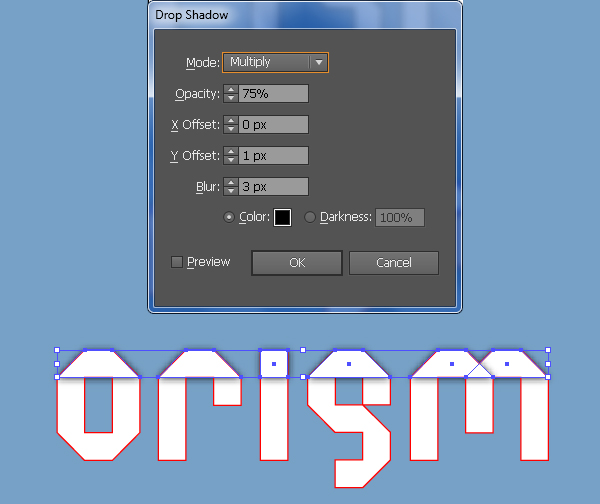
22. Select all red objects, make a copy (Ctrl +C, Ctrl +F) of them and replace the existing stroke color of the copies with black, then press (Ctrl +3) to hide these black objects.
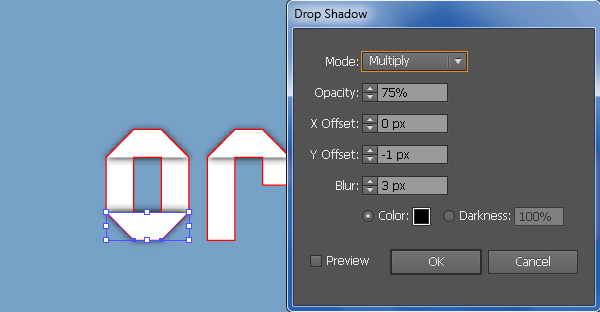
23. Select six shapes as shown below and go to the Effect > Stylize > Drop Shadow… Follow the data like you see in the image below and then click OK.
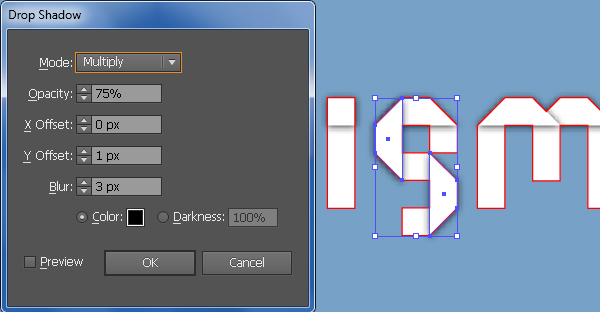
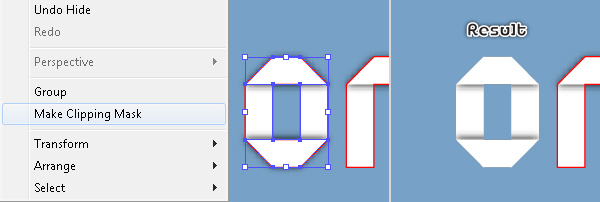
24. Now, follow the sequence of images and add shadows for some shapes similar to the ones from below.
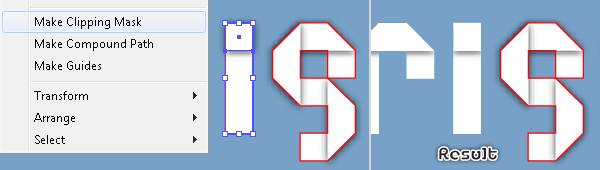
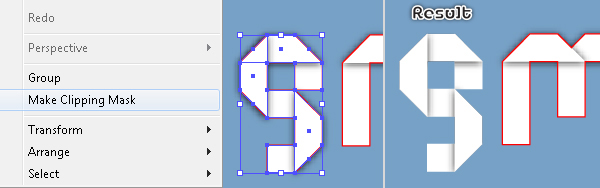
25. Focus on the letter “O”. With the help of the Shift key, select the red object and the two shape with shadow effect applied, then go to the Object > Clipping Mask > Make (Ctrl +7). Next follow the sequence of images and repeat the same techniques for the three letters: “R”, “I” and “G”.
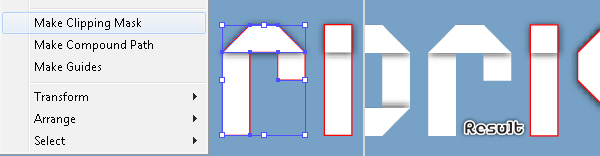
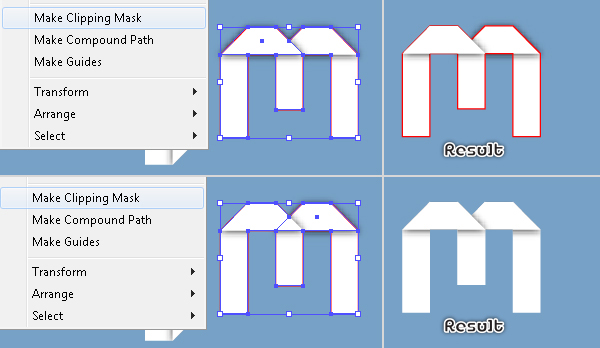
26. Next come the letter “M”. Select the red object and duplicate it once. Keep the copy selected, hold down the Shift, click on the left shape with shadow effect applied and go to the Object > Clipping Mask > Make (Ctrl +7), then press (Ctrl +2) to lock the clipping set. Reselect the remaining red object and the right shape with shadow effect applied and go to the Object > Clipping Mask > Make (Ctrl +7). Keep the newly created clipping set selected, hold down the Shift and click on the right shape of the letter “M”, then send them to back. Finally press (Ctrl +Alt +2) to unlock all.
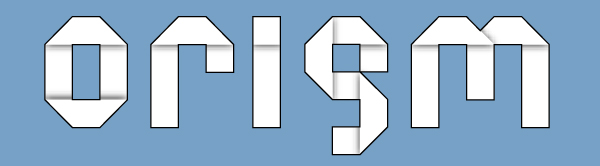
27. At this point your letters should look like in the next image:

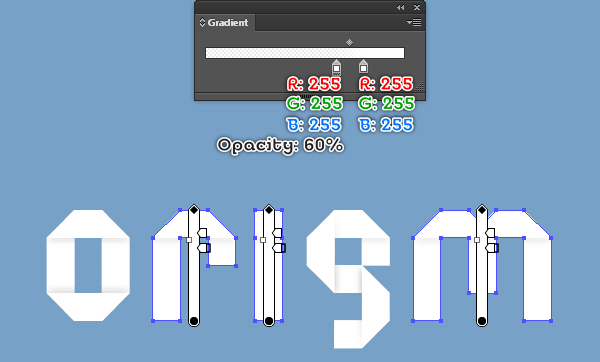
28. Before you continue, press (Ctrl +Alt +3) to show all black objects hidden in the step 22. Now select the black objects of the “O” and the “G” letters, remove the stroke of them and then fill them with the linear gradient as shown in the second image below.

29. Fill the remaining black objects with the linear gradient like you see in the image below.
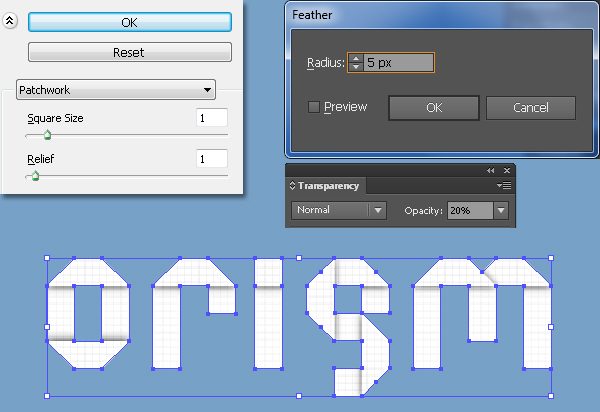
30. Reselect all five newly shapes created in the 28 and the 29 steps and then go to the Effect > Texture > Patchwork… Follow the data as shown below and click OK. Keep the resulting shapes selected and go to the Effect > Stylize > Feather… Enter a 5px Radius and click OK, then reduce the Opacity of the resulting shapes to 20%.
Creating an Origami Style Vector Fox
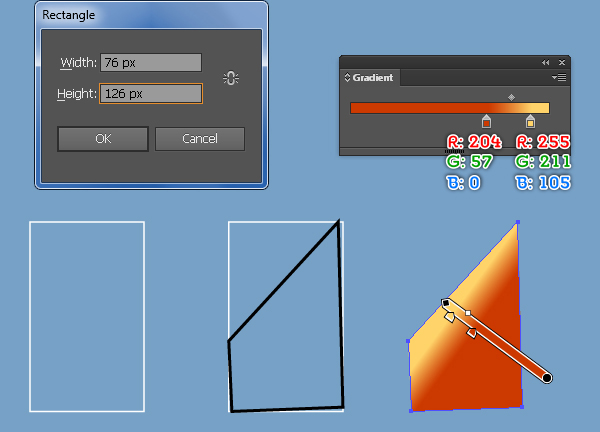
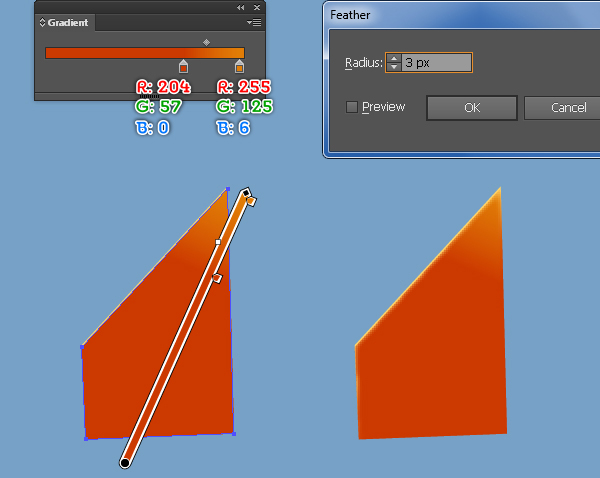
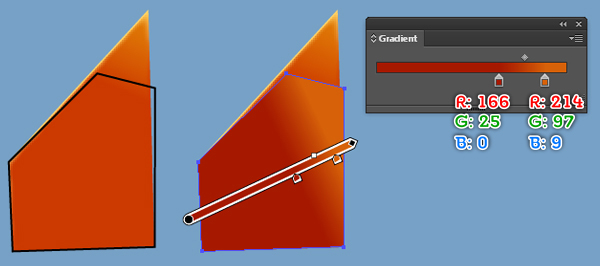
31. Start with drawing a 76 by 126px rectangle using the Rectangle Tool (M). Next pick the Pen Tool (P) and create a black object like you see in the second image. Once your object is drawn, fill it with the linear gradient and then remove the white rectangle. Now make a copy of the new shape and replace the existing color of the copy with new linear gradient as shown in the fourth image, then apply a 3px Feather effect for the resulting shape. Finally select two top anchor points of the new shape and move them 1px down.
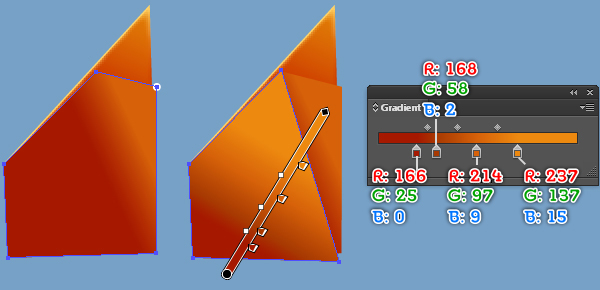
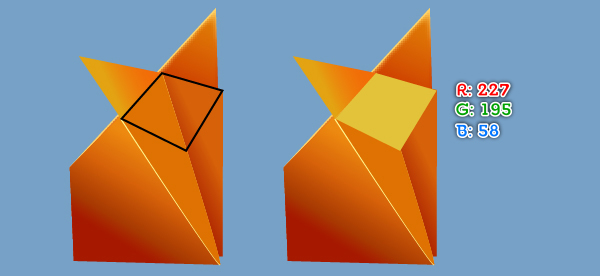
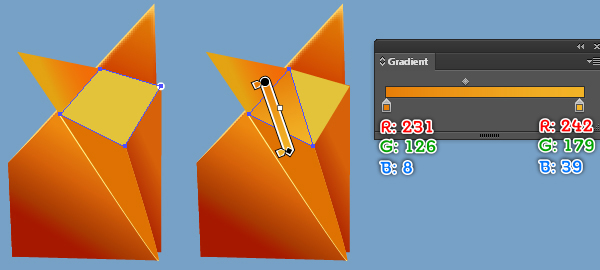
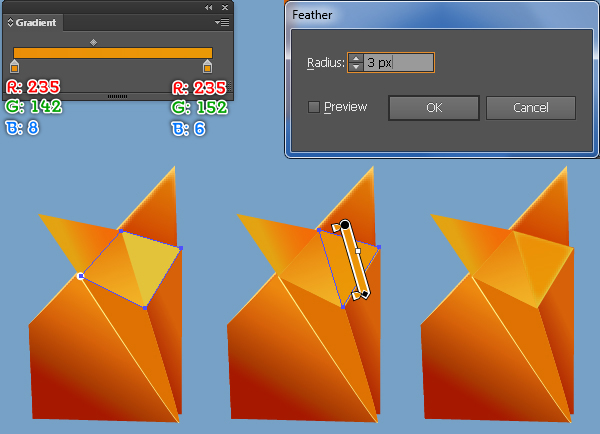
32. Create another object using the Pen Tool (P) like in image. Next fill this object with the linear gradient like you see in the second image. Now make a copy (Ctrl +C, Ctrl +F) of the new shape, then select and remove the anchor point highlighted with white of the copy. Next replace the existing color of the new shape with new linear gradient like you see in the fourth image.
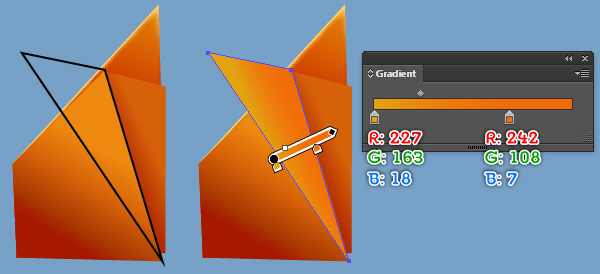
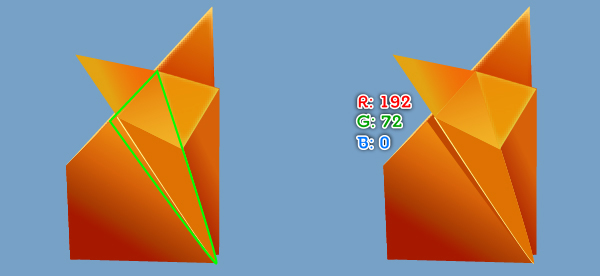
33. Now, follow the sequence of images, draw some objects and then fill them similar to the ones from below.
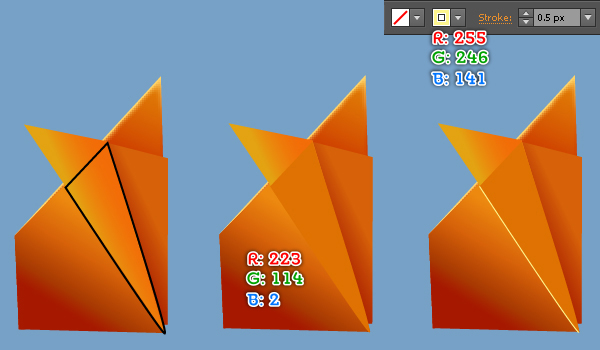
34. With the Pen Tool (P) create an object as shown below. Once your object is drawn, fill it with R=227, G=195 and then make two copies (Ctrl +C, Ctrl +F, Ctrl +F) of the resulting shape. Keep a copy selected, select the anchor point highlighted with white and remove it. Next replace the existing color of the new shape with the linear gradient like you see in the fourth image. Then select the remaining copy and remove the anchor point highlighted with white of it. Next replace the existing color of the resulting shape with the linear gradient as shown in the fifth image. Finally apply a 3px Feather effect for the resulting shape.
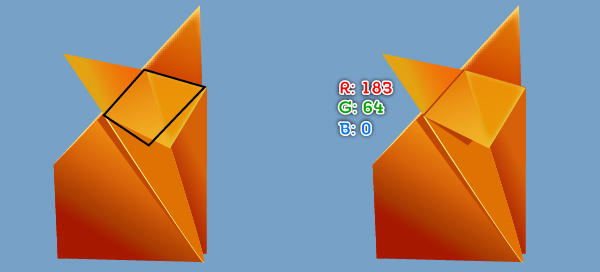
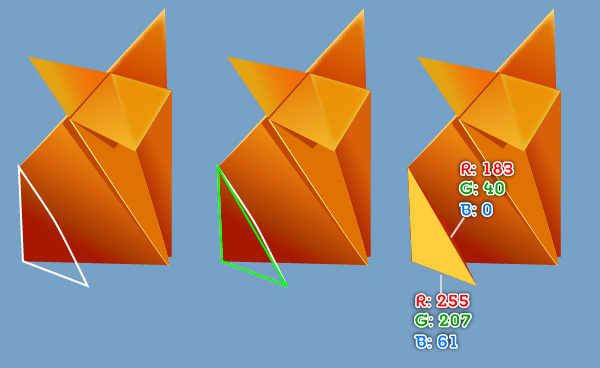
35. With the help of the Pen Tool (P) create an object as shown below. Next fill this object with R=192, G=72, B=0 and then hide the resulting shape behind the leg of the fox. Continue create another object like you see in the third image. Once your object is drawn, fill it with R=183, G=64, B=0 and then hide the resulting shape behind the head of the fox.
36. Keep working with the Pen Tool (P) create two objects as shown below. Next fill the white object with R=183, G=40, B=0 and then fill the remaining object with R=255, G=207, B=61. Finally draw eyes and nose for our fox like you see in the final image.

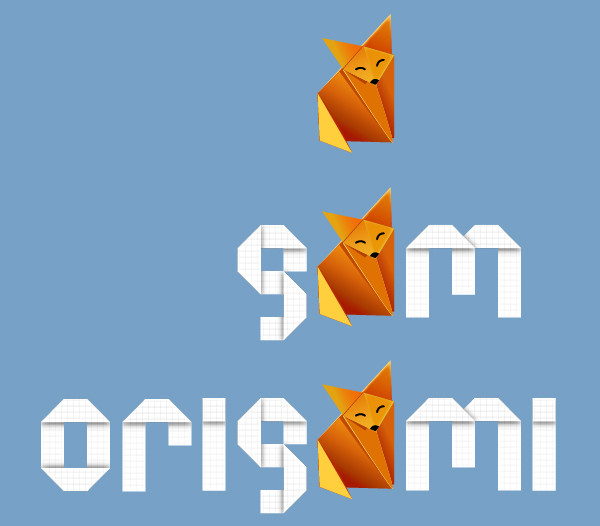
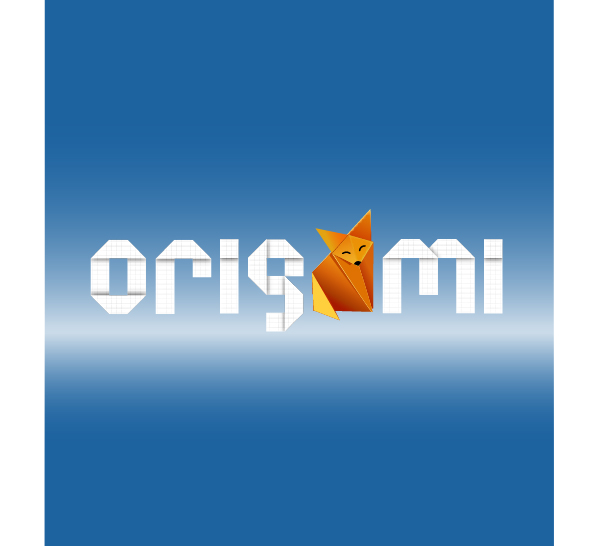
37. Place the fox and the letters as shown below.
Create the Background
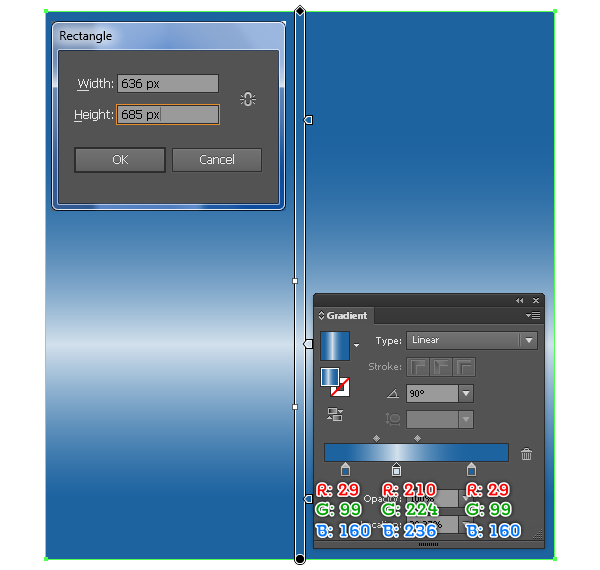
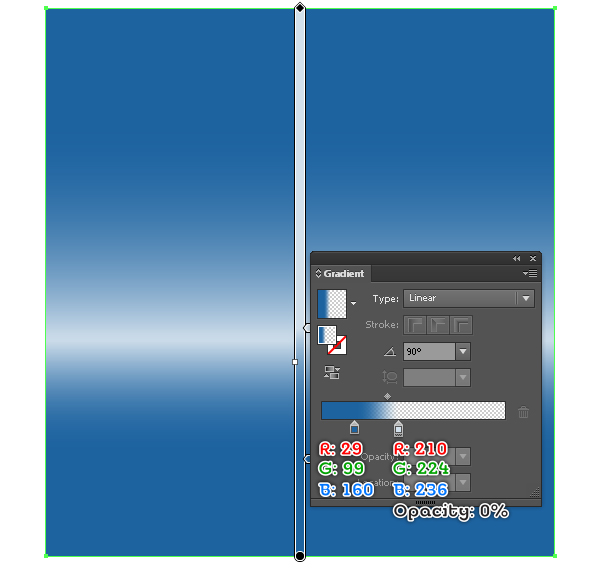
38. It’s time to draw a nice background. With the Rectangle Tool (M) create a 636 by 685px rectangle. Next fill the rectangle with the linear gradient as shown below. Make a copy of this rectangle and then replace the existing color of the copy with new linear gradient like you see in the second image. Finally place the fox and the letters to the positions as shown in the final image.
Adding some shadows on the letters
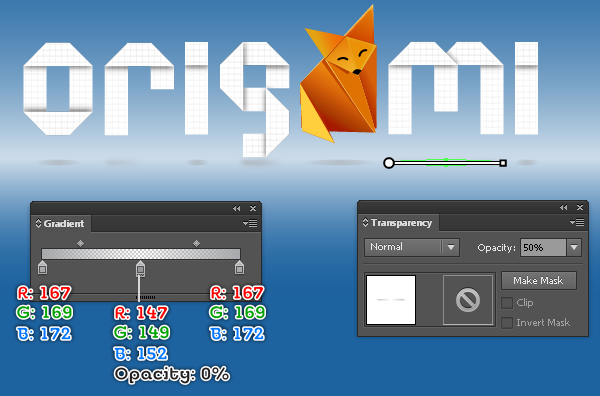
39. First create seven ellipses as shown below. Once your ellipses are drawn, fill four black ellipses with the linear gradient like you see in the second image and then reduce the Opacity of the resulting ellipses to 50%.

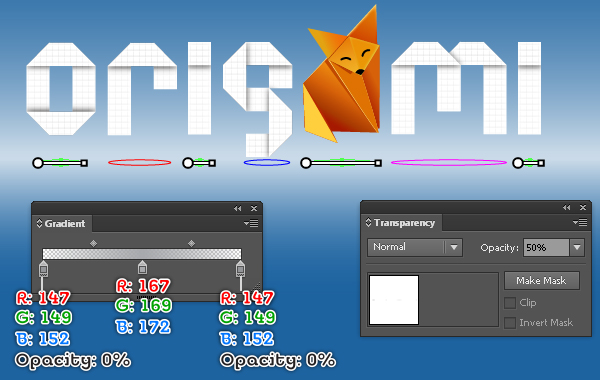
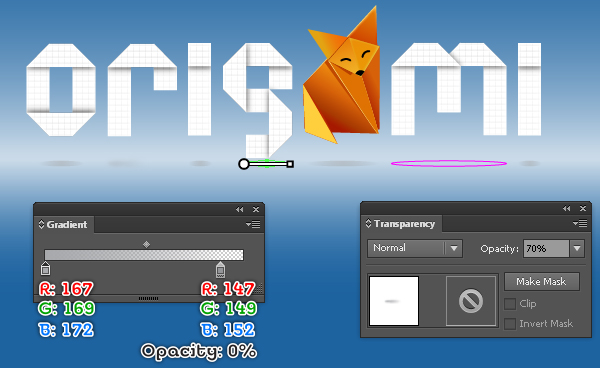
40. Fill the green ellipse with the linear gradient as shown below and then reduce its Opacity to 70%. Next fill the magenta ellipse with the linear gradient like you see in the second image and then reduce its Opacity to 50%.
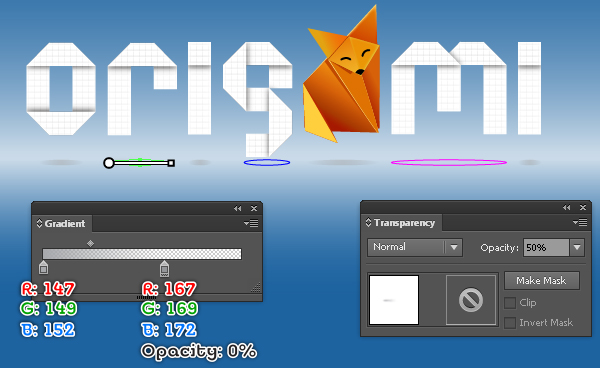
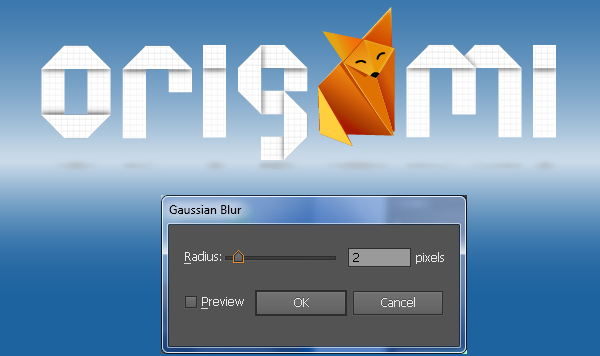
41. Now select all seven ellipses created in the previous steps and apply a 2px Gaussian Blur effect for them, then hide the resulting ellipses behind the letters.
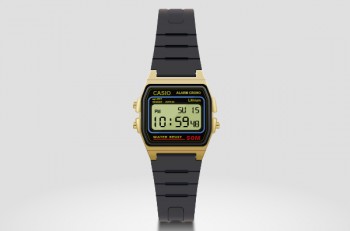
And We’re Done!