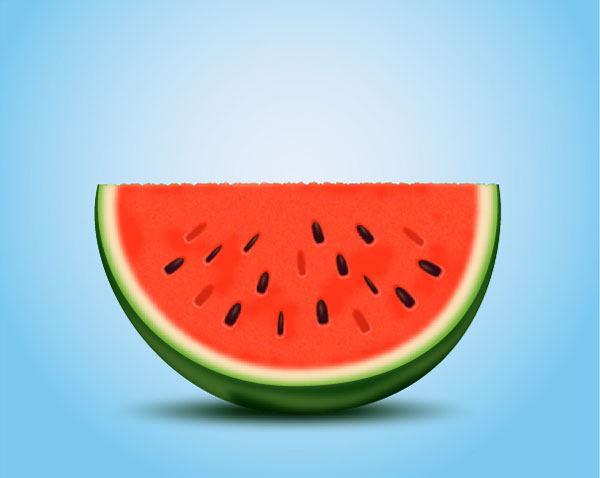
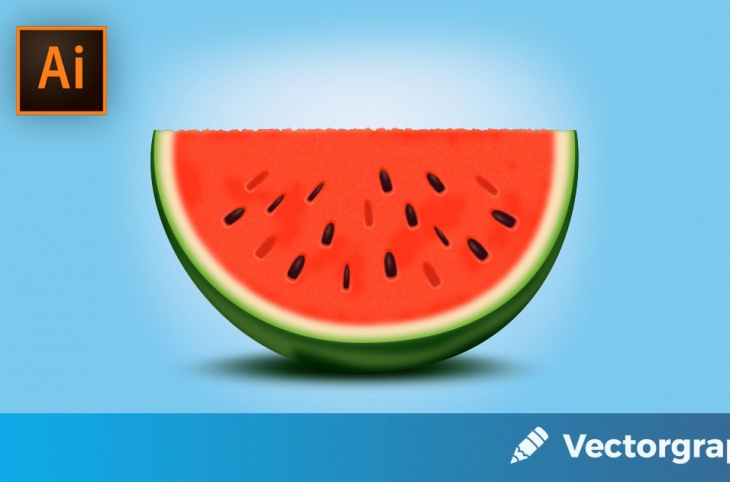
Today you are going to learn how to create a tasty watermelon slice in Adobe Illustrator. You will learn how to create the main shapes of the watermelon slice using basic shapes. Moving on, you will learn how to add color, details using a bunch of gradients along with some basic effects. Finally, you will learn how to add subtle shadow and a simple background.
Create a New Document
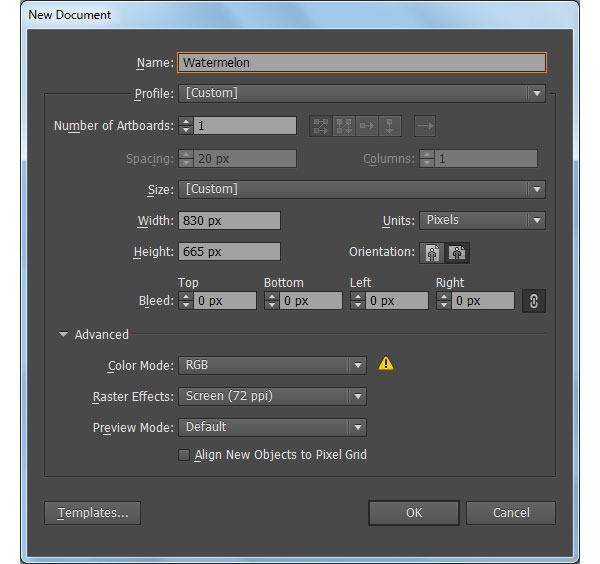
1. Launch Illustrator and then press (Ctrl + N) to create a New document. Select Pixels from the Units drop-down menu, enter 830 in the width box and 665 in the height box then click on the Advanced button. Select RGB, Screen (72ppi) and make sure that the Align New Objects to Pixel Grid box is unchecked before you click OK.
Create the Main Shape
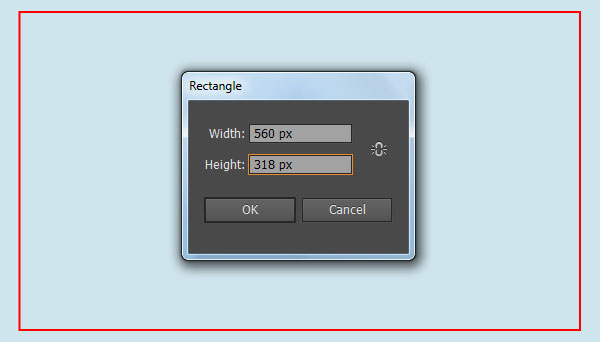
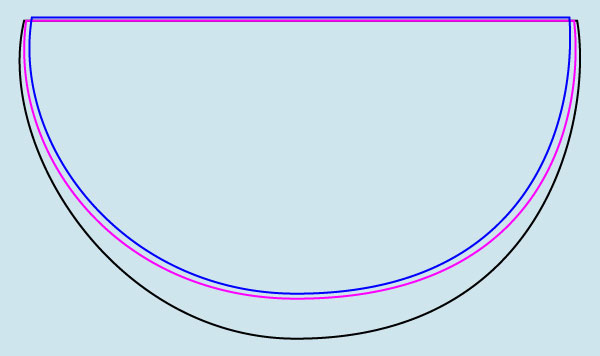
2. Pick the Rectangle Tool (M) and create a 560 by 318px red rectangle. Next with the help of the Pen Tool (P), create a black object like you see in the second image. Once your black object is drawn, reselect and remove the red rectangle.
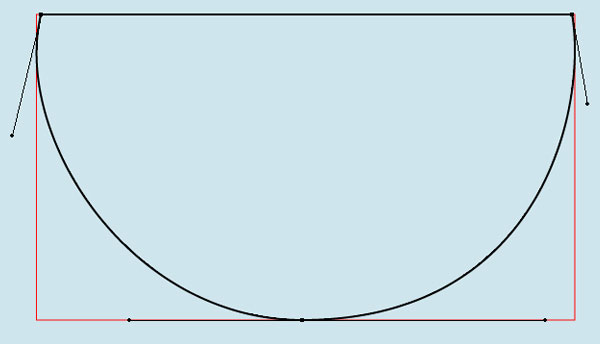
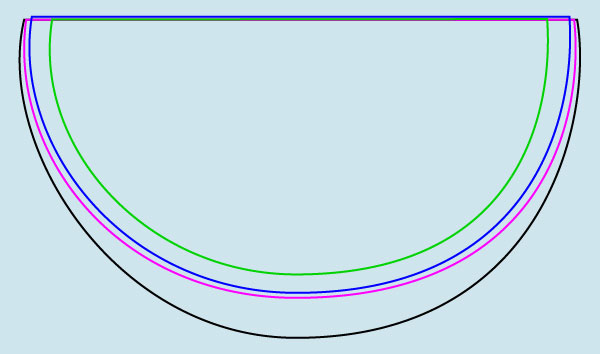
3. Select the black object created in the step 2 and make a copy (Ctrl +C, Ctrl +F) of it, then replace the existing stroke color of the copy with magenta. With the Direct Selection Tool (A), select the top-right anchor point of the magenta object and move it 3px to the left. Next select the top-left anchor point and move it 3px to the right. Continue select the bottom anchor point and move it 40px up. Keep working with the Direct Selection Tool (A) and adjust the lower handles of the two top anchor points of the magenta object as shown in the third image.
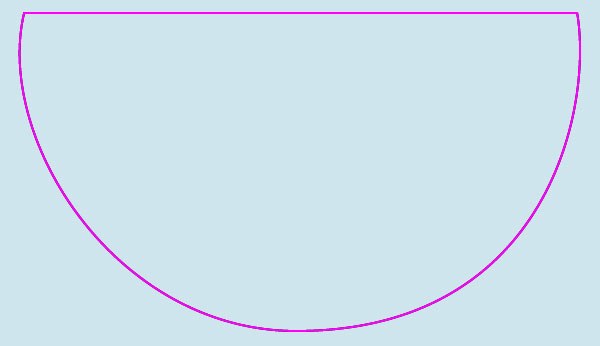
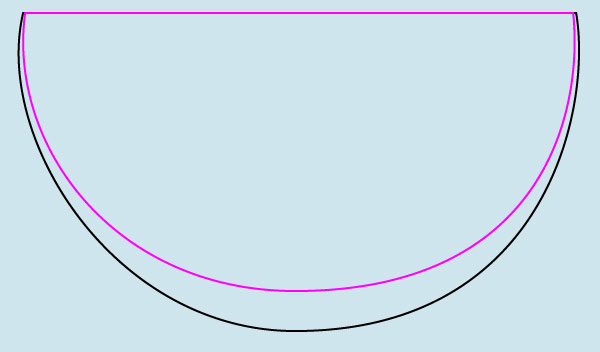
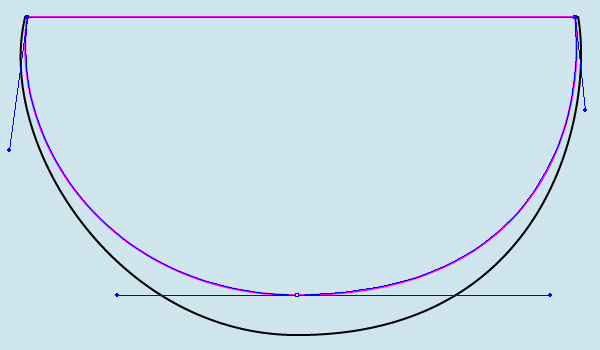
4. Likewise, repeat the same process as the previous steps to draw two more objects.
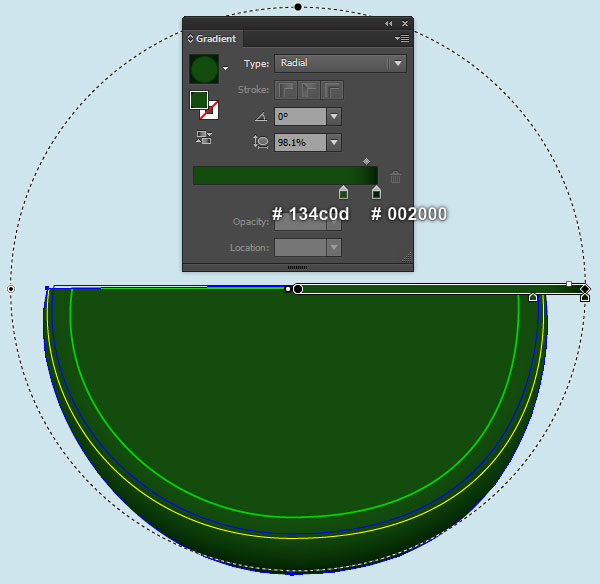
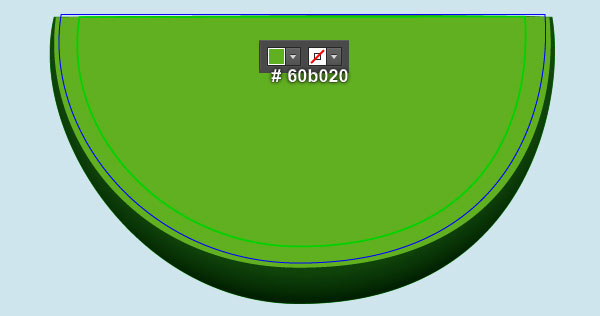
5. Select the black object created in the step 2, remove its stroke and fill this object with the radial gradient as shown below. Continue select the magenta object created in the step 3, remove its stroke and then fill this object with dark green (# 60b020).
6. Select the blue object created in the step 4, remove its stroke and fill this object with very soft orange (# fae2ba). Keep the resulting shape selected and go to the Effect > Blur > Gaussian Blur… Enter a 5px Radius and click OK. Continue select the green object and remove its stroke, then fill this object with vivid red (# fe361a). Still having the resulting shape selected and apply a 4px Gaussian Blur effect for it.
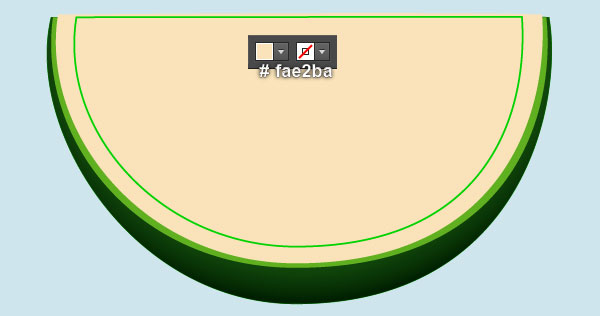
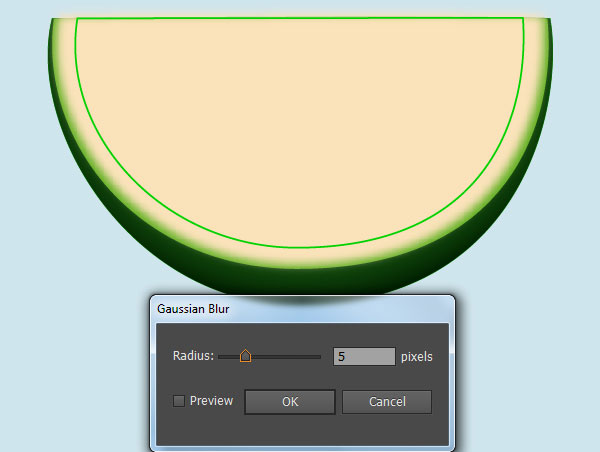
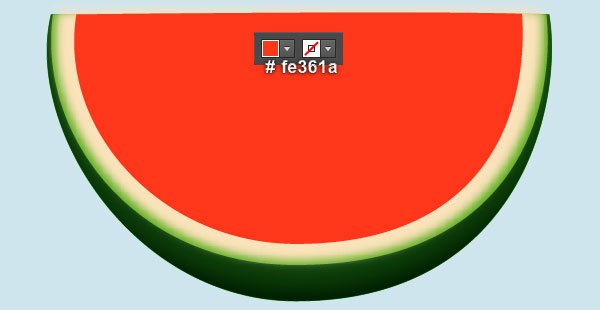
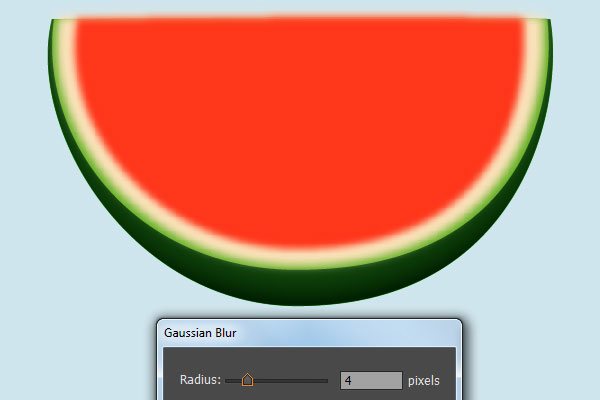
7. To add detail for green part of the watermelon rind, first draw a very dark green shape (# 3e6725) like you see in the first and the second image. Make sure that the newly created shape is still selected and go to the Effect > Blur > Gaussian Blur… Enter a 5px Radius and click OK.
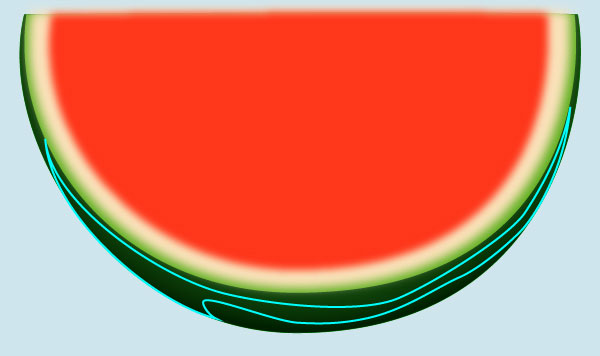
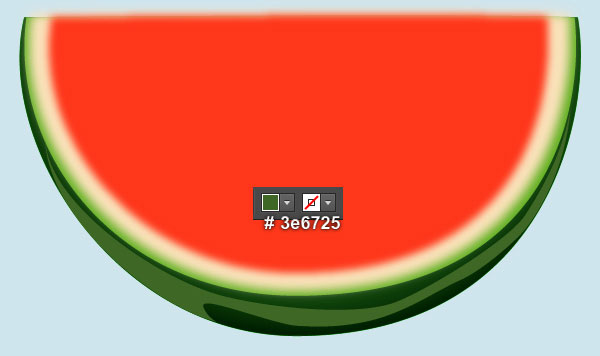
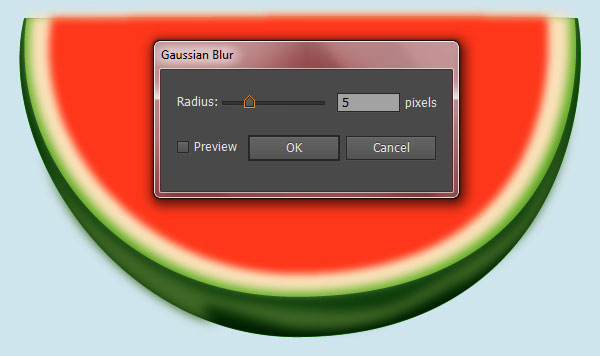
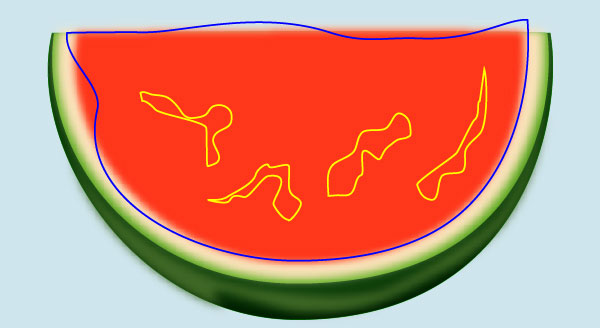
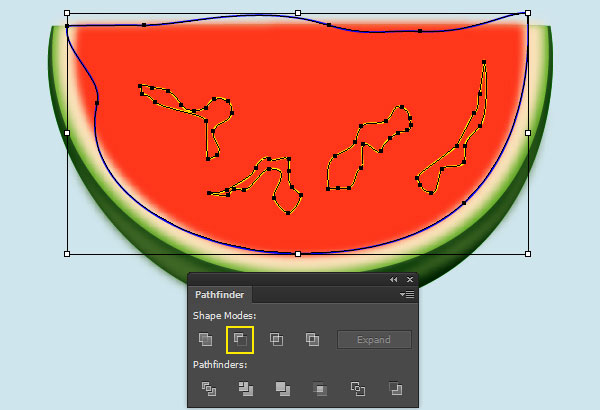
8. With the help of the Pen Tool (P) and the Pencil Tool (N), create five objects like you see in the first and the second images. Once your objects are drawn, reselect them, then open the Pathfinder panel (Window > Pathfinder) and click on the Minus Front button. Remove the stroke of the resulting object and then fill it with very soft red (# f2bec4).
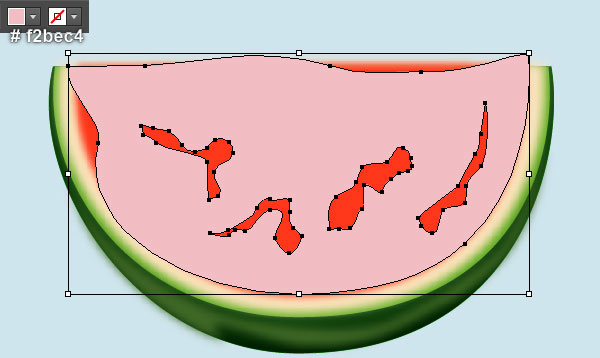
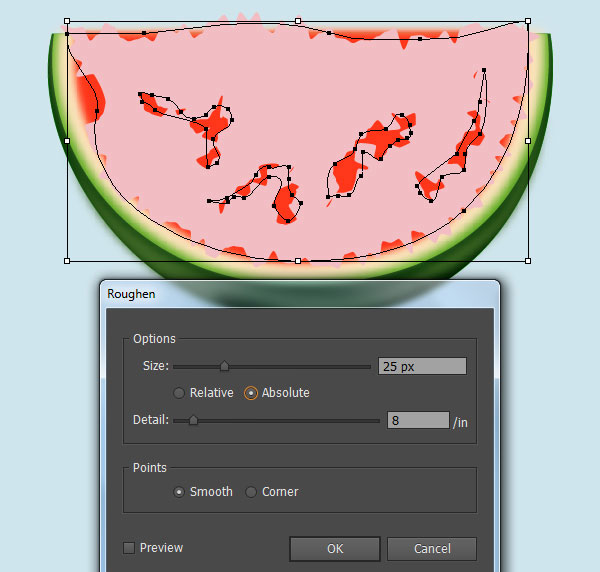
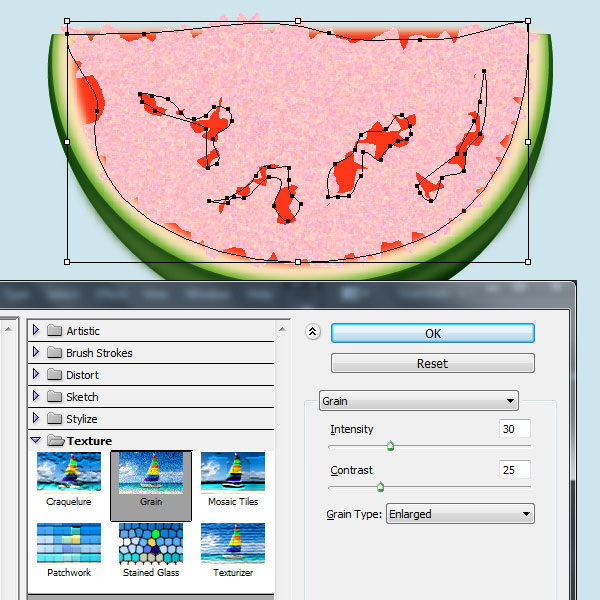
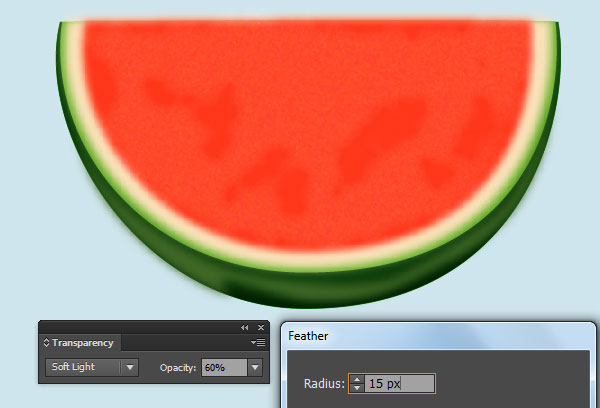
9. Select the very soft red shape created in the step 8 and go to the Effect > Distort & Transform > Roughen… Follow the data like you see in the first image and click OK. Keep the resulting shape selected and go to the Effect > Texture > Grain… Follow the data as shown in the second image and click OK. Apply a 15px Feather effect for the resulting shape, then change the Blending Mode to Soft Light and reduce its Opacity to 60%.
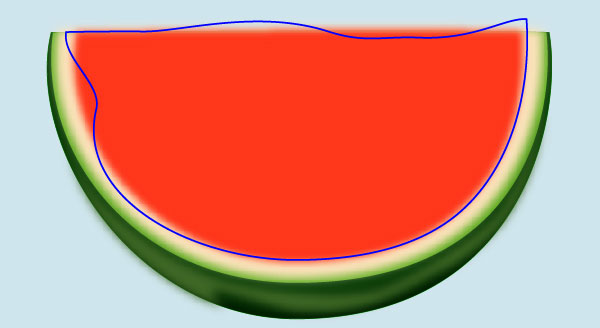
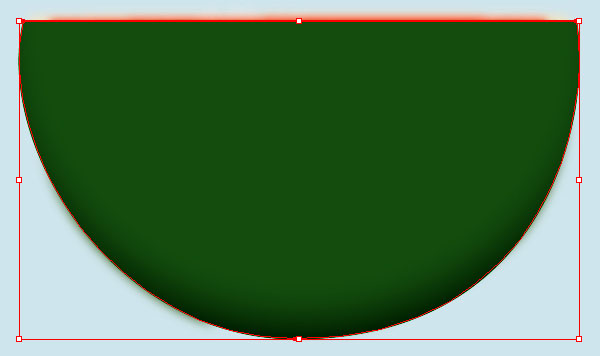
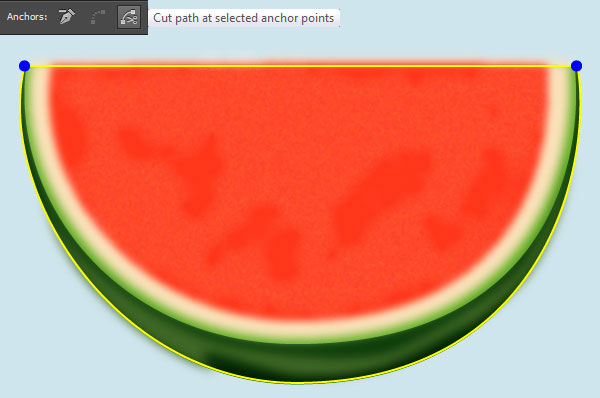
10. Select the first shape created in the step 5 and make a copy (Ctrl +C, Ctrl +F) of it, then bring the copy to front (Ctrl +Shift +Right Square Bracket). Remove the fill color of the newly created shape and then add a 1px yellow stroke for it. Focus on the second image, select the two anchor points highlighted with blue and then click on the “Cut path at selected anchor points” icon from the Properties bar. This make the yellow object becomes two paths. Reselect the upper path and replace the existing stroke color of it with blue.
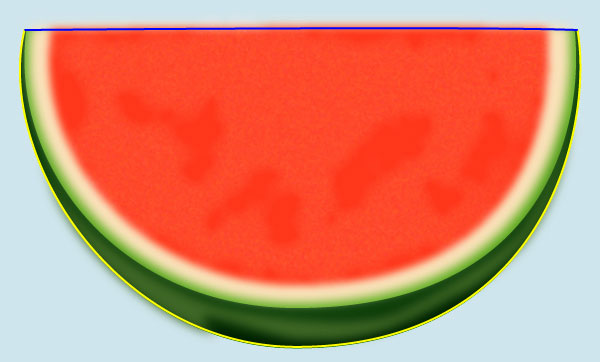
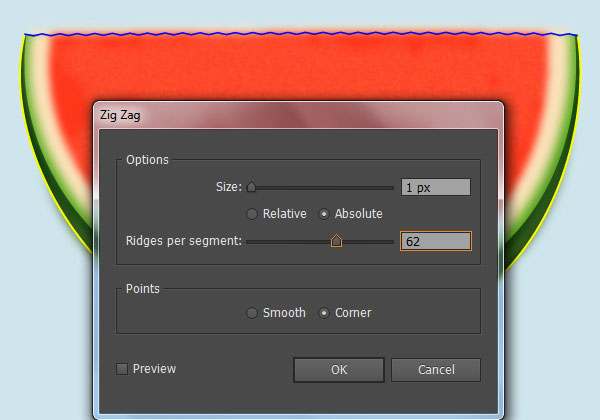
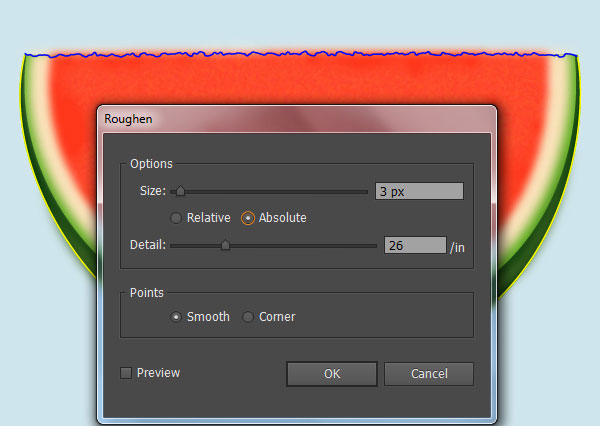
11. Select the blue path created in the step 10 and go to the Effect > Distort & Transform > Zig Zag… Follow the data like you see in the first image and click OK. Keep the resulting path selected and go to the Effect > Distort & Transform > Roughen… Follow the data as shown in the second image and click OK. Make sure that the resulting path is still selected and go to the Object > Expand Appearance.
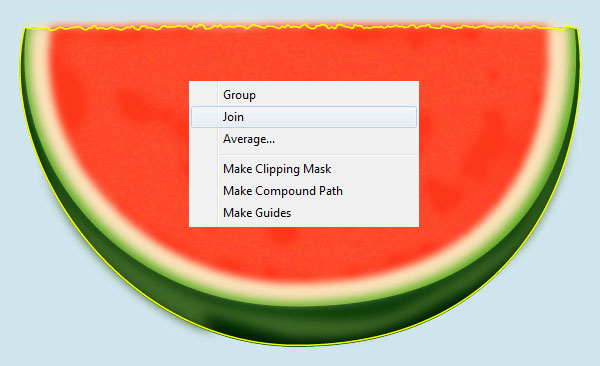
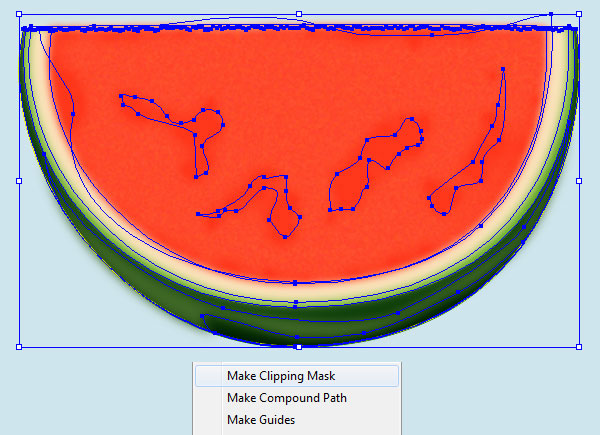
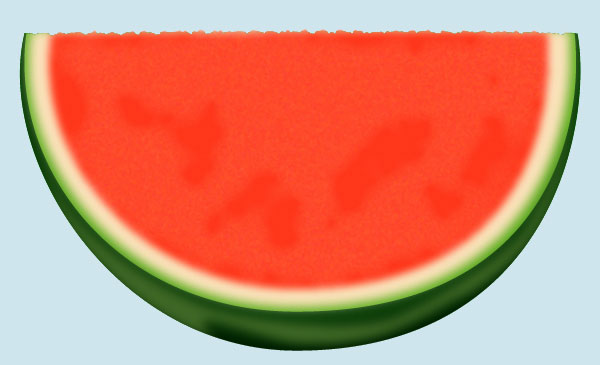
12. Reselect the blue and the yellow path, right click on the artboard and then select the Join section from the drop-down menu. Next right click on the artboard again, then select the Join section. Now select all objects created from beginning step 2 to this time. Then right click on the artboard and select the Make Clipping Mask section from the drop-down menu.
Create the Watermelon Seeds
13. Pick the Ellipse Tool (L) and create a 16 by 37px blue ellipse. Now select the right and the left anchor points of the newly created ellipse, then move them 3px down. With the help of the Direct Selection Tool (A) and the Shift, extend the handles of the top and the bottom anchor point of the resulting ellipse. The resulting object should look like the last image below.

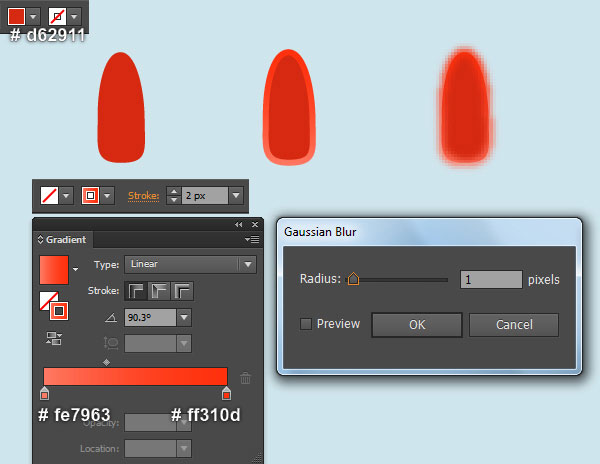
14. Reselect the blue object created in the step 13, remove its stroke and fill this object with strong red (# d62911). Keep the resulting shape selected and make a copy (Ctrl +C, Ctrl +F) of it. Still having this copy selected, swap the fill and stroke colors by clicking the bent double-headed arrow next to the Fill and Stroke color swatches in the Toolbox. Change the stroke weight of the resulting object to 2px and replace the existing stroke color with linear gradient within stroke. Then apply a 1px Gaussian Blur effect for the resulting object. Finally reselect and group (Ctrl +G) all objects created in this step.
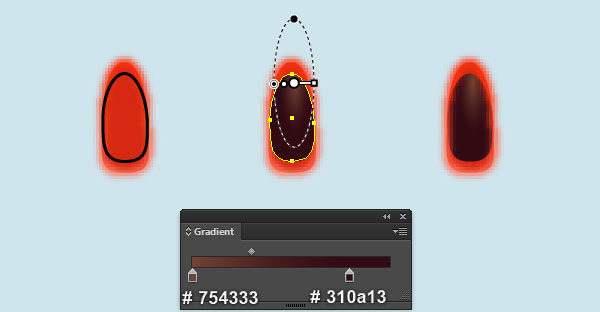
15. Make a copy (Ctrl +C, Ctrl +F) of the group created in the step 14 and place the copy to new position. Before you continue, reselect the newly created group and press (Ctrl +Shift +G) to ungroup it. Now with the help of the Pen Tool (P) and the Gradient Tool (G), create a very dark red shape like you see in the first and the second image. Then hide the newly created shape behind the object with blur effect created in this step. Finally select and group (Ctrl +G) all objects created in this step.
16. Likewise, repeat the same process as the previous steps to draw more seeds.

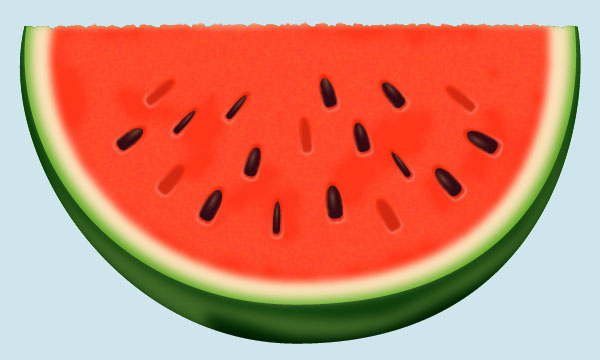
17. Make some copies of the seeds created in the previous steps. Place these seeds into the watermelon slice, then scale and rotate them as needed. You should end up with something like the image below. Now select and group (Ctrl +G) all objects created from beginning step 2 to this time. The watermelon slice is ready and looks like this:
Create the Background
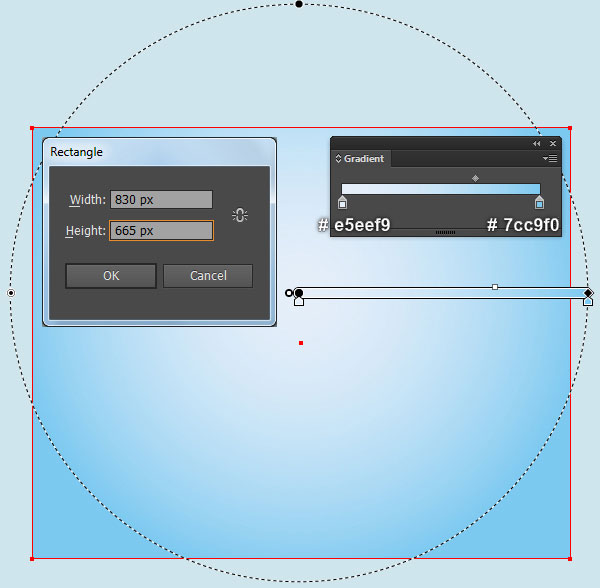
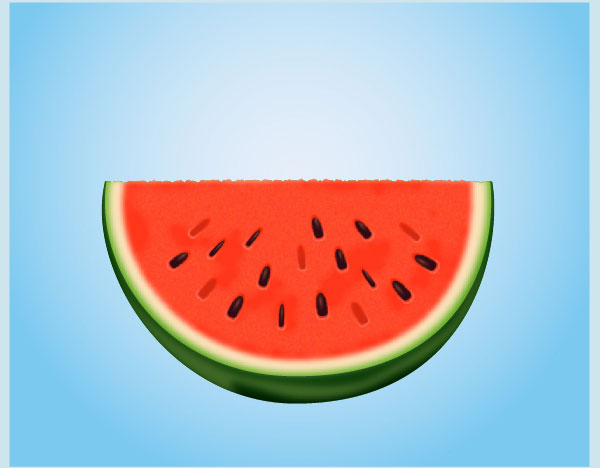
18. We’re done with the watermelon slice. It’s time for the background now. With the help of the Rectangle Tool (M) and the Gradient Tool (G), create a 830 by 665px light grayish blue rectangle like you see in the first image. Next place the watermelon slice into the newly created background.
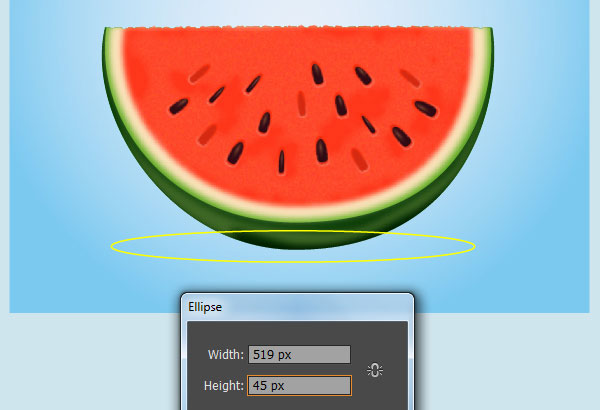
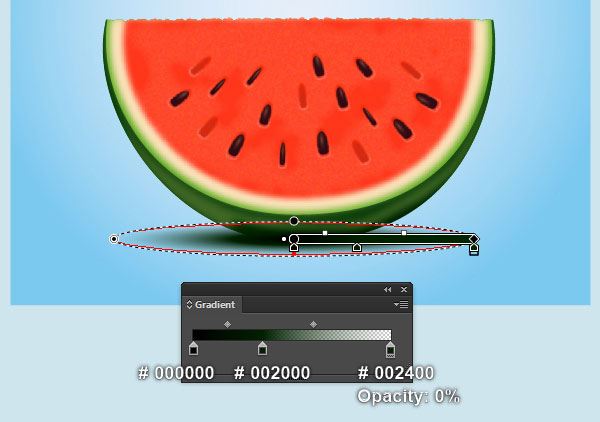
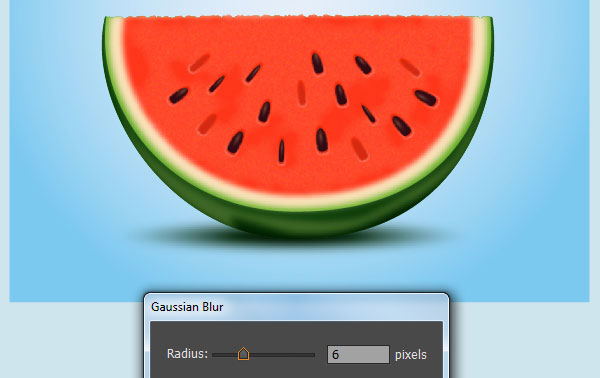
19. To give a more realistic look I’m going to be adding shadow for the watermelon slice. Pick the Ellipse Tool (L) and create a 519 by 45px ellipse, then place it to the position as shown in the first image. Reselect the newly created ellipse, remove its stroke and fill this object with the radial gradient like you see in the second image. Keep the resulting ellipse selected and apply a 6px Gaussian Blur effect for it. Finally hide the resulting ellipse behind the watermelon slice.
And We’re Done!
