In the following Adobe Illustrator tutorial you will learn to create a nice and simple Clipboard using the Appearance Panel in order to create some great shadow & highlight effects, but we’ll also find out how to create a conical gradient using the envelope distort.
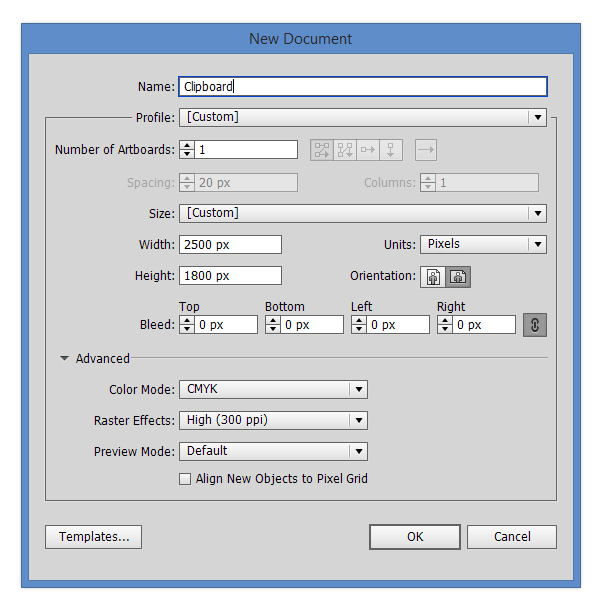
1. Open Adobe Illustrator and create a new 2500 x 1800px document (Ctrl + N). Select CMYK Color Mode, 300 PPI Raster Effects and make sure that Align New Objects to Pixel Grid is unchecked.
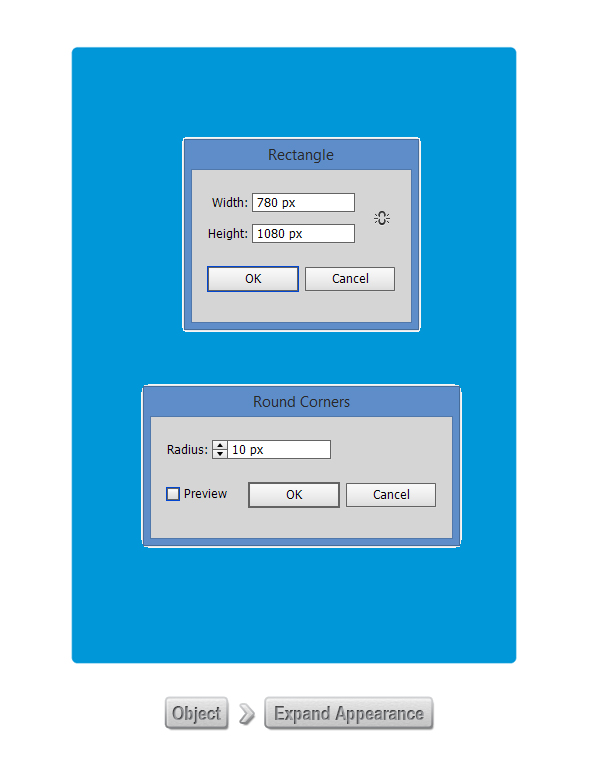
2. Pick the Rectangle Tool (M) and draw a 780 x 1080px rectangle. Make sure that there is no stroke applied then with the shape still selected go to Stylize > Round Corners then in the dialog box enter a value for the radius of 10px. With the rectangle selected go to Object > Expand appearance. Now we no more have the dynamic Round Corners Effect.
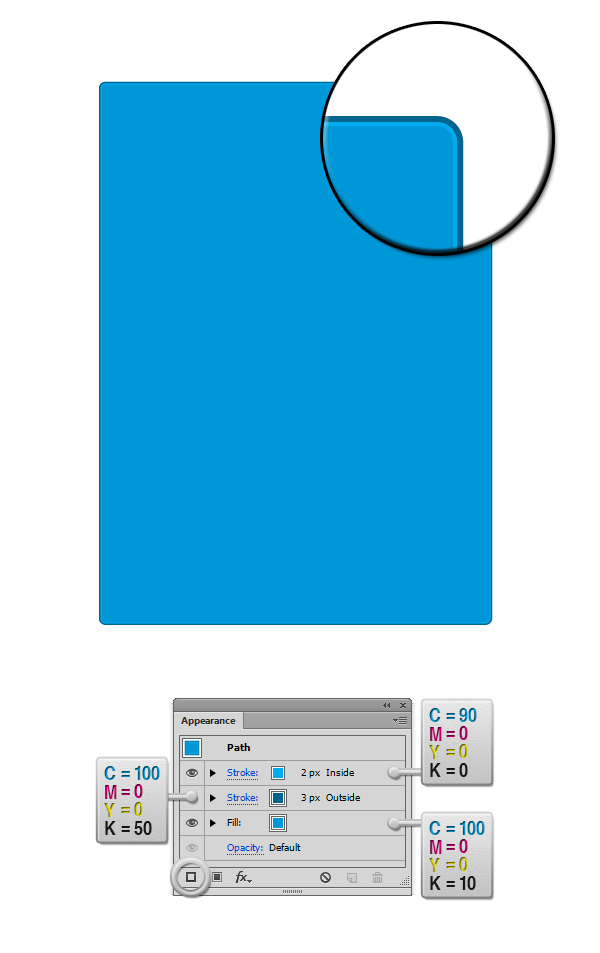
3. Focus on the Appearance Panel and add a C=100 M=0 Y=0 K=10 fill. For the first stroke set the colour to C=100 M=0 Y=0 K=50 and the width to 3px then from the Stroke Panel (Window > Stroke) select Align Stroke to Outside. Add a new stroke (see the highlighted button from the screenshot below) and set it’s colour to C=90 M=0 Y=0 K=0 and set the width to 2px then from the Stroke Panel (Window > Stroke) select Align Stroke to Inside.
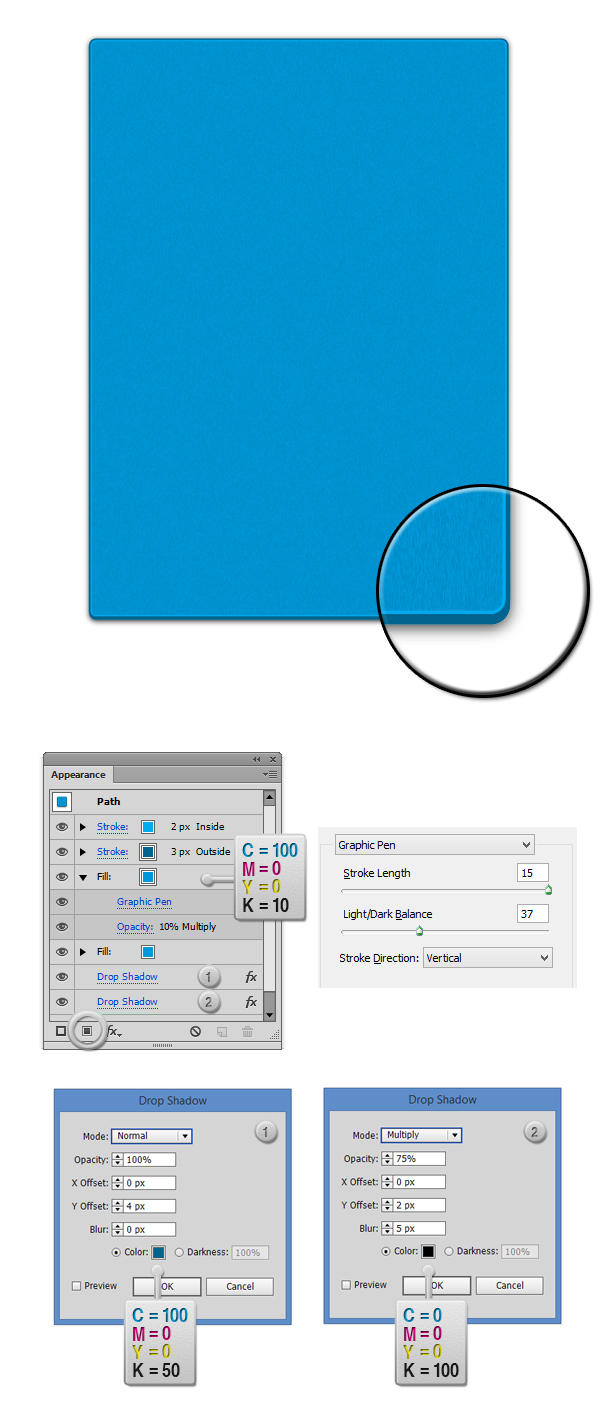
4. With the previous shape still selected, add a new fill (see the highlighted button from the screenshot below) and set it’s colour to C=100 M=0 Y=0 K=0. With the last fill created still selected go to Effect > Sketch > Graphic Pen and in the dialog box enter the values you see in the image below, then from the Transparency Panel lower the opacity to 10% and set the Blending Mode to Multiply. Now with the whole shape selected, add a Drop Shadow (Effect > Stylize > Drop Shadow) and enter the values from below. Add a second Drop Shadow and again enter the values you see below. (When you add a new Drop Shadow effect and you already have one, an alert box will say “hey you already have a drop shadow”, just press the “Apply New Effect” button).
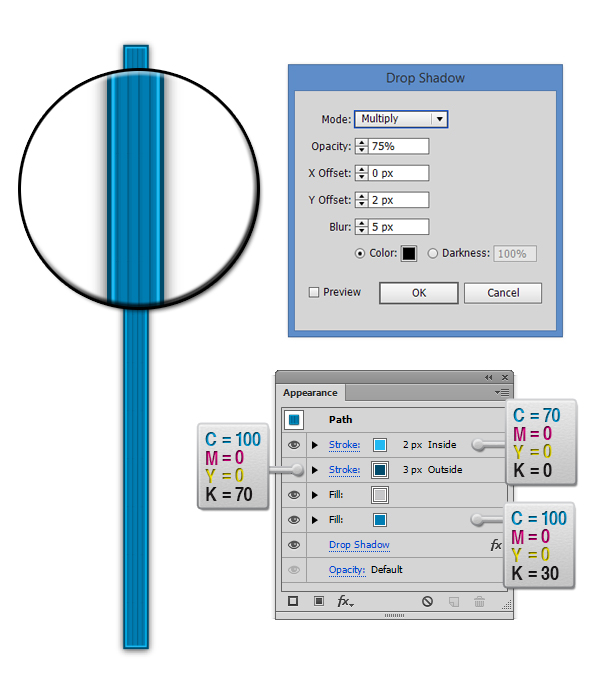
5. Pick again the Rectangle Tool and draw a 32 x 900px Rectangle. Focus on the Appearance Panel. For the first Fill set the colour to C=100 M=0 Y=0 K=30. Add a second fill but this time we will assign it a pattern instead of a colour. You can find the patterns by going to Window > Swatch Libraries > Patters. For the first stroke set the colour to C=100 M=0 Y=0 K=70 and the width to 3px then from the Stroke Panel (Window > Stroke) select Align Stroke to Outside. Add a new stroke (see the highlighted button from the screenshot below) and set it’s colour to C=70 M=0 Y=0 K=0 and set the width to 2px then from the Stroke Panel (Window > Stroke) select Align Stroke to Inside. Now add a Drop Shadow (Effect > Stylize > Drop Shadow) and in the dialog box enter the values from below.
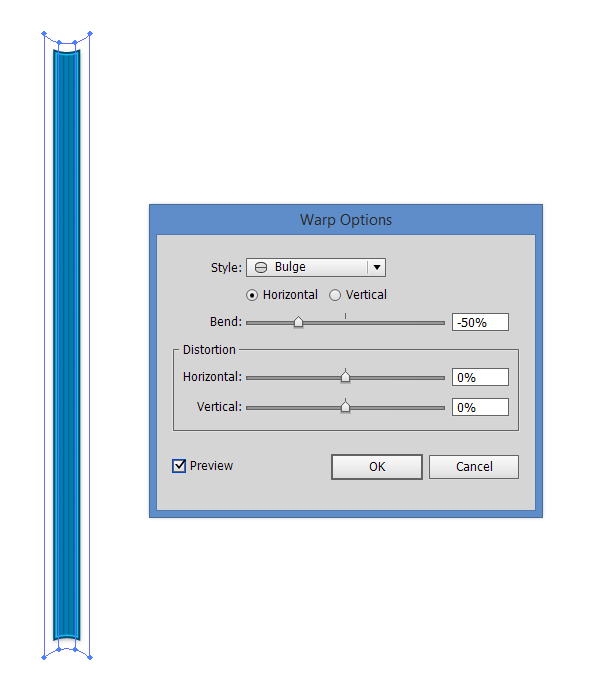
6. With the previous shape selected go to Object > Envelope Distort > Make with Warp then set the style to Bulge and lower the bend to -50%.
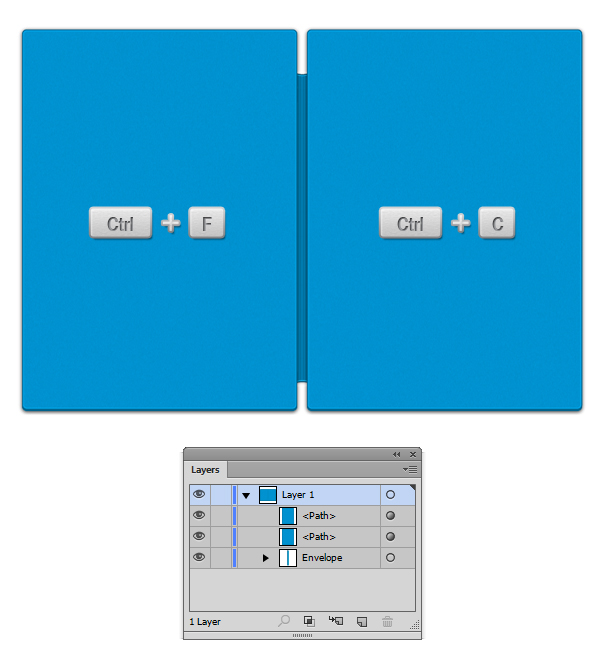
7. Copy (Ctrl + C > Ctrl +F) the first shape we’ve created (From Step 2) and arrange them as you see in the image below and make sure the Envelope is the last in the stack. (see the Layers Panel)
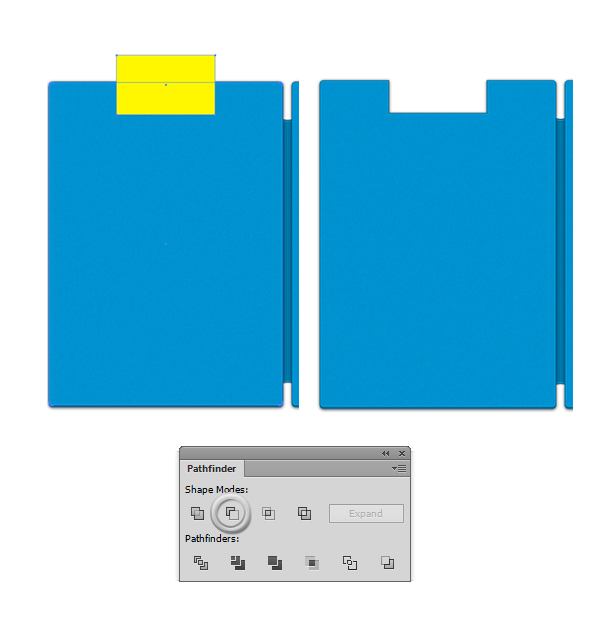
8. With the Rectangle Tool (M) create a new 330 x 200px rectangle (the colour fill doesn’t matter) then horizontal center align it with the left big shape of the clipboard. Select both shapes and from the Pathfinder Panel (Window > Pathfinder) hit the Minus Front button.
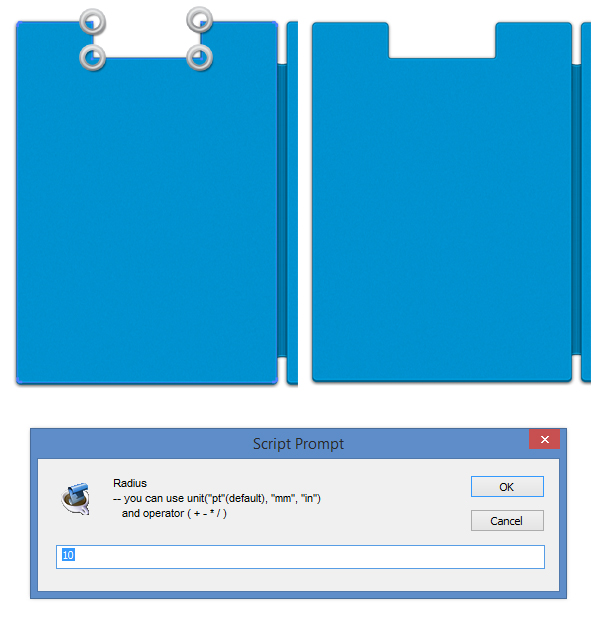
9. For this step, you’ll need the Round Any Corner script. You can find it in this article 20 Free and Useful Adobe Illustrator Scripts. Save it to your hard drive, return to Illustrator and grab the Direct Selection Tool (A). Select only the anchor points highlighted in the image and go to File > Scripts > Other Script. Open the Round Any Corner script, enter a 10px radius and click OK.
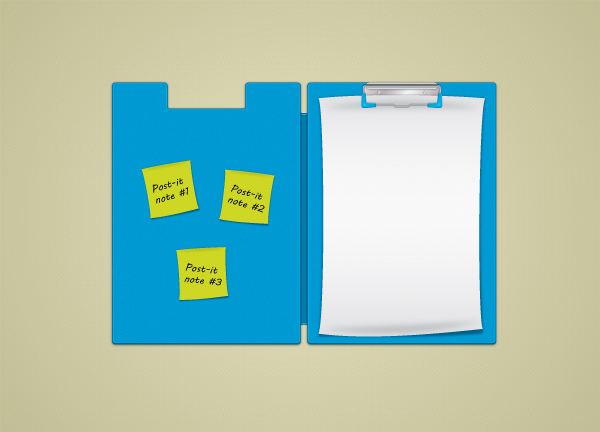
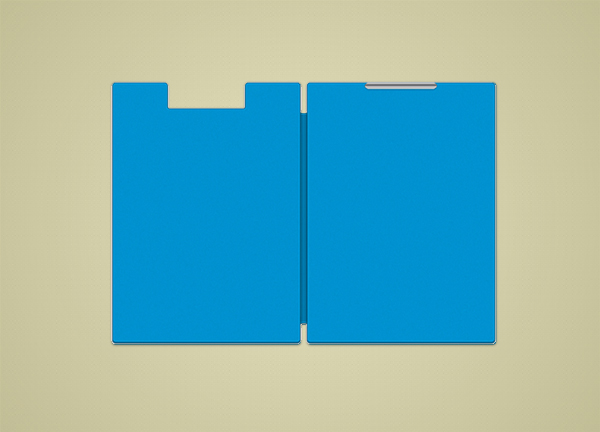
The base of the clipboard is finished. In the second part of the tutorial we will create the inside parts (clamps, paper).
Here the final image of the Clipboard.