In this Adobe Illustrator tutorial you can learn to create a nice and simple Clipboard using the Appearance Panel in order to create some great shadow & highlight effects, but we’ll also find out how to create a conical gradient using the envelope distort.
In the first part of this tutorial you’ve learned how to create a Nice and Simple Clipboard, today we finish it with the clamps and paper inside.
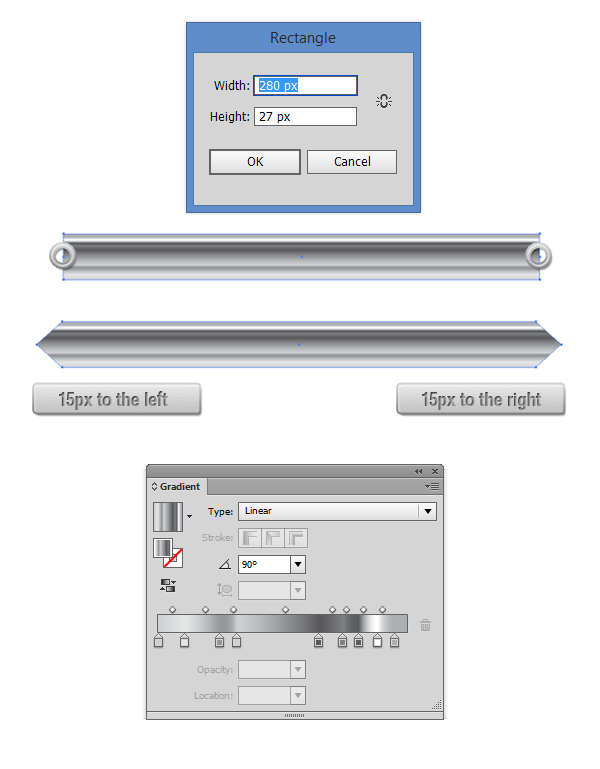
10. Pick the Rectangle Tool (M) and draw a 280 x 27px rectangle. Fill it with a Metalic Gradient (Window > Swatch Libraries > Gradients > Metals) and from the Gradient Panel (Window > Gradient) set the angle to 90 degrees. Now with the Add Anchor Point Tool (+) add two anchor points in the center of the small edges (left and right edge as you see in the image below). Now with the White Arrow Tool (A) drag the left anchor point created 15px to the left and the right one 15px to the right.
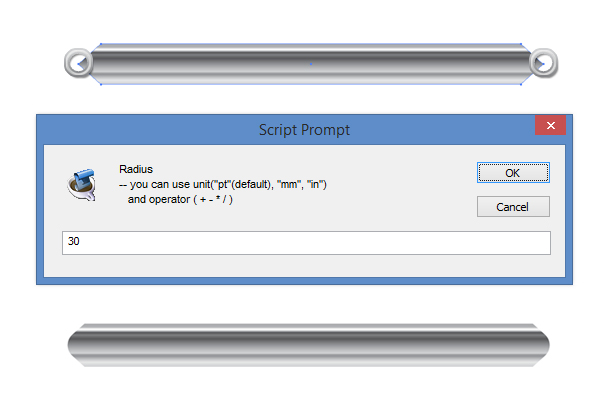
11. For this step, you’ll need the Round Any Corner script. You can find it in this article 20 Free and Useful Adobe Illustrator Scripts. Save it to your hard drive, return to Illustrator and grab the Direct Selection Tool (A). Select only the anchor points highlighted in the image and go to File > Scripts > Other Script. Open the Round Any Corner script and enter a 30px radius and click OK.
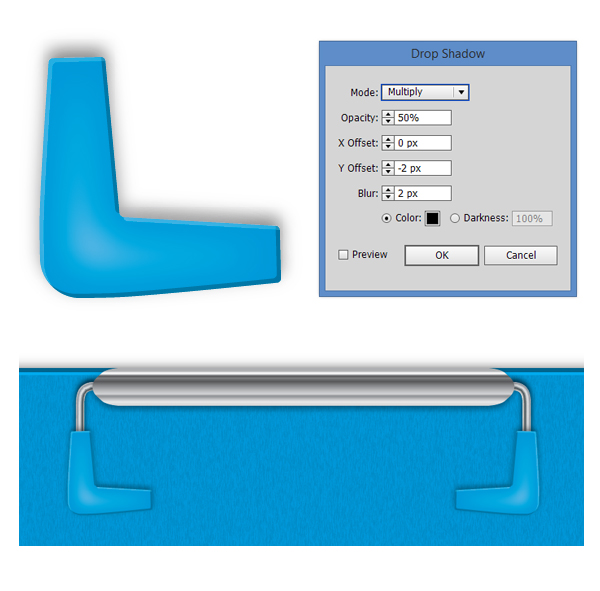
12. Now select the rest of the anchor points using the Direct Selection Tool (A) and again use the Round Any Corner script (File > Scripts > Other Script) and enter a 10px radius value. After you smooth the corners, add a Drop Shadow (Effect > Stylize > Drop Shadow) and in the dialog box enter the values you see below.
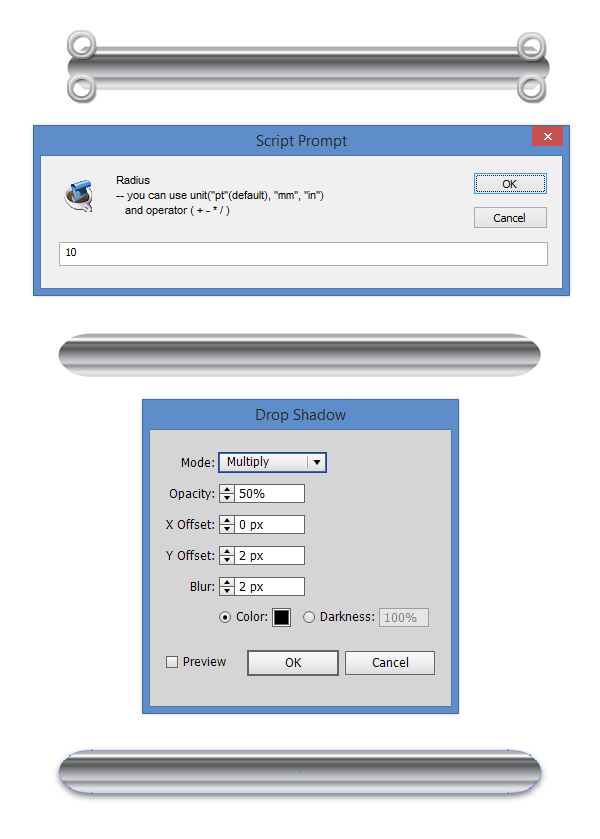
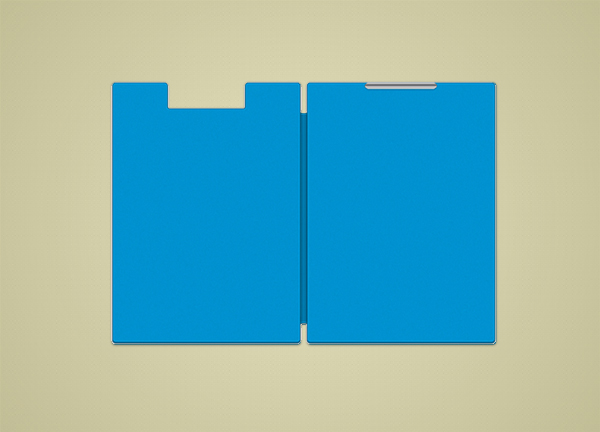
13. Until now this is how our illustration should look like.
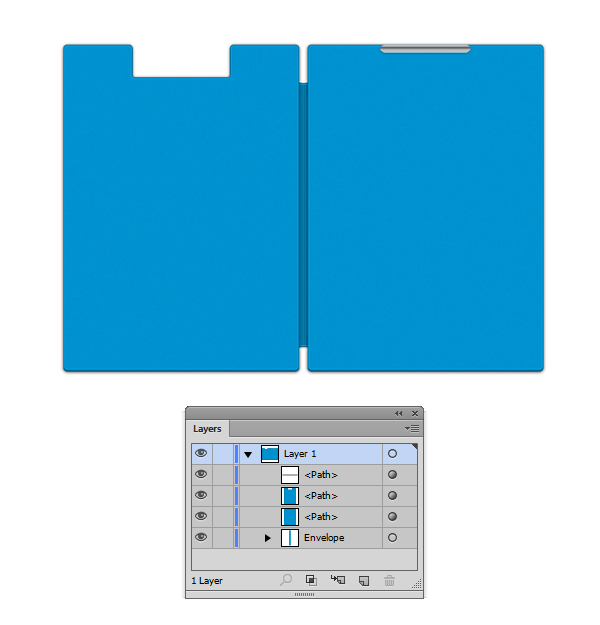
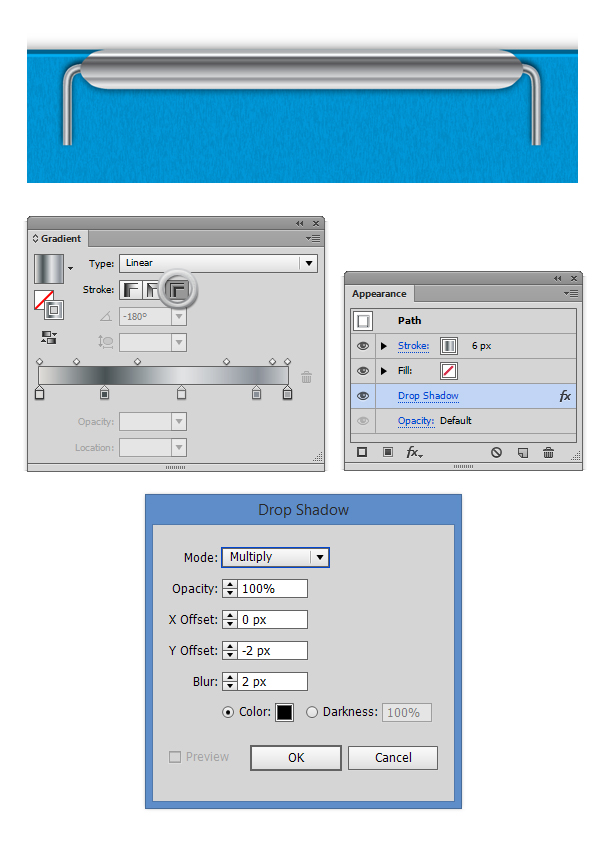
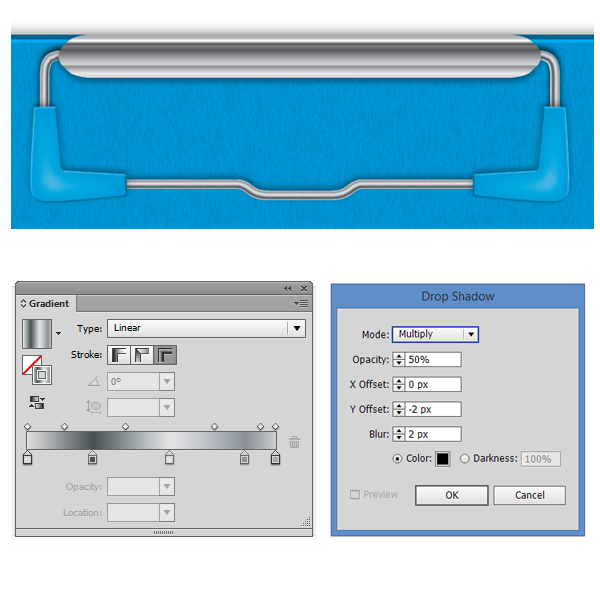
14. Using the Pen Tool (P) draw a shape like the one from the screenshot below (you see that there are two new shapes, create just one of them). Set the stroke width to 6px then add a metal gradient stroke to them (You will need at least Adobe Illustrator CS6) and make sure that from the Gradient Panel that you select the third option for the stroke (see the highlighted button from the image below). Now add drop shadow to it (Effect > Stylize > Drop Shadow) and enter the same values as I did. Then use the Reflect Tool (O) to duplicate it using the vertical Axis.
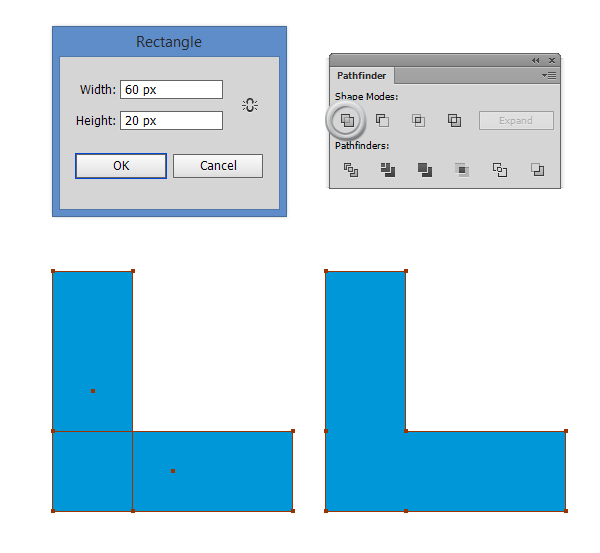
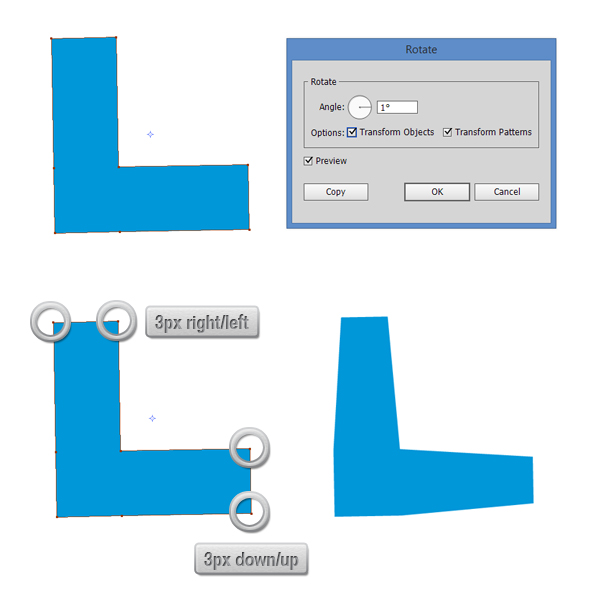
15. Grab the Rectangle Tool (M) and draw a 60 x 20px rectangle and a 20 x 60px rectangle then arrange them as you see below. Select both shapes and from the Pathfinder Panel hit the Unite button.
16. After you unite the shapes, select the resulting one and use the Rotate Tool (R) to rotate it 1 degree. With the Direct Selection Tool (A) move the upper left anchor point 3px to the right and the upper right point 3px to the left. Now move the lower right point 3px up and the lower up point 3px down.
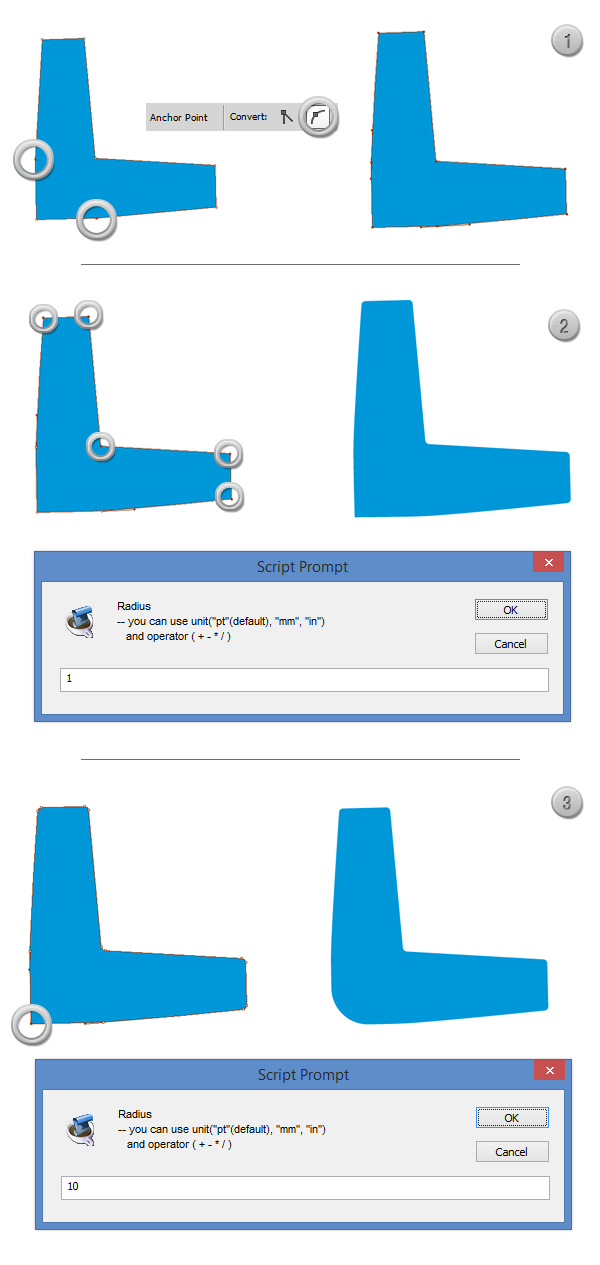
17. Now we need to round the shape a bit. First select the two anchor points (see Step 1 from the image below) and click on the Convert Anchor Points to Smooth. Second, select all the five anchor points (see Step 2 from the image below) and use the Round Any Corner script (File > Scripts > Other Script) and enter a 1px radius value. Third, select the last anchor point (see Step 3 from the image below) and use again the Round Any Corner script (File > Scripts > Other Script) and enter a 10px radius value.
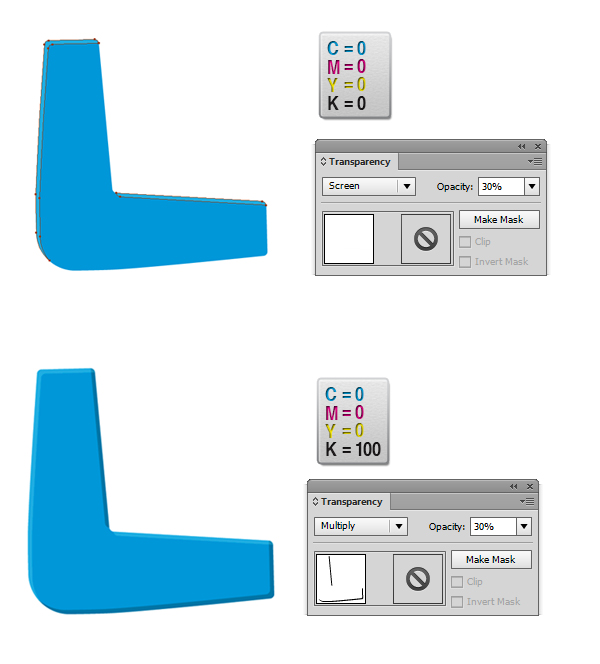
18. Now let’s create a small shadow and highlight effect to our shape. Select the shape then make two copies (Ctrl + C > Ctrl + F > Ctrl + F). Select the last copy and move it 1px to the right and 1px down. Now select both copies and from the Pathfinder Panel hit the Minus Front button. Fill the resulting two little shapes with white (C=0 M=0 Y=0 K=0) and from the Transparency Panel lower the opacity to 30% and set the Blending Mode to Screen. Select again the initial shape, make two copies in front of it (Ctrl + C > Ctrl + F > Ctrl + F) then move the last copy 1px up and 1px to the left. Now select both copies and from the Pathfinder Panel hit the Minus Front button. Fill the resulting two little shapes with black (C=0 M=0 Y=0 K=100) and from the Transparency Panel lower the opacity to 30% and set the Blending Mode to Multiply.
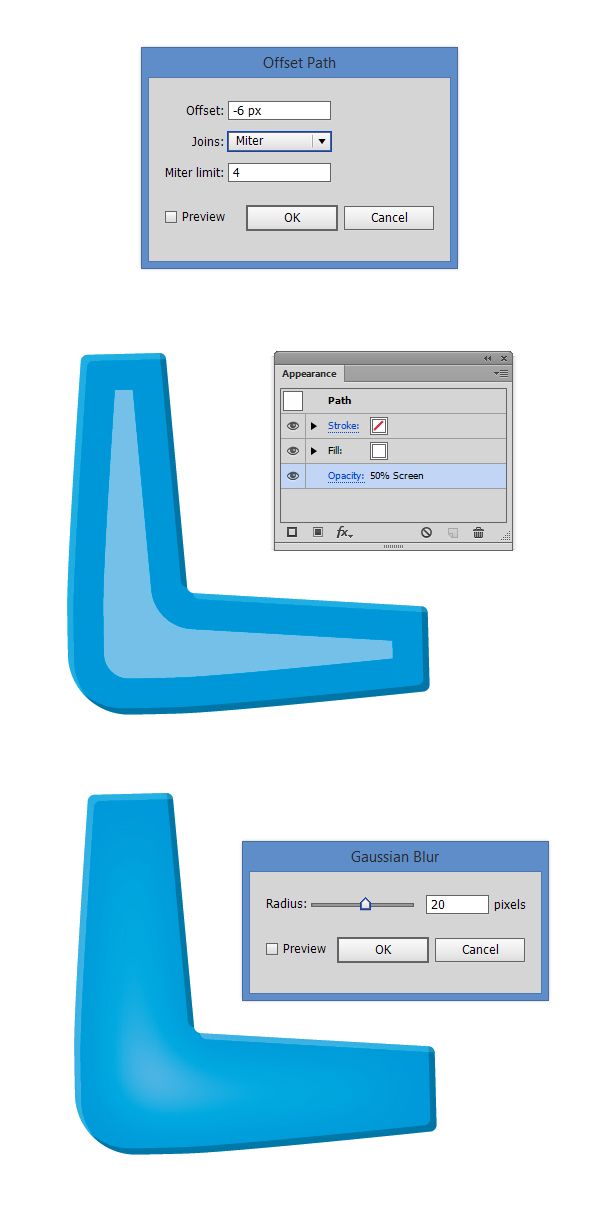
19. Select the main shape and go to Object > Path > Offset Path and in the dialog box enter an offset value of -6px. Fill the resulting shape with white (C=0 M=0 Y=0 K=0) and from the Transparency Panel lower the opacity to 50% and set the blending mode to Screen. Blur the shape (Effect > Blur > Gaussian Blur) and in the dialog box enter a value of 20px blur.
20. Now let’s add a drop shadow to it. Go to Effect > Stylize > Drop Shadow then enter the values from the image below. Then use the Reflect Tool (O) to duplicate it using the vertical Axis.
21. Using the Pen Tool (P) draw a path similar to the one from the image below. Set the stroke width to 6px then add a metal gradient stroke to them (You will need at least Adobe Illustrator CS6) and make sure that from the Gradient Panel that you select the third option for the stroke. Now add a drop shadow to it (Effect > Stylize > Drop Shadow) and enter the same values as I did.
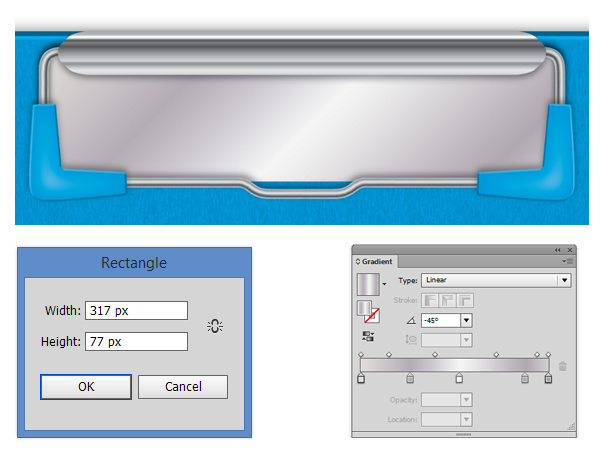
22. We are almost done. Grab the Rectangle Tool (M) and draw a 317 x 77px rectangle. Fill it with a metal gradient and from the Gradient Panel set the angle to -45 degrees.
23. Now we are going to finish our illustration by learning how to make the screws using a Conical Gradient. Create a Rectangle (M), then add a multicolor gradient.
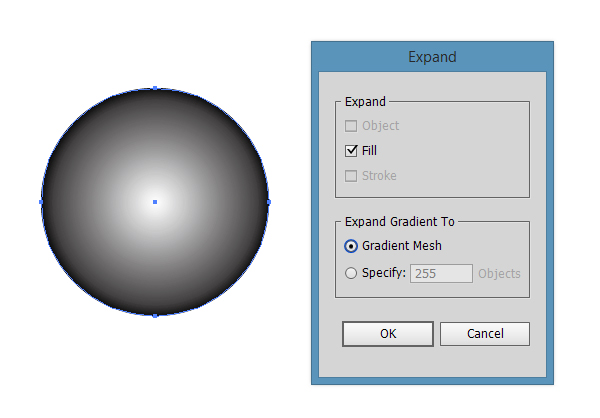
24. Draw an Ellipse (E) and fill it with a two color radial Gradient (Click Window > Gradient and simply click on the gradient thumbnail to add the linear gradient then change the type of gradient from Linear to Radial, like in the image below). It doesn’t matter what colors you use. With the Ellipse selected, go to Object > Expand and be sure you check Expand Gradient to Gradient Mesh. Then hit OK.

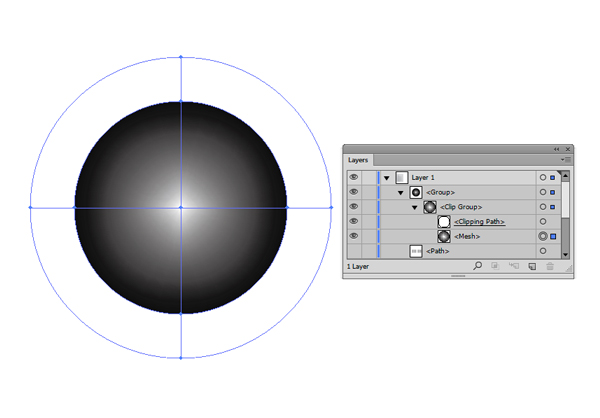
25. Now we have a Clip Group. Delete the Clipping Path from the Layers panel.
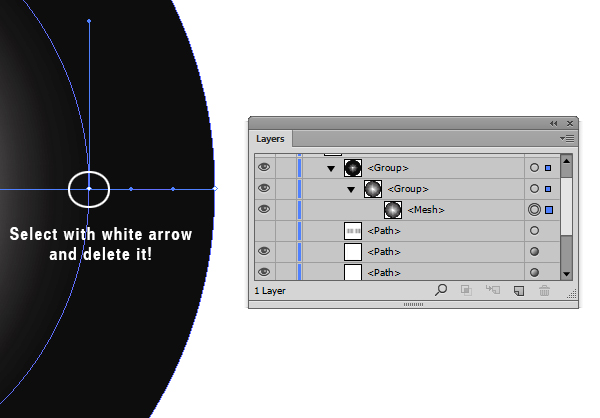
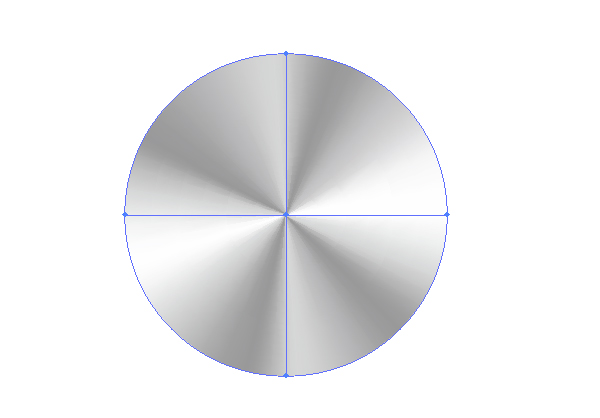
26. With the Direct Selection Tool (A) select the right point on the Inner Circle and delete it (del).
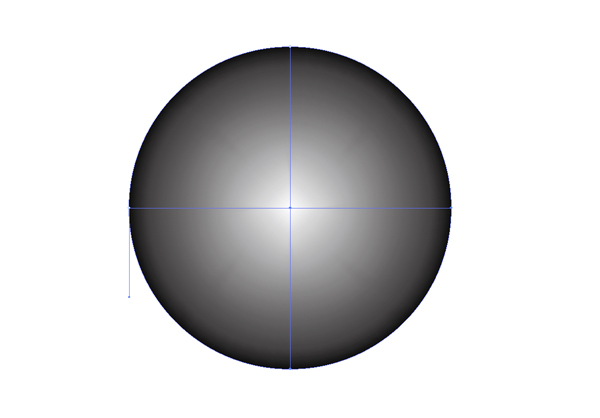
This is the shape that will remain: a Gradient Mesh with 4 points.
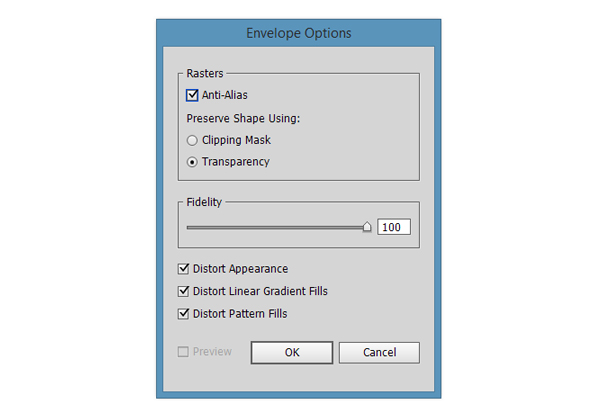
27. Go to Object > Envelope Distort > Envelope Options and be sure you have the same properties just like in the image below.
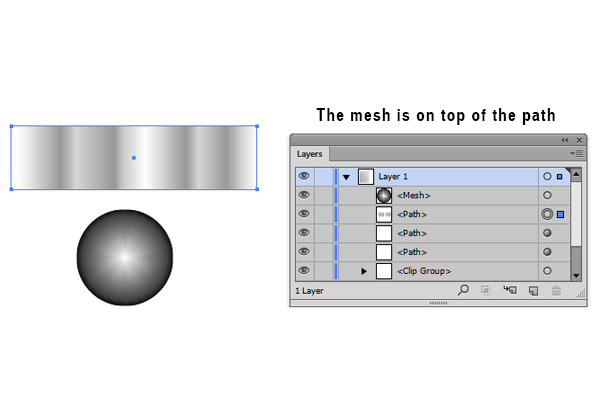
28. Select both the Gradient Mesh and the Rectangle, make sure that the Mesh is on top by checking the Layers Panel, then go to Object > Envelope Distort > Make with Top Object.
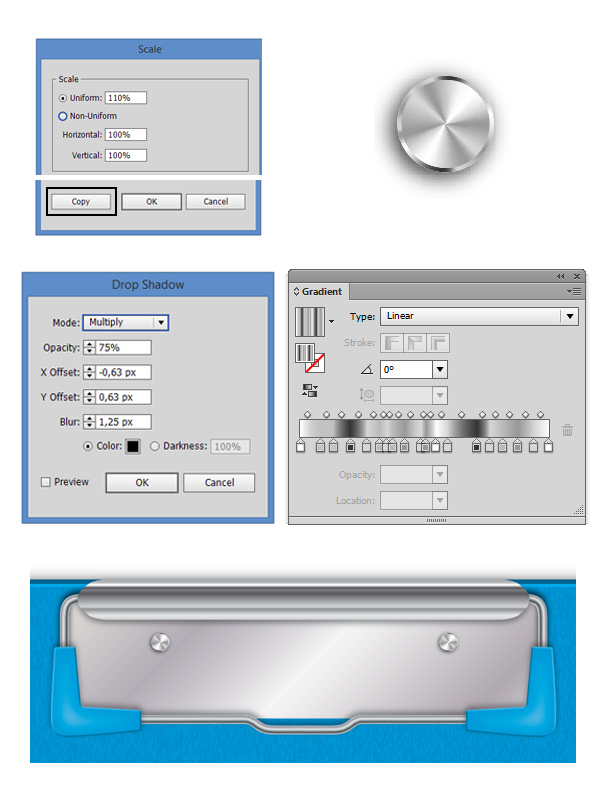
29. Now select the screw we’ve just created and double click on the Scale Tool (S). Enter a value of 110% then click Copy. Change the gradient of the screw (See Step 23) in order to give an edge effect then add a Drop Shadow (Effect > Stylize > Drop Shadow) with the settings you see below. Now make a copy of the entire screw (both conical gradients) and duplicate it and arrange it like you see in the image below.
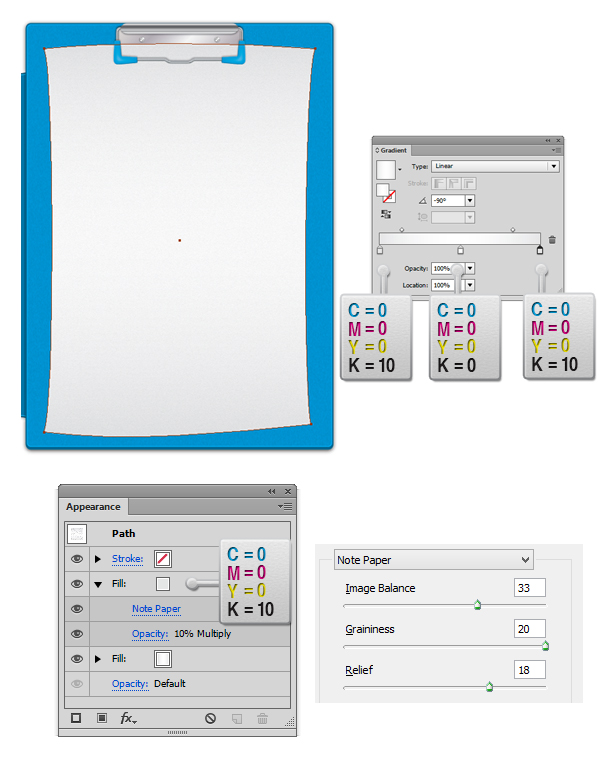
30. Now the final piece of our illustration, the paper. Grab the Pen Tool (P) and draw a similar shape like the one below. From the gradient panel fill it with a three colour gradient. Focus on the appearance panel and add a new fill then set it’s colour to C=0 M=0 Y=O K=10. With the last fill still selected go to Effect > Sketch > Note Paper and enter the values you see in the screenshot below. From the Transparancy Panel lower the opacity value to 10% and set the blending mode to Multiply.
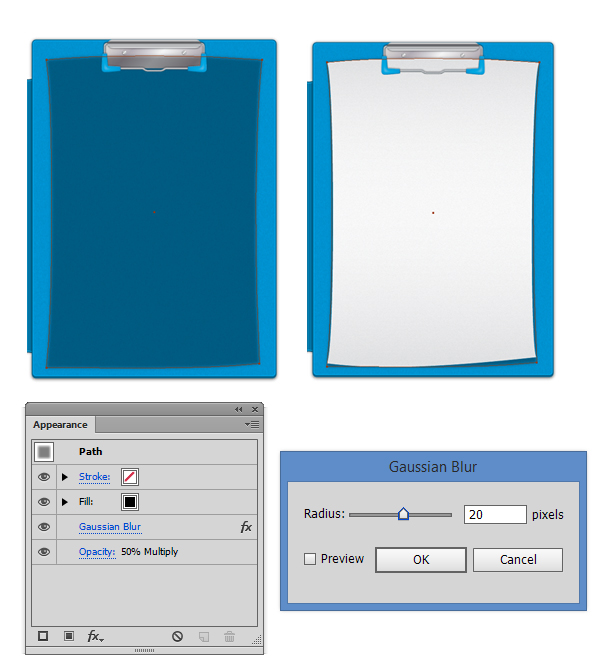
31. Now let’s create the shadow of the paper. Copy and paste the paper (Ctrl + C > Ctrl + B) then with the Direct Selection Tool move a bit the anchor points in order to make the shadow bigger than the paper, but just a bit. Fill it with Black then from the Transparancy Panel set the Blending Mode to Multiply and lower the opacity to 50%. With the shape still selected go to Effect > Blur > Gaussian Blur and enter a value of 20px blur.
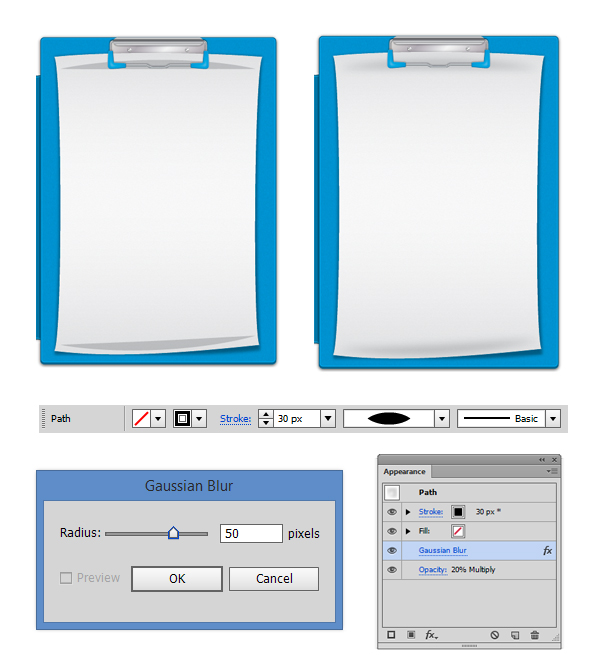
32.Pick the Pen Tool (P) and draw two path like in the image below. Set the width to 30px, the stroke fill to black and the Width Profile to “Width Profile 1”. From the Transparancy Panel set the Blending mode to Multiply and the opacity to 20%. Now with the Paths selected go to Effect > Blur > Gaussian Blur and enter a value of 50%.
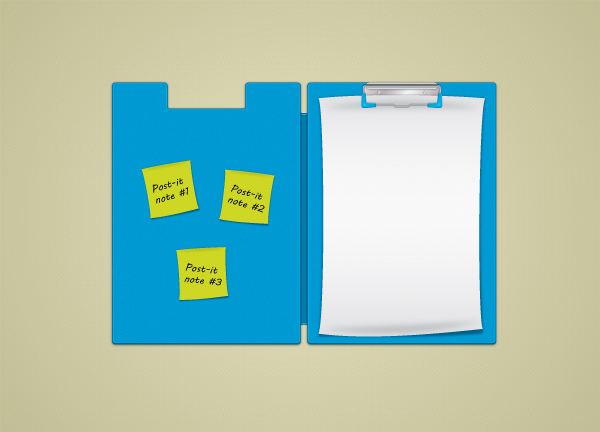
33. Here is the result of our work:
Did you enjoy this tutorial? If you want to see my work, you can find me on Behance. Thanks!