In this tutorial you will learn how to create a realistic headphone using simple and understandable techniques. Most of the process is based on Pen tool and Gradient tool. This tutorial is easy for any beginner to complete. Let’s begin!
Create a New Document
1. Launch Illustrator and then press (Ctrl + N) to create a New document. Select Pixels from the Units drop-down menu, enter 810 in the width box and 660 in the height box then click on the Advanced button. Select RGB, Screen (72ppi) and make sure that the Align New Objects to Pixel Grid box is unchecked before you click OK.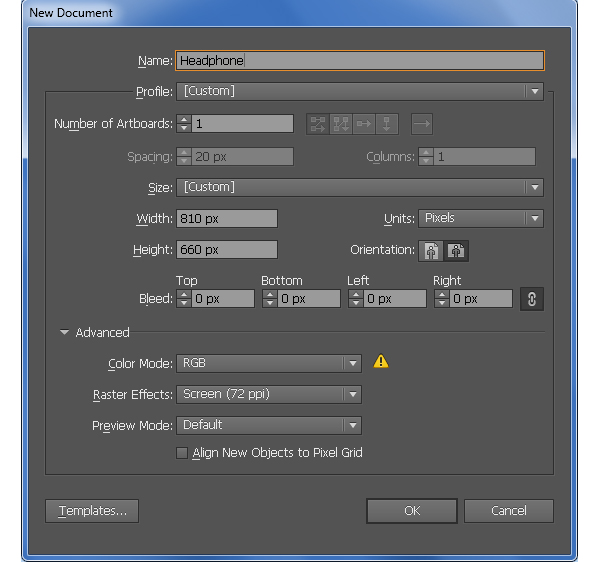
Create the Headphone
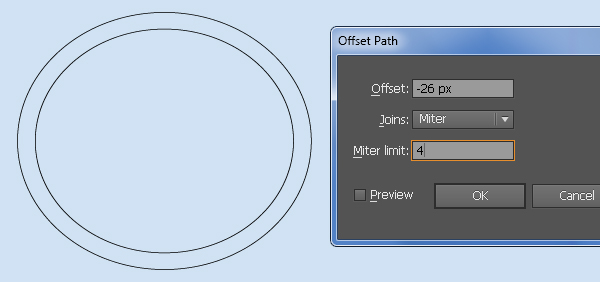
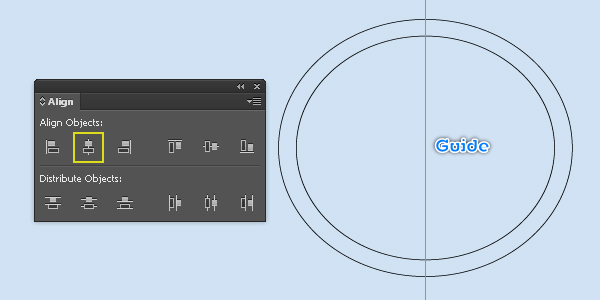
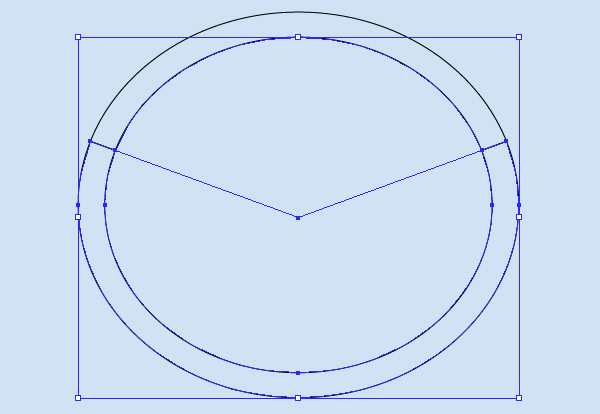
2. First of all, we’ll create the headband. Pick the Ellipse Tool (L) and create a 440 by 386px ellipse. Make sure that the newly created ellipse is still selected and go to the Object > Path > Offset Path… Enter a -26px Offset and then click OK. Before you continue, show the Rulers (View > View Rulers > Show Ruler) or (Ctrl +R). Next drag a vertical guide from the Ruler (if the guide locked, go to the View > Guides > Lock Guides) or (Ctrl +Alt + ;). Now select the bigger ellipse created in this step, hold down the Shift, click on the vertical guide, release the Shift and then click on the bigger ellipse again (to fixed its position). Next open the Align palette (Window > Align) and click on the Horizontal Align Center button.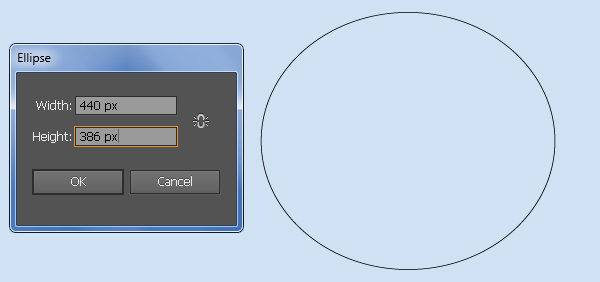
3. Using the Line Segment Tool (\) create a horizontal line of length 426px, with a red stroke and no fill. Now select the bigger ellipse created in the step 2, hold down the Shift, click on the horizontal line, release the Shift and then click on the bigger ellipse again (to fixed its position). Next click on the Horizontal Align Center button from the Align palette and then click on the Vertical Align Top button. Reselect the horizontal line and move it 128px down. Focus on the second image, with the help of the Add Anchor Point Tool (+), click on the point highlighted with blue of the horizontal line. Finally select the newly created anchor point and move it 78px down.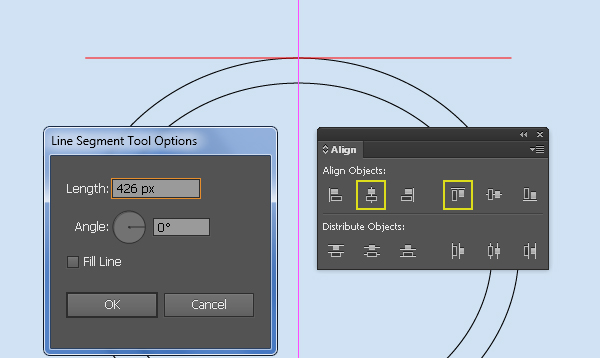
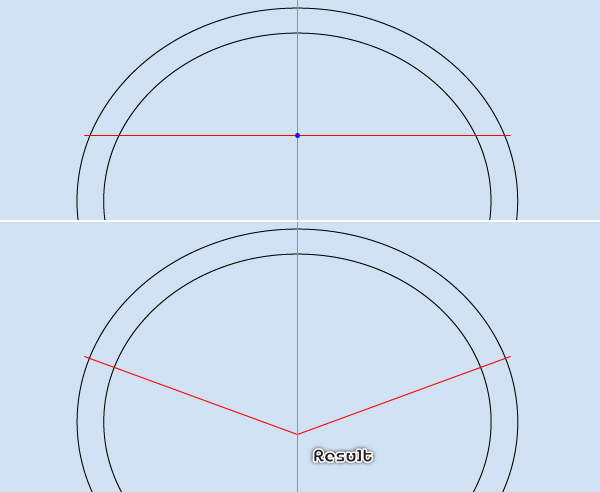
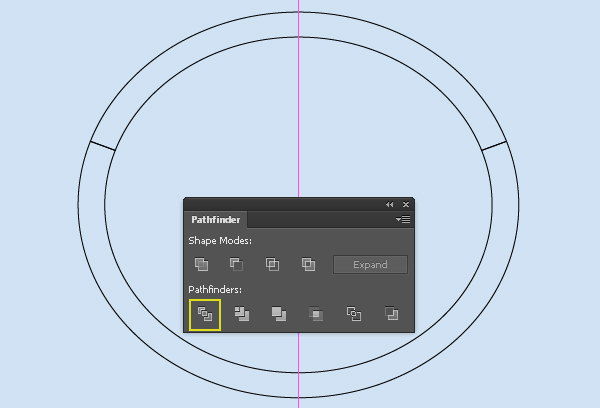
4. Select the two black ellipses, then open the Pathfinder palette (Window > Pathfinder) and click on the Minus Front button. Keep the resulting object selected, hold down the Shift and click on the red line created in the step 3, then click on the Divide button from the Pathfinder palette. Next press (Ctrl +Shift +G) to ungroup the resulting group. Now select all objects as shown in the third image and remove them. In the end your object should look like the last image shown.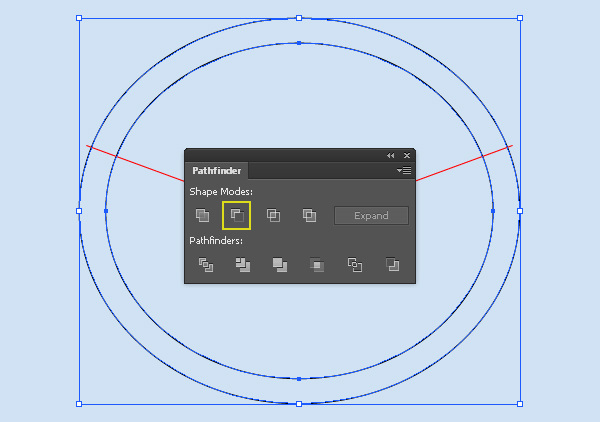

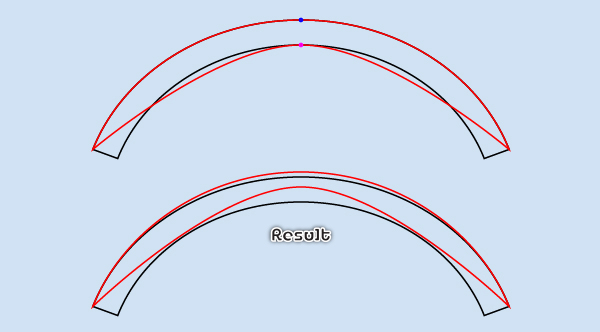
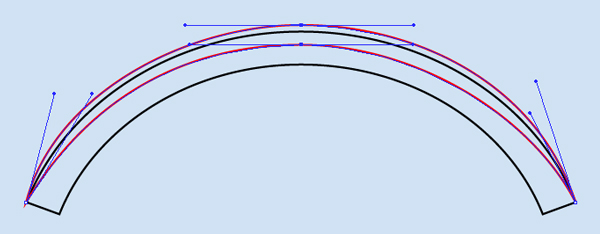
5. Select the black object created in the step 4 and make a copy (Ctrl +C, Ctrl +F) of it, then replace the existing stroke color of the copy with red. Pick the Direct Selection Tool (A) along with the Shift, select two anchor points highlighted with blue and remove them. Now focus on the third image, select the anchor point highlighted with blue of the red object and move it 5px up. Next select the anchor point highlighted with magenta and move it 15px up. With the help of the Direct Selection Tool (A), adjust the handles of the anchor points of the red object as shown in the last image.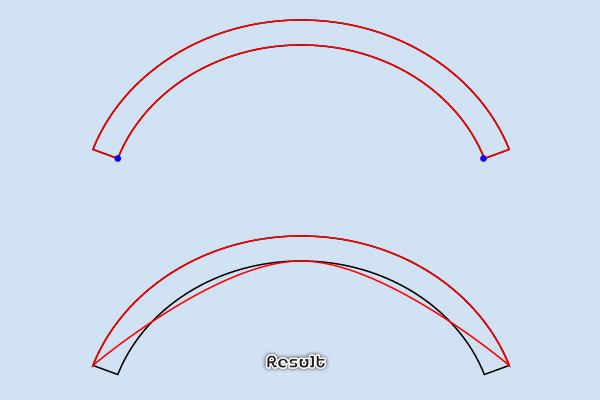
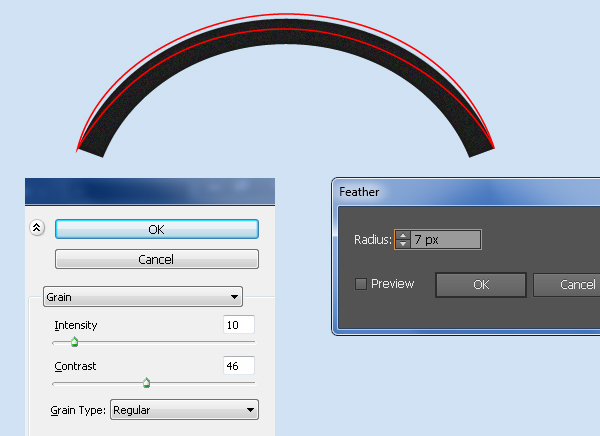
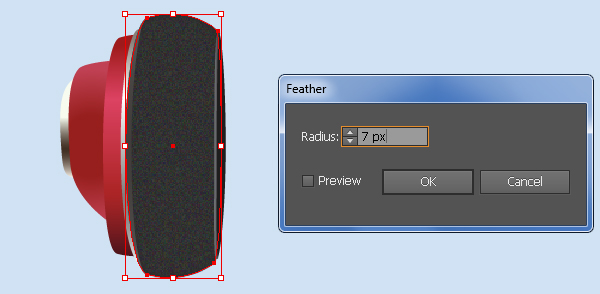
6. Select the black object created in the step 4 and remove its stroke, then fill it with R=24, G=24, B=24. Still having the resulting shape selected and make a copy (Ctrl +C, Ctrl +F) of it. Make sure that the copy is still selected and go to the Effect > Texture > Grain… Follow the data as shown in the second image and click OK, then go to the Effect > Stylize > Feather… Enter a 7px Radius and click OK.
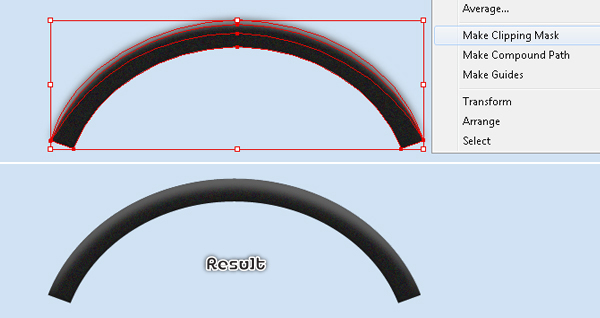
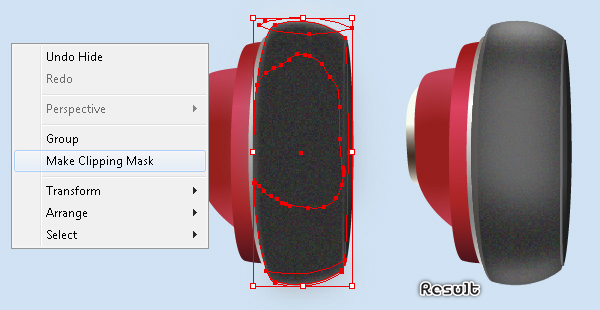
7. Select the red object, remove its stroke and fill it with R=99, G=99, B=99, then apply a 4px Gaussian Blur effect for the resulting shape. Now select the shape with feather effect applied in the step 6 and make a copy of it, then bring the copy to front (Ctrl +Shift +Right Square Bracket). Keep this copy selected, hold down the Shift and click on the shape with blur effect applied in this step, then go to the Object > Clipping Mask > Make (Ctrl +7).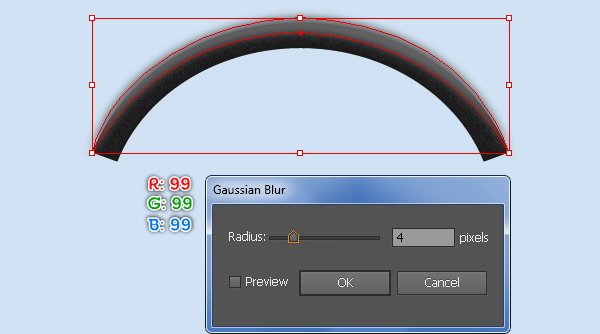
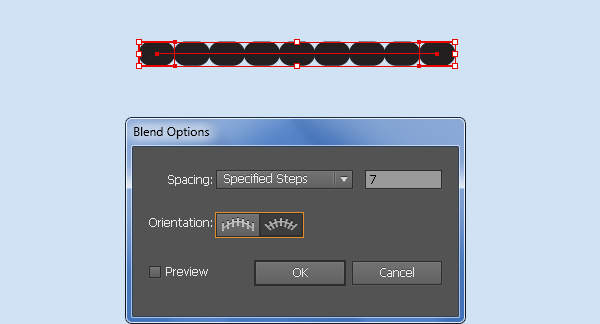
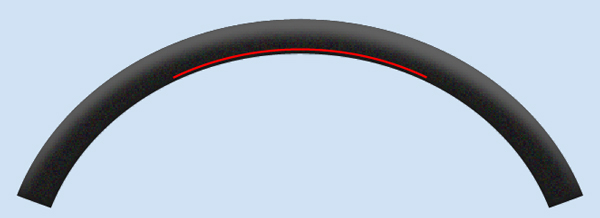
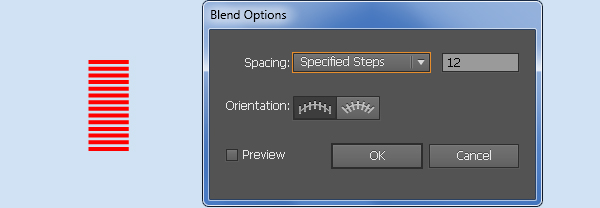
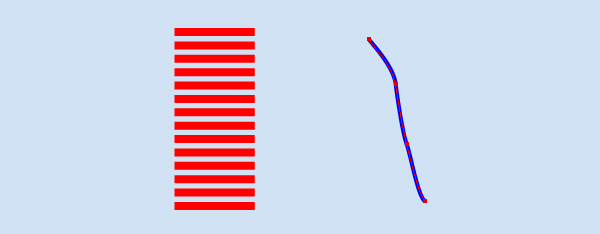
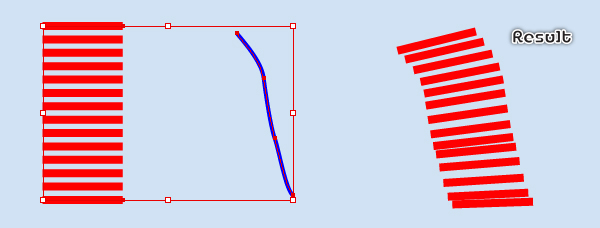
8. Pick the Rounded Rectangle Tool, simply click on your artboard and enter the data as shown below, then click OK. Make a copy (Ctrl +C, Ctrl +F) of the newly created rectangle and then move the copy 187px to the right. Select the two rectangles created in this step and go to the Object > Blend > Blend Options… Follow the data like you see in the third image and click OK, then go to the Object > Blend > Make (Ctrl +Alt +B). Now with the Pen Tool (P) create a curved path as shown in the fourth image. Once your path is drawn, reselect it, hold down the Shift and click on the blended object, then go to the Object > Blend > Replace Spine.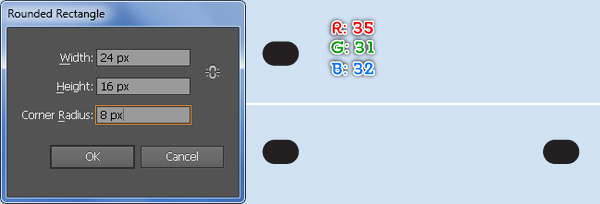
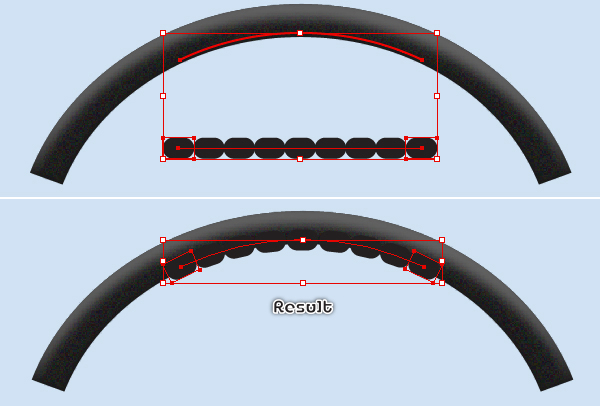
9. In the end your illustration should look like in the next image:
10. Draw an object with the Pen Tool (P) like in the image. Once your object is drawn, pick the Convert Anchor Point Tool (Shift +C), click on the bottom anchor point of this object, hold mouse and drag it to the right. Next with the help of the Convert Anchor Point Tool (Shift +C), adjust the handles of the anchor points of the blue object as shown in the third image. Finally pick the Pen Tool (P) and create a red object like you see in the last image.
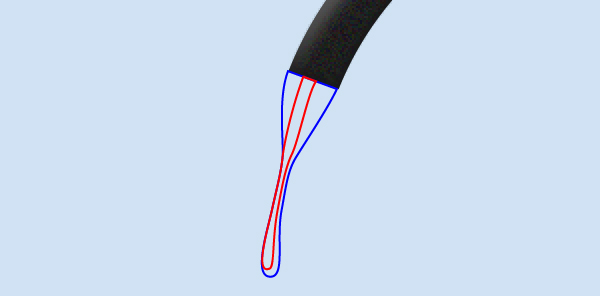
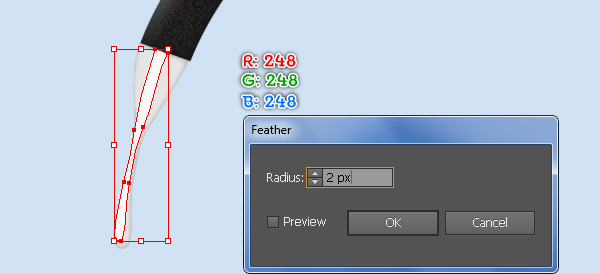
11. Select the blue object, remove its stroke and fill it with R=177, G=177, B=177. Make a copy (Ctrl +C, Ctrl +F) of the newly created shape and replace the existing color of this copy with R=229, G=229, B=229, then apply a 3px Feather effect for the resulting shape. Finally select the red object, remove its stroke and fill this object with R=248, G=248, B=248, then apply a 2px Feather effect for the resulting shape.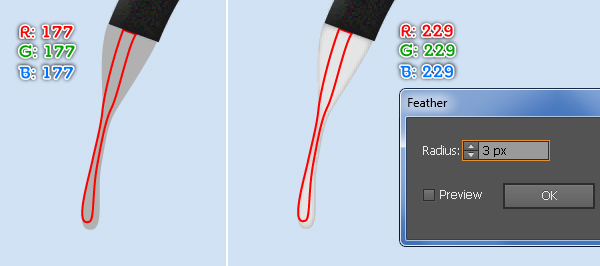
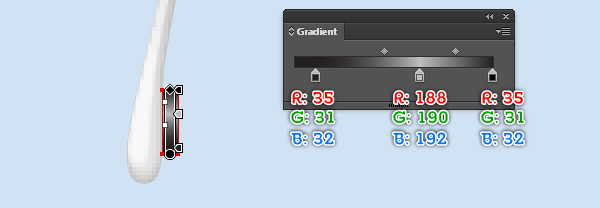
12. Pick the Rectangle Tool (M) and create a 4 by 16px rectangle, then place it to the position as shown below. Next remove the stroke of the newly created rectangle and fill it with the linear gradient like you see in the second image.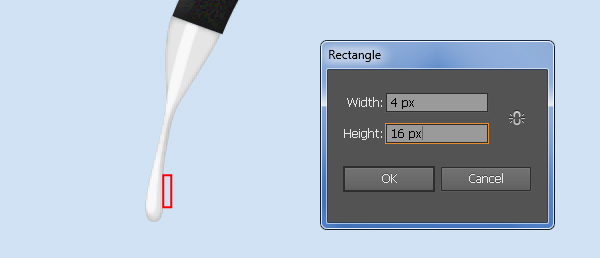
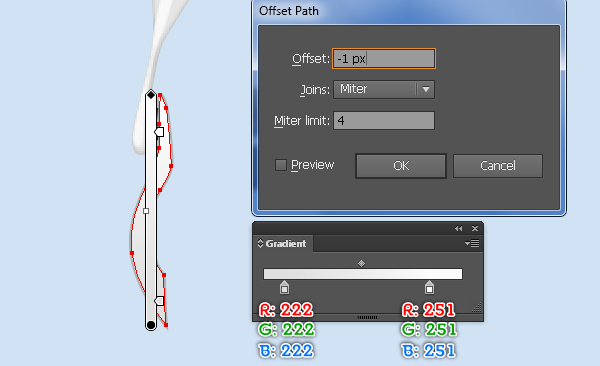
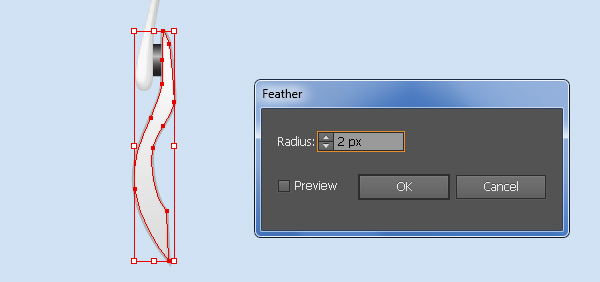
13. With the help of the Pen Tool (P) create a shape (R=177, G=177, B=177) as shown below. Make sure that the newly created shape is still selected and go to the Object > Path > Offset Path… Enter a -1px Offset and click OK, then replace the existing color of the new shape with the linear gradient like you see in the second image. Finally apply a 2px Feather effect for the resulting shape.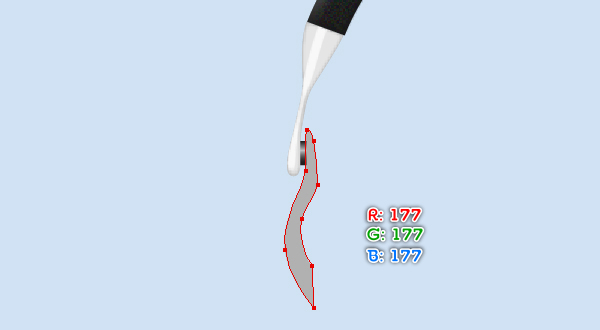
14. At this point your illustrator should look like in the next image: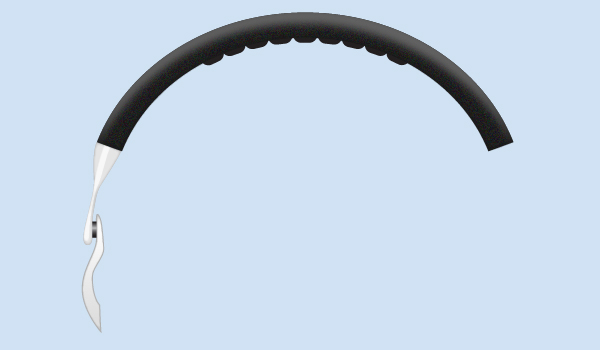
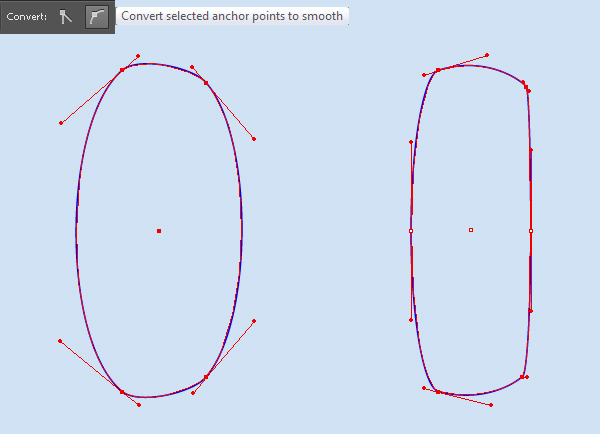
15. Next come the ear cup. Pick the Rectangle Tool (M) and create a 56 by 214px rectangle. With the Direct Selection Tool (A), select the top-right anchor point of the newly created rectangle and move it 8px down. Next select the bottom-right anchor point and move it 10px up. Now select four anchor points of the blue object and click on the “Convert selected anchor points to smooth” button from the Properties bar. Finallly with the help of the Direct Selection Tool (A), adjust the handles of the anchor points of the blue object like you see in the last image.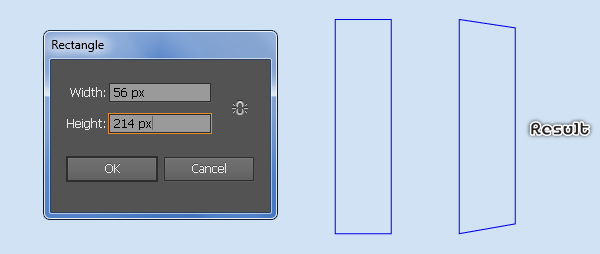
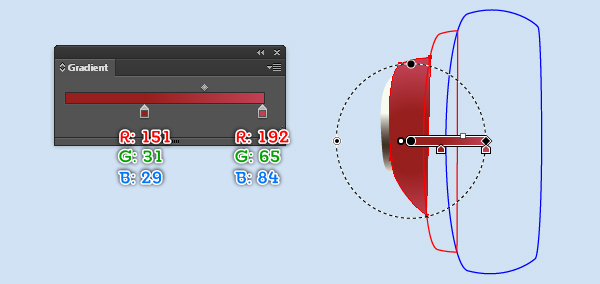
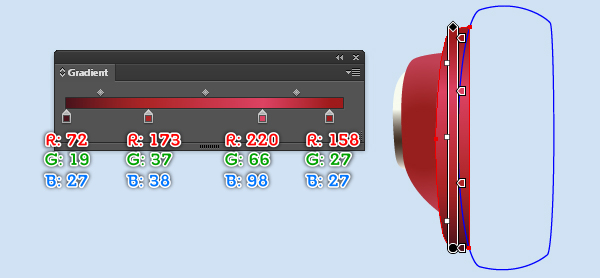
16. Now, follow the sequence of images and draw three objects similar to the ones from below.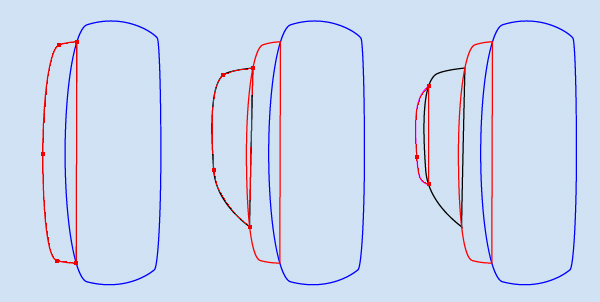
17. Once your objects are drawn, fill them with the gradients like you see in the images below. Next remove the strokes of these newly created shapes.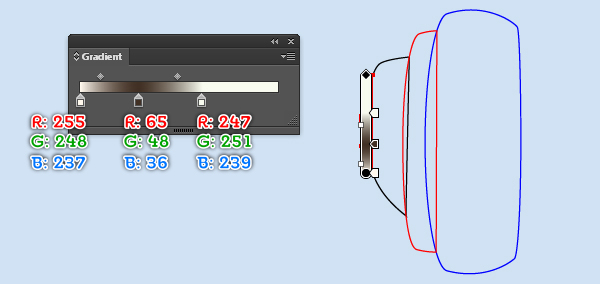
18. Select the blue object created in the step 15 and remove its stroke, then fill it with R=44, G=44, B=44. With the Pen Tool (P), create an object like you see in the second image. Once your object is drawn, remove its stroke and fill it with R=30, G=30, B=30. Continue with the Pen Tool (P), create a curved path as shown in the fourth image. Change the stroke weight of this path to 2px and then replace the existing stroke color with the linear gradient within stroke. With the help of the Pen Tool (P) create a yellow object as shown in the next to last image. Next remove the stroke of this object and fill it with the radial gradient like you see in the last image.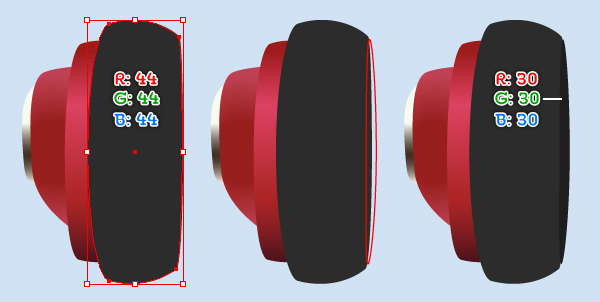
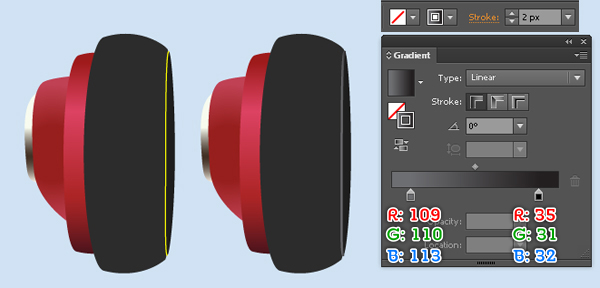
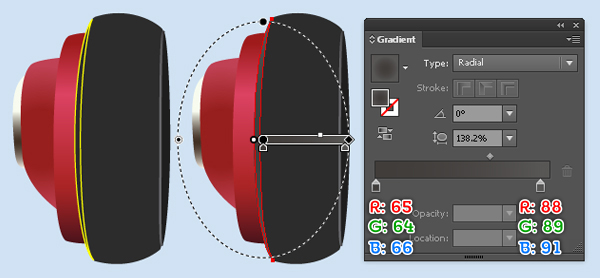
19. With the Pen Tool (P) create another yellow object. Fill this object with the linear gradient like you see in the second image and then remove the stroke of it. Finally hide the resulting shape behind the bigger shape created in the step 18.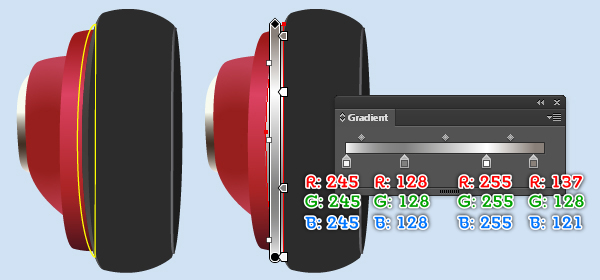
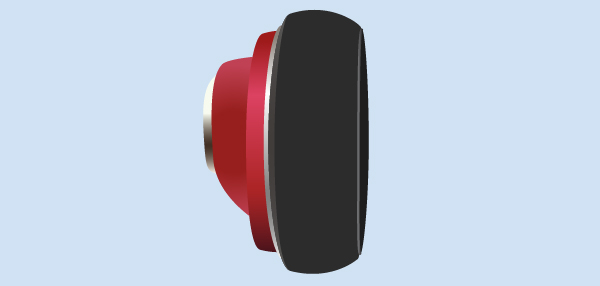
20. Select the bigger shape created in the step 18 and make a copy (Ctrl +C, Ctrl +F) of it. Still having the copy selected and go to the Effect > Texture > Grain… Follow the data as shown below and click OK. Next apply a 7px Feather effect for the resulting shape.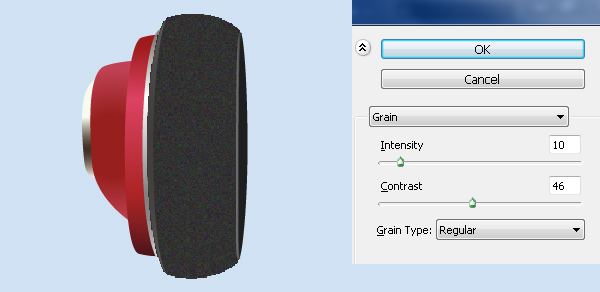
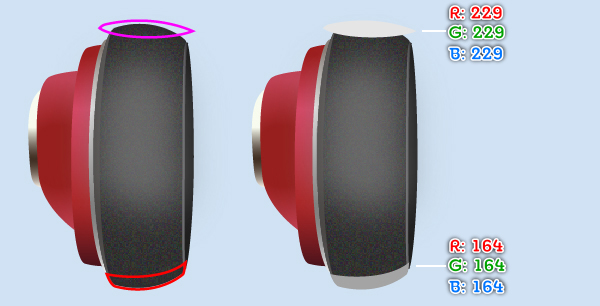
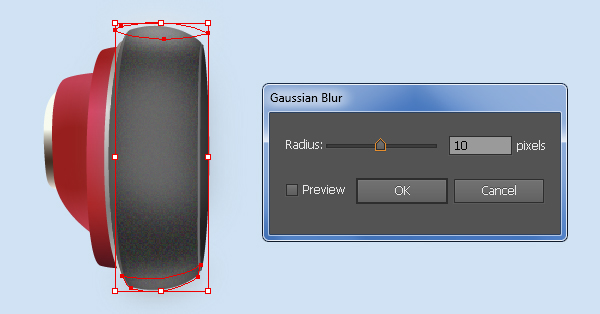
21. Pick the Pencil Tool (N) and create a shape (R=128, G=128, B=128) as shown below. Next apply a 15px Gaussian Blur effect for the newly created shape and reduce its Opacity to 70%. With the Pen Tool (P) create two objects like you see in the third image. Once your objects are drawn, select the magenta object and fill it with R=229, G=229, B=229, then remove its stroke. Select the remaining object and fill it with R=164, G=164, B=164, then remove its stroke. Next select the two newly created shapes and apply a 10px Gaussian Blur effect for them. Now select the shape with Grain effect applied in the step 20 and make a copy (Ctrl +C, Ctrl +F) of it, then bring the copy to front (Ctrl +Shift +Right Square Bracket). Keep this copy selected, hold down the Shift and click on the three shapes with blur effect applied in this step, then go to the Object > Clipping Mask > Make (Ctrl +7).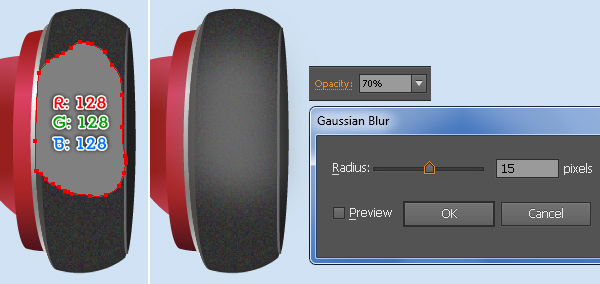
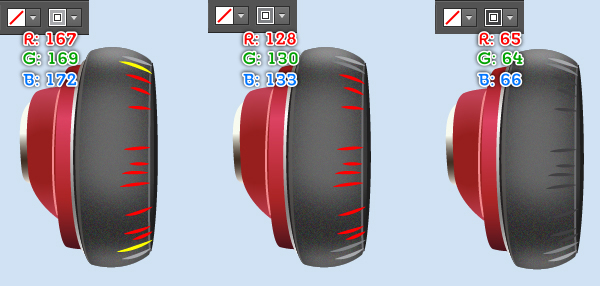
22. To add some details, first draw some curved paths with the Pen Tool (P) and give them a 3px Stroke for the moment, then apply the Width Profile 1 for these paths. Now select the two green paths and replace the existing stroke color with R=167, G=169, B=172. Then select the two yellow paths and replace the existing stroke color with R=128, G=130, B=133. Next select the remaining red paths and replace the existing stroke color with R=65, G=64, B=66. Finally select all paths created in this step and apply a 3px Gaussian Blur effect for them, then reduce their Opacity to 60%.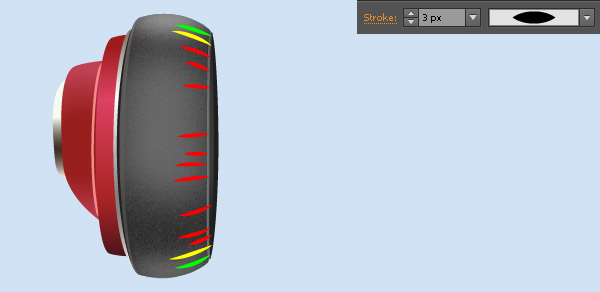
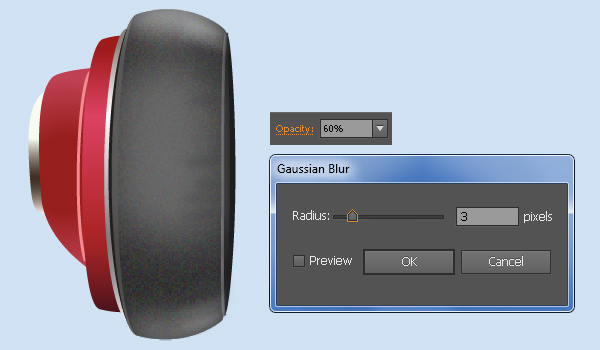
23. In the end your illustration should look like in the next image: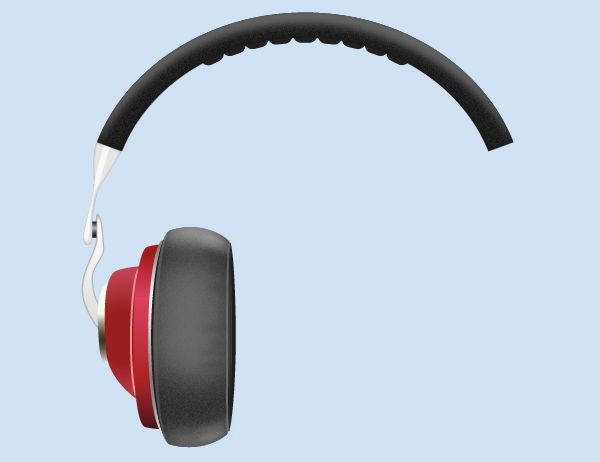
24. With the help of the Pen Tool (P) create three objects like you see in the images below.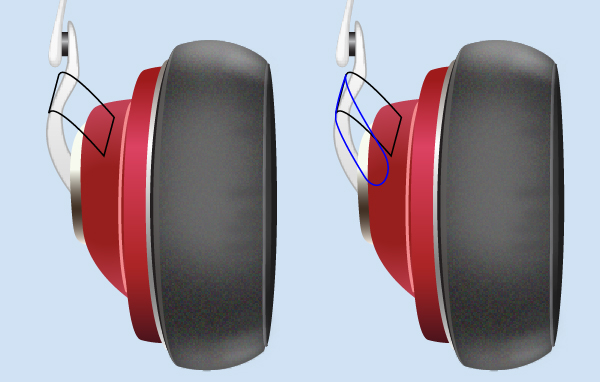
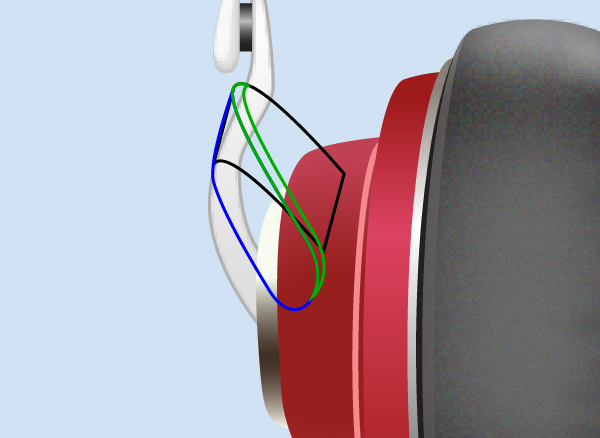
25. Once your objects are drawn, select the black object, fill it with R=149, G=18, B=25 and remove the stroke of it, then send the resulting shape to back (Ctrl +Shift +Left Square Bracket). Next select and fill the two remaining objects with the linear gradients like you see in the third and the fourth images. Finally remove the strokes of these two shapes.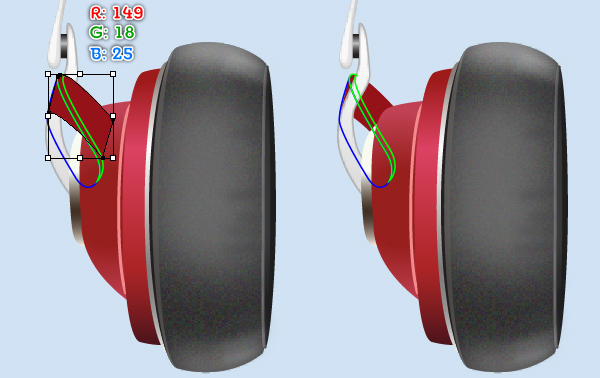
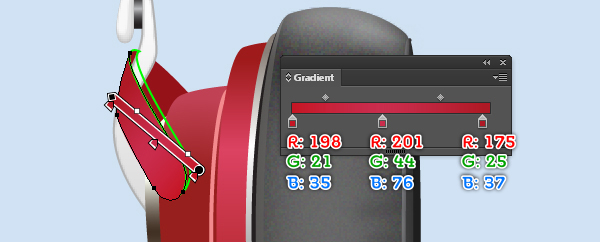
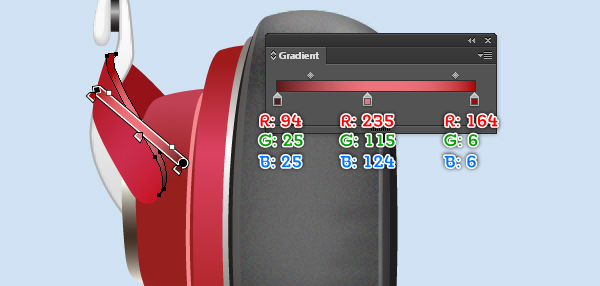
26. You should end up with something like this: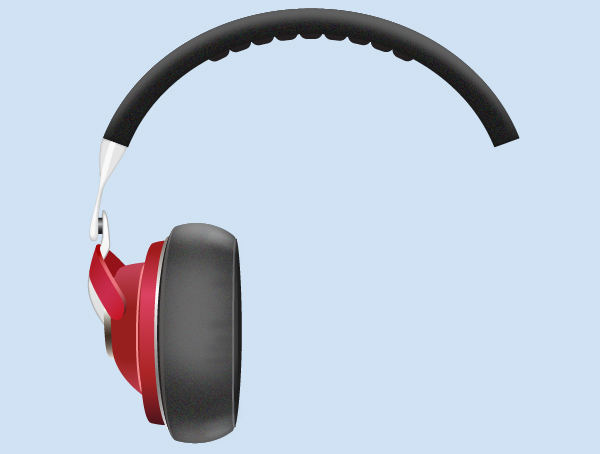
27. Using the Line Segment Tool (\) create a horizontal line of length 20px, with a red stroke and no fill. Make a copy (Ctrl +C, Ctrl +F) of this line and then move the copy 44px down. Next select the two newly created lines and create a blend between them. With the help of the Pen Tool (P) create a curved path like you see in the fourth image. Once your path is drawn, select it and the blended object created in this step, then go to the Object > Blend > Replace Spine. The resulting object should look like the sixth image below. Next place this blended object to the position as shown in the next to last image. Make sure that the blended object is still selected and go to the Object > Blend > Expand, then press (Ctrl +Shift +G) to ungroup the newly created group. Finally with the Pen Tool (P) create two curved black paths like you see in the last image.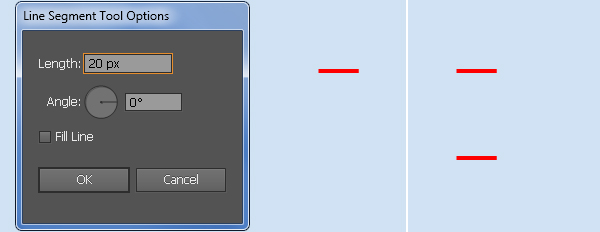
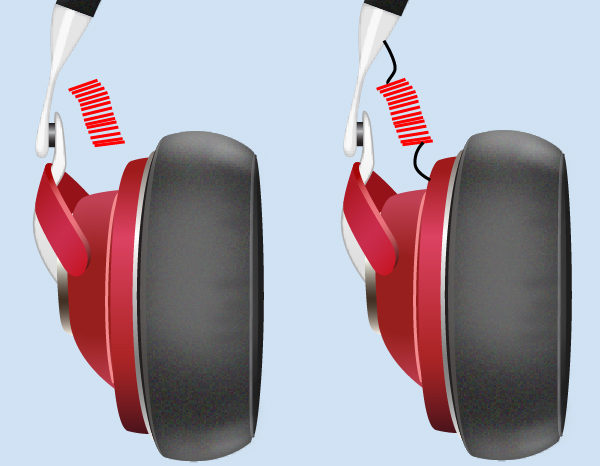
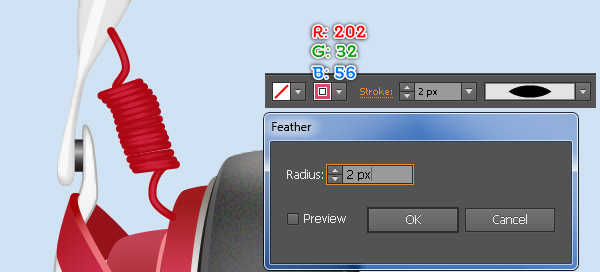
28. Select all paths created in the step 27, change the stroke weight to 4px and replace the existing stroke color with R=173, G=8, B=21, then open the Stroke palette (Window > Stroke) and click on the Round Cap button. Keep these resulting paths selected and make a copy (Ctrl +C, Ctrl +F) of them. Replace the existing stroke color of these copy with R=202, G=32, B=56 and change the stroke weight to 2px. Next apply the Width Profile 1 and a 2px Feather effect for the newly created paths. Finally select and group (Ctrl +G) all paths created from beginning step 27 to this time, then send this group to back (Ctrl +Shift +Left Square Bracket).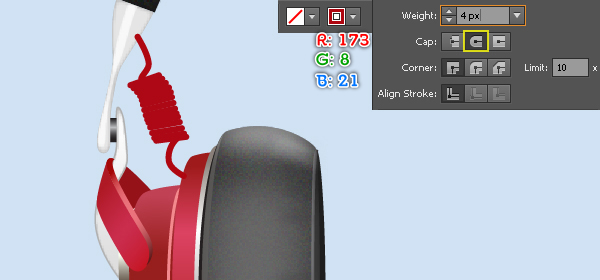
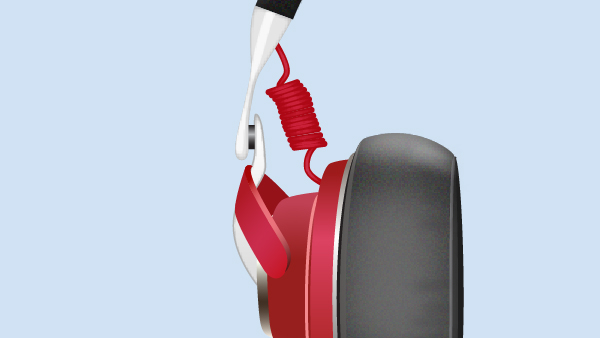
29. At this point your illustration should look like in the next image: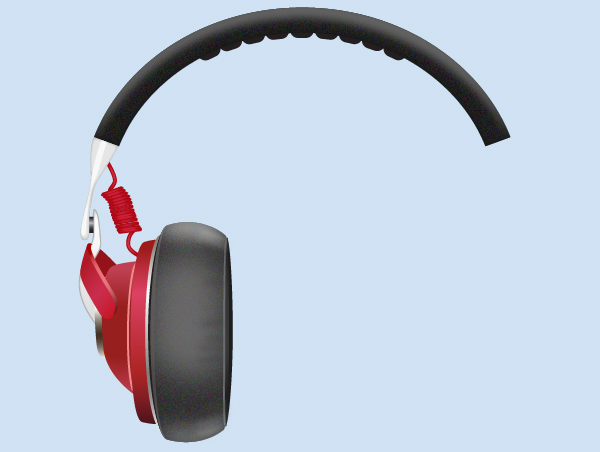
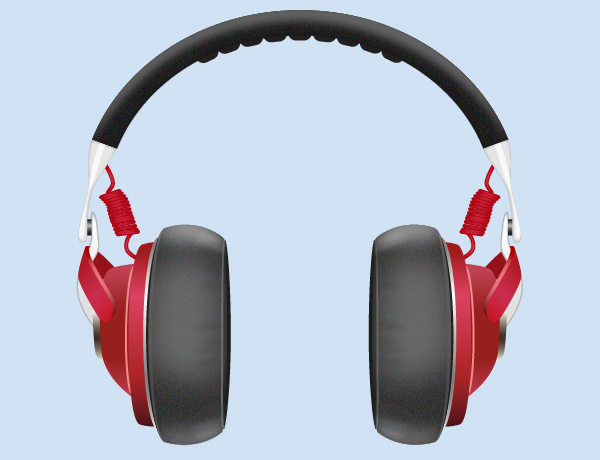
30. Select and group (Ctrl +G) all object created from beginning step 10 to this time. Keep the newly created group selected and go to the Object > Transform > Reflect. Set the Axis to Vertical and then click Copy. Drag the copy we have just created to the right. Don’t forget to hold the Shift key on the keyboard for straight dragging. Next select and group (Ctrl +G) all object created from beginning step 2 to this time. The headphone is ready and looks like the second image below.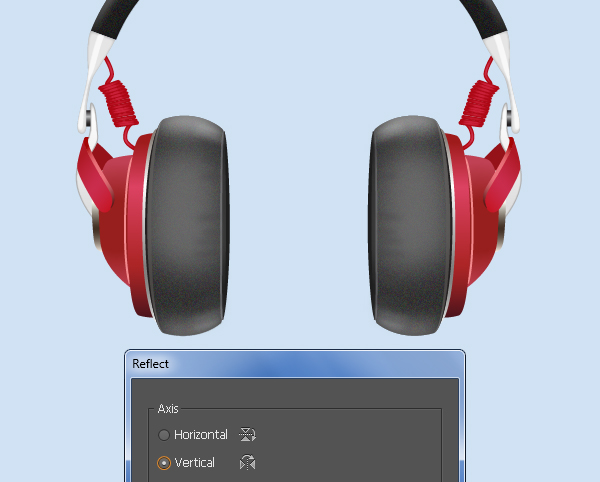
Create the Background
31. We’re done with the headphone. It’s time for the background now. Pick the Rectangle Tool (M) and create a 806 by 660px rectangle, then fill it with the radial gradient as shown below. Next place the headphone into this background.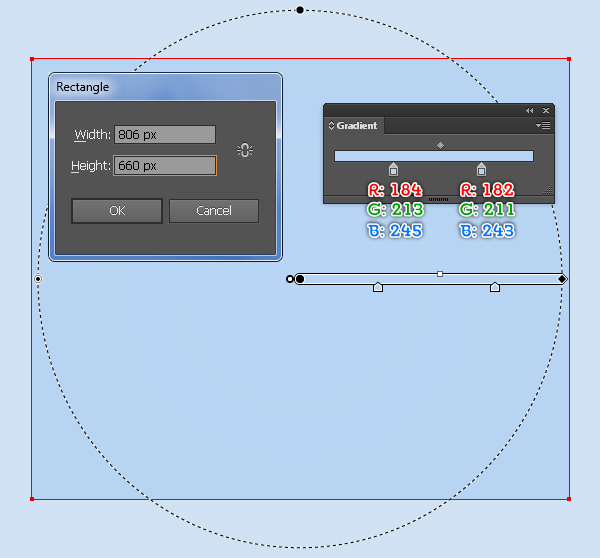
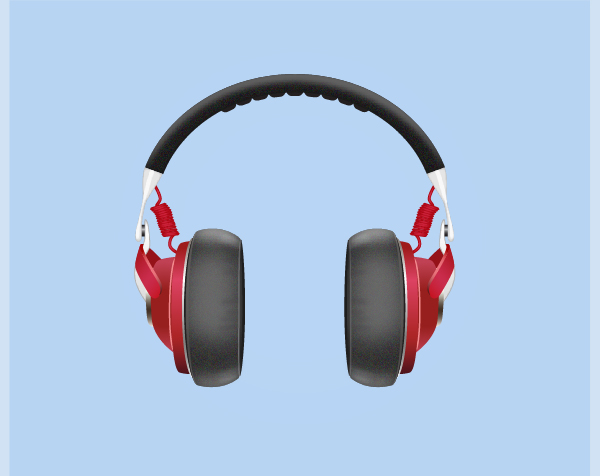
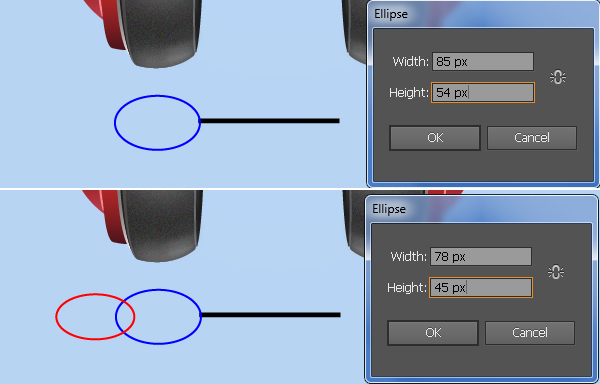
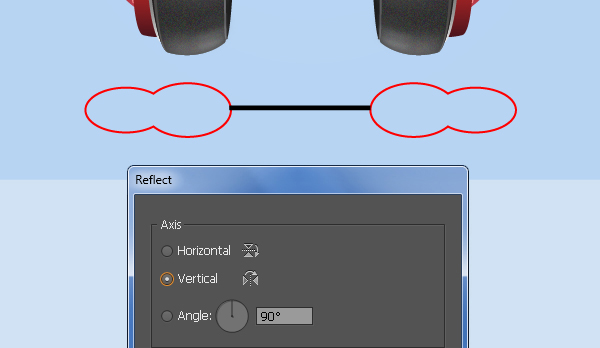
32. To give a more realistic look I’m going to be adding some shadows on some key places. With the Rectangle Tool (M) create a black rectangle of 140 by 5px size and then place this rectangle to the position as shown below. Next pick the Ellipse Tool (L) and create two ellipses with dimensions: 85 by 54px and 78 by 45px, then place these ellipses to the positions like you see in the second and the third images. Now select the two ellipses created in this step and open the Pathfinder palette (Window > Pathfinder), then click on the Unite button. Make sure that the resulting object is still selected and go to Object > Transform > Reflect. Check the Vertical box then click the Copy button. Select the resulting object, drag it to the right and place it as shown in the last image.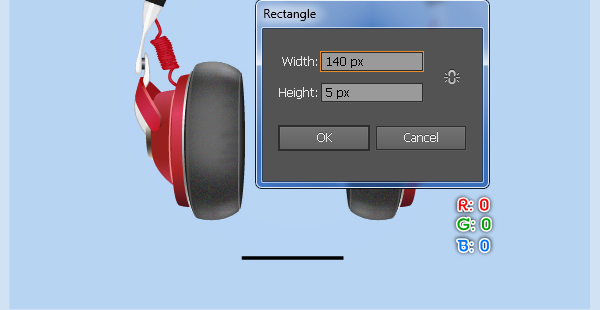

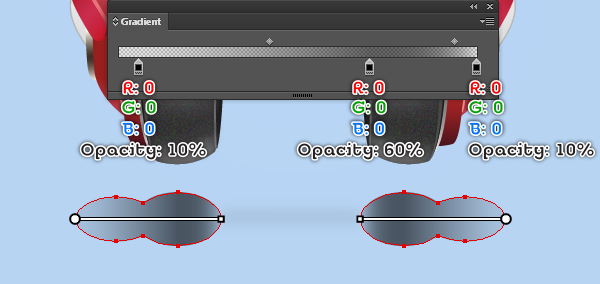
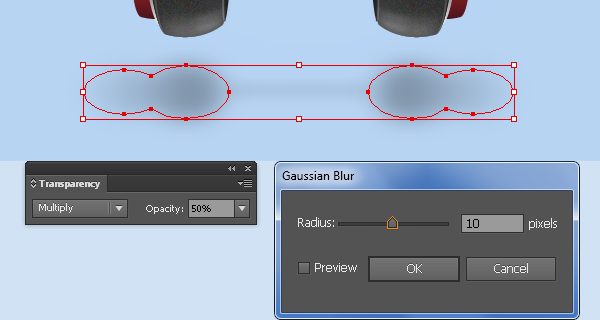
33. Select the black rectangle created in the step 32, apply a 7px Gaussian Blur then set it to Blending Mode Multiply and reduce the Opacity to 20%. Next select the two red objects created in the step 32 and remove their strokes, then fill these objects with the linear gradient as shown in the second image. Finally apply a 10px Gaussian Blur effect for the two new shapes, then set them to Blending Mode Multiply and reduce the Opacity to 50%.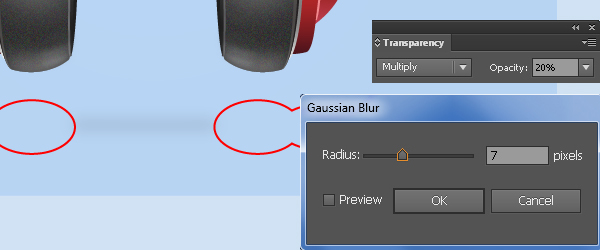
And We’re Done!

You can also check an interesting article on headphones at Spriee

