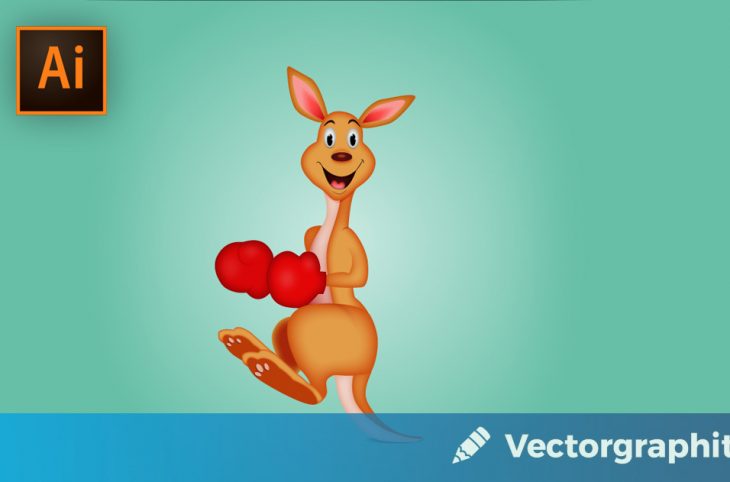
Follow this tutorial and learn how to draw a Cute Boxing Kangaroo character in Adobe Illustrator. You will practice drawing with the Pen Tool, you will use the Blend Tool, effects and brushes to add dimension and details in your drawing. Let’s begin!
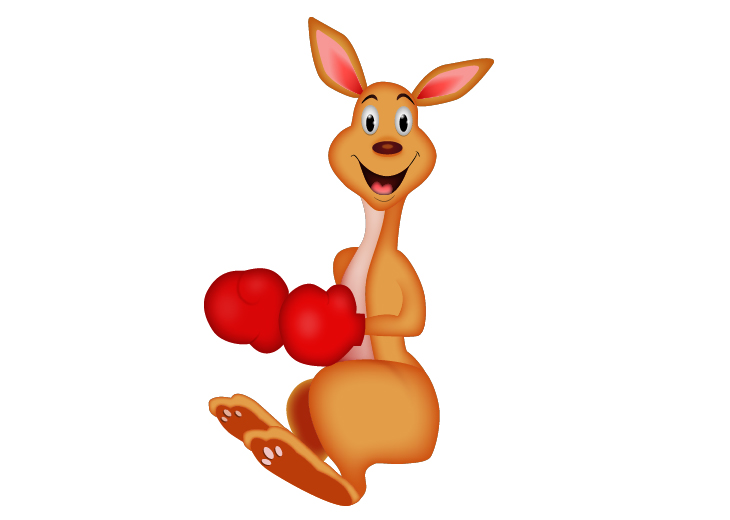
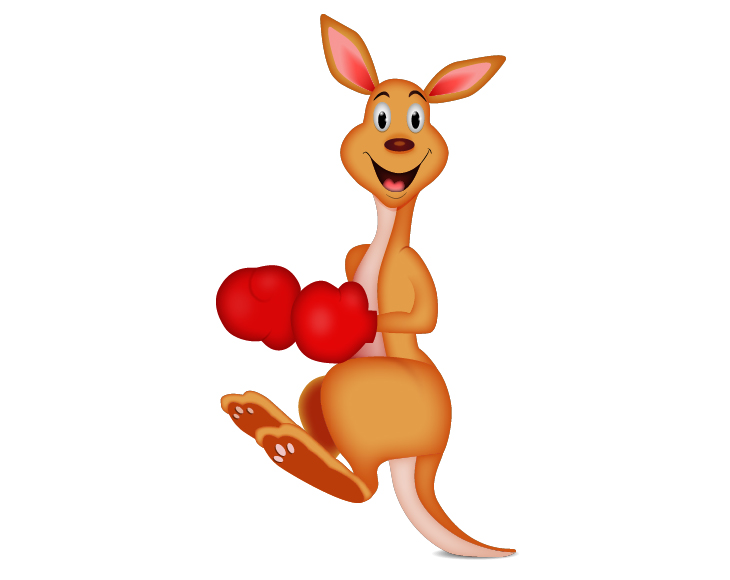
Final Image
Tutorial Details
- Program: Adobe Illustrator CS6 – CC 2017
- Difficulty: Intermediate
- Estimated Completion Time: 1 hour
Open a New Document
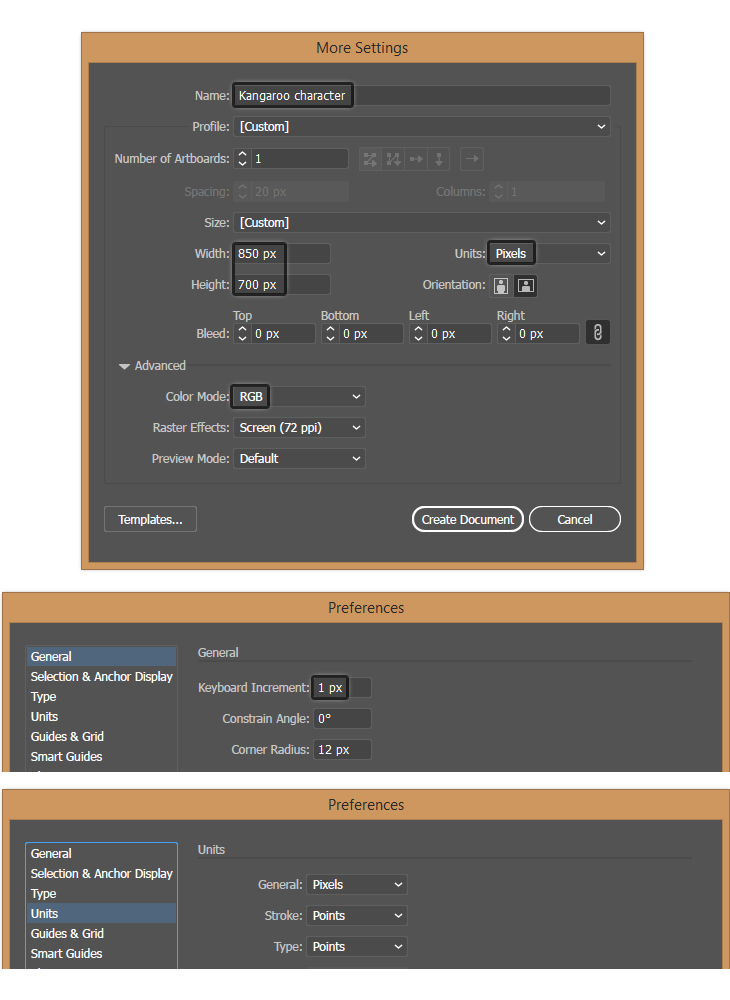
1. Launch Illustrator and open a new document. Type a name and set up the dimensions then select Pixels as Units and RGB as Color Mode. Next, go to Edit > Preferences > General and set the Keyboard Increment to 1 px and while there, also check the Units. These settings will help you throughout the drawing process.
Draw the Head of the Kangaroo
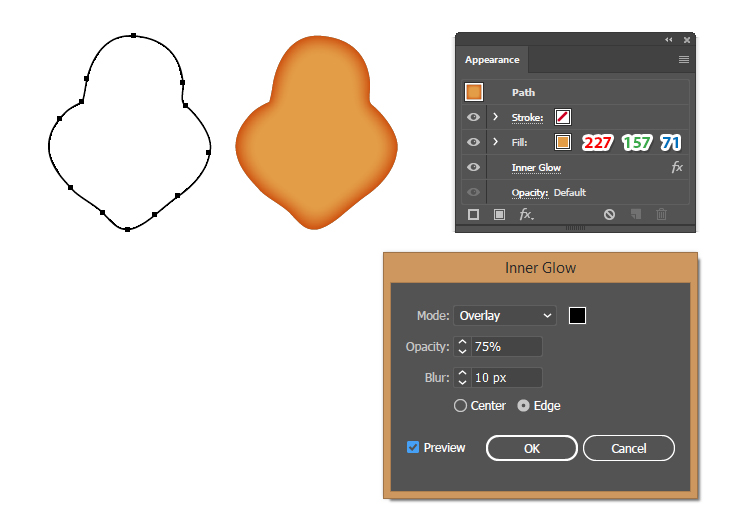
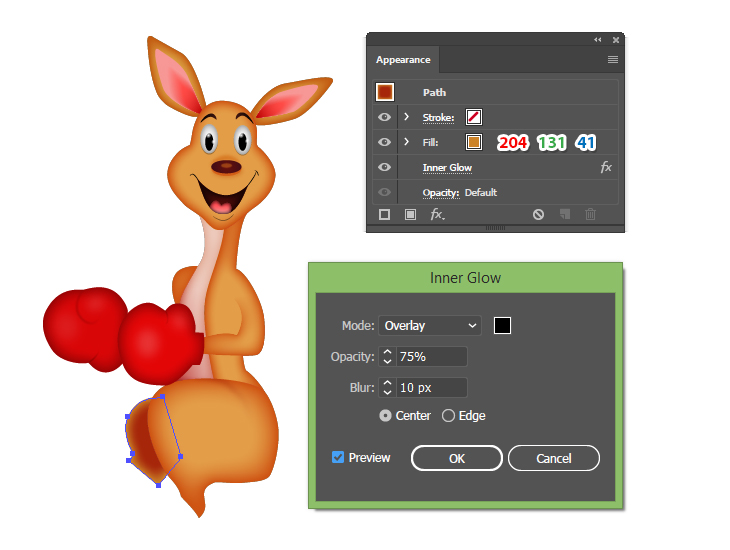
2. We are starting with the head. Take the Pen Tool (P) and draw a shape like below filled with R=227, G=157, B=71. Next, go to Effect > Stylize > Inner Glow and apply the settings shown.
Draw the Eyes of the Kangaroo
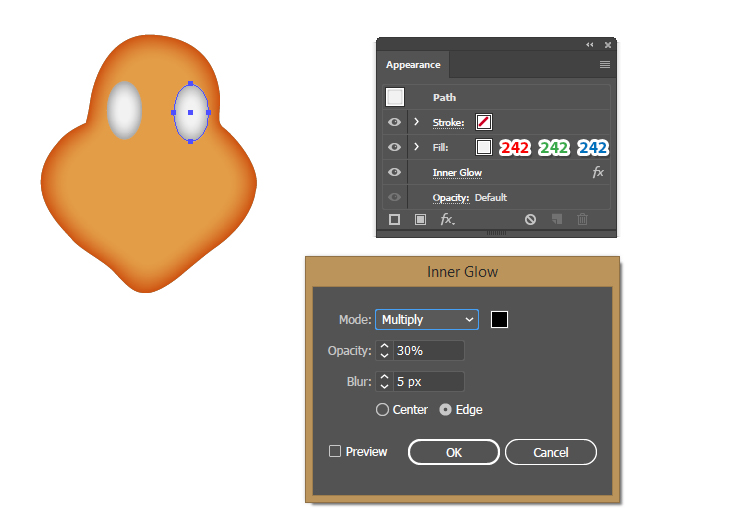
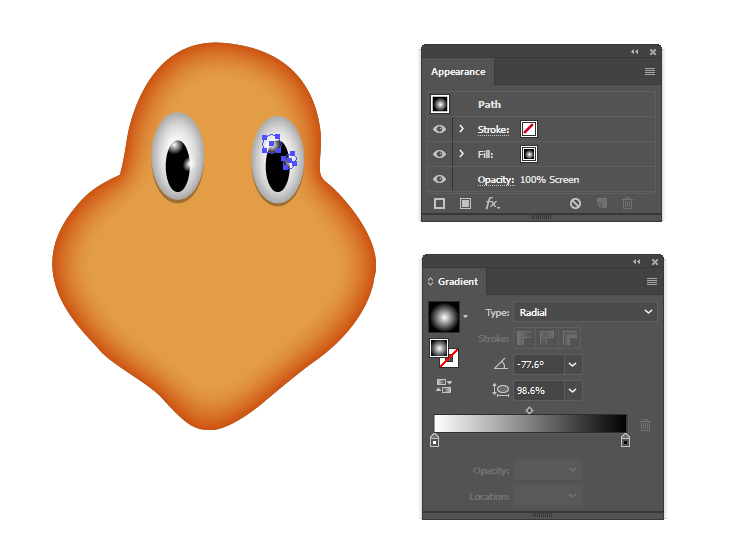
3. Take the Ellipse Tool (L) and draw two ellipses as the eyes having the size of about 17 x 30 px. Color them with light gray and apply the Inner Glow effect again.
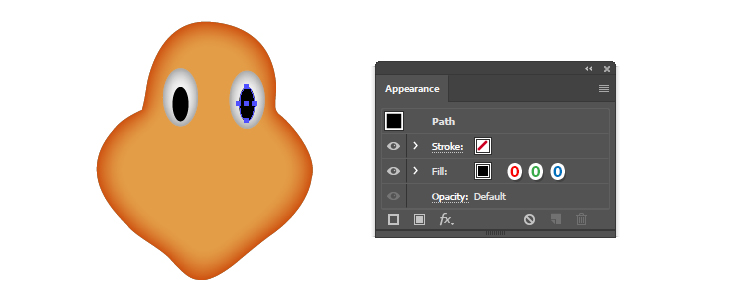
4. Draw two new ellipses on the eyes filled with black.
5. Select the eyes and then Copy and Paste in Back (Control-B). Delete the existing appearances and select a black fill. Move these copies a little down by pressing the Down Arrow key on your keyboard. Set the Blending Mode to Multiply and the Opacity to 30%.

6. To add a few sparkles in the eyes, take the Ellipse Tool (L) and draw two circles on each eye. Fill them with a white to black radial gradient and then change the Blending Mode to Screen.
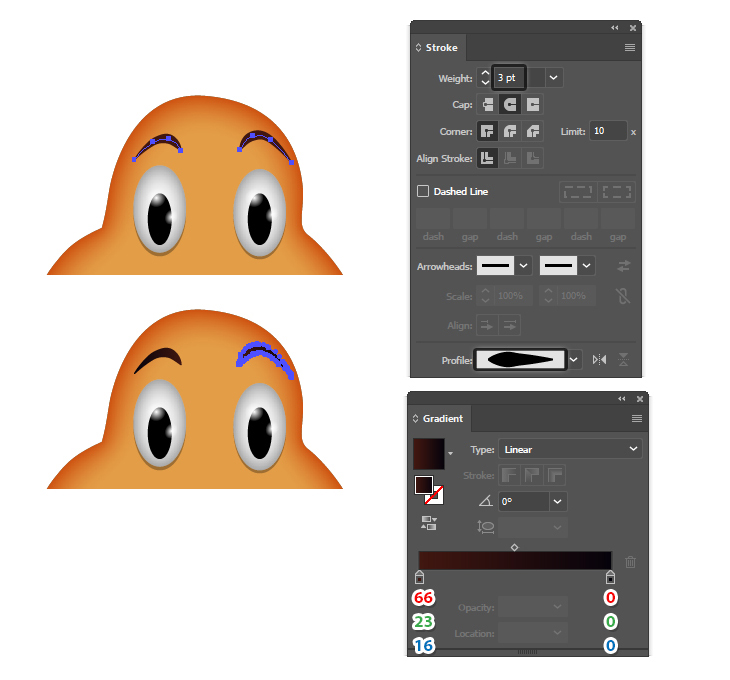
7. At this step we make the eyebrows. Use the Pen Tool (P) to draw the two paths; then select a 3 pt Stroke and the Width Profile 5 in the Stroke panel. Expand the paths by going to Object > Expand Appearance and then use a brown to black linear gradient to color the eyebrow shapes.
Draw the Nose of the Kangaroo
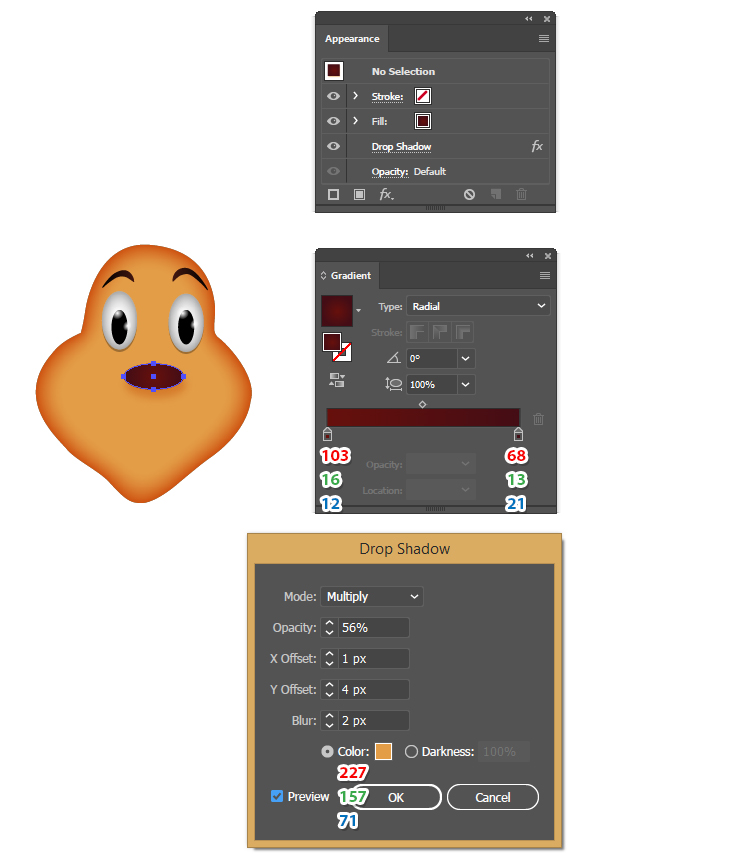
8. The nose is a 30 x 13 px ellipse filled with the radial gradient shown below. Next, go to Effect > Stylize and apply the Drop Shadow effect to create a soft shadow under the nose.
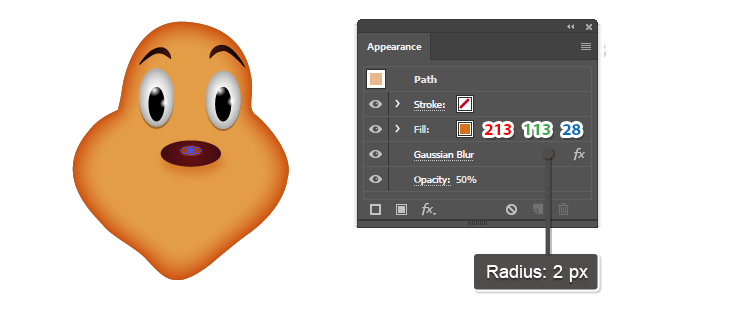
9. Draw a smaller ellipse in the middle of the nose and fill it with R=213, G=113, B=28. Go to Effect > Blur > Gaussian Blur and apply a Radius of 2 px. Lower the Opacity to 50% and you will get a highlight on the nose.
10. Take the Pen Tool (P) again and draw a path above the nose. Select a 5 pt Stroke with the color R=213, G=113, B=26 and also select the Width Profile 1 in the Stroke panel. Apply a 6 px Gaussian Blur and lower the Opacity to 80%.
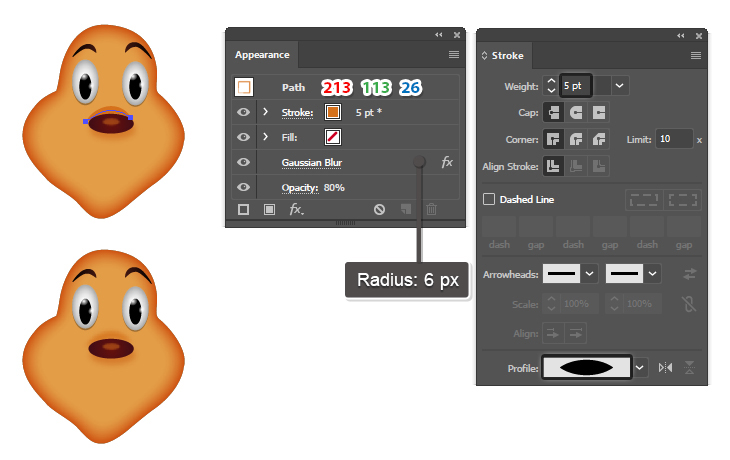
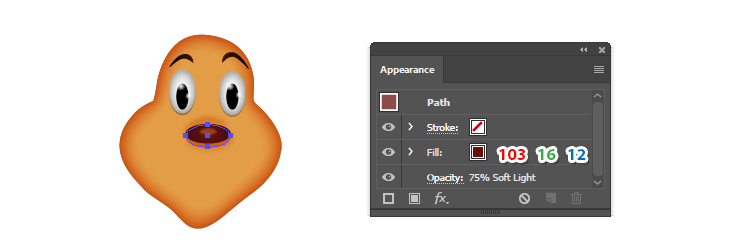
11. Draw a 30 x 15 px ellipse slightly bigger than the nose and move it behind it. Put R=103, G=16, B=12 as the fill color; then set the Blending Mode to Soft Light and the Opacity to 75%.
Draw the Mouth of the Kangaroo
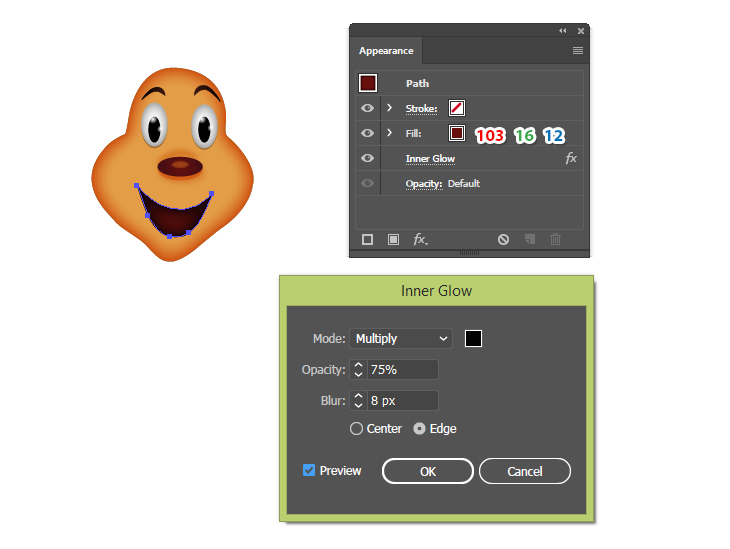
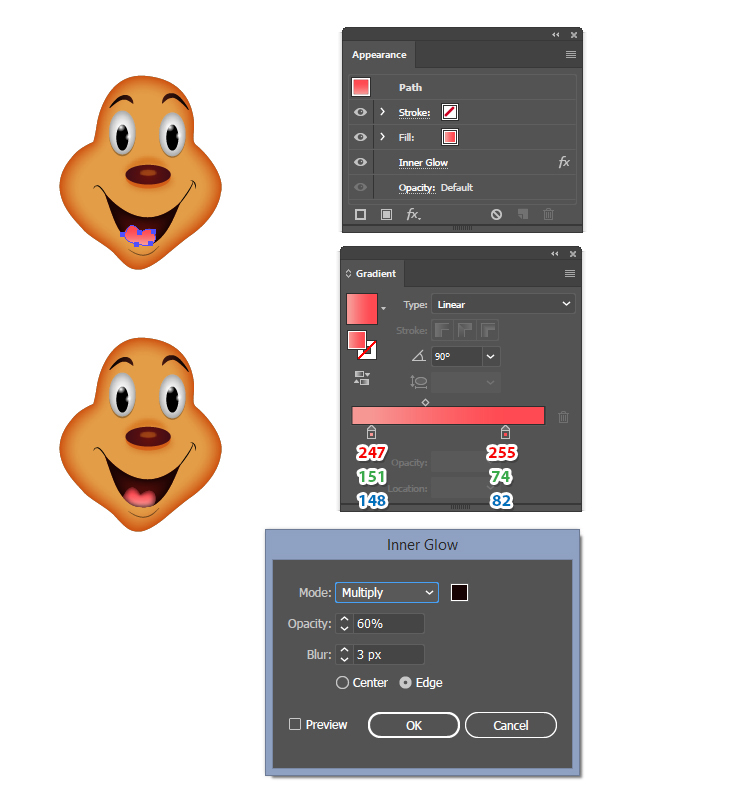
12. Use the Pen Tool (P) to draw the shape of the mouth like in the next image. Set the color to R=103, G=16, B=12 and then apply the Inner Glow effect.
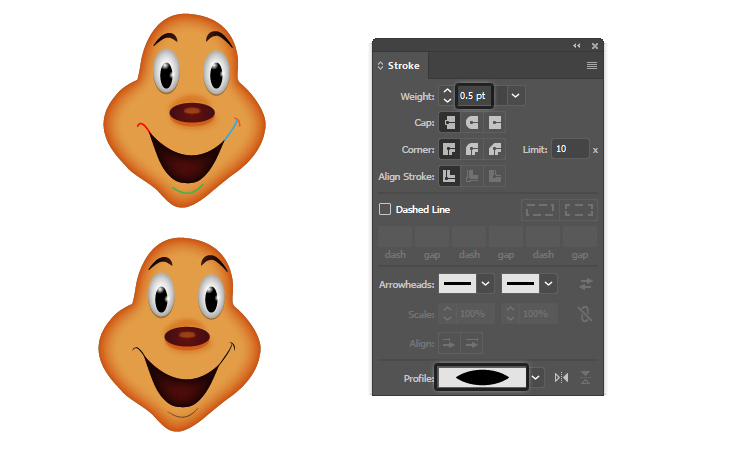
13. To add some details around the mouth, use the Pen Tool (P) to draw a few lines as shown. Give them a 0.5 pt Stroke using black and the Width Profile 1. Only for the path under the mouth lower the Opacity to 50%.
14. Draw the shape of the tongue with the Pen Tool (P) and use the linear gradient shown to fill it. Next, apply the Inner Glow effect.
Draw the Ears of the Kangaroo
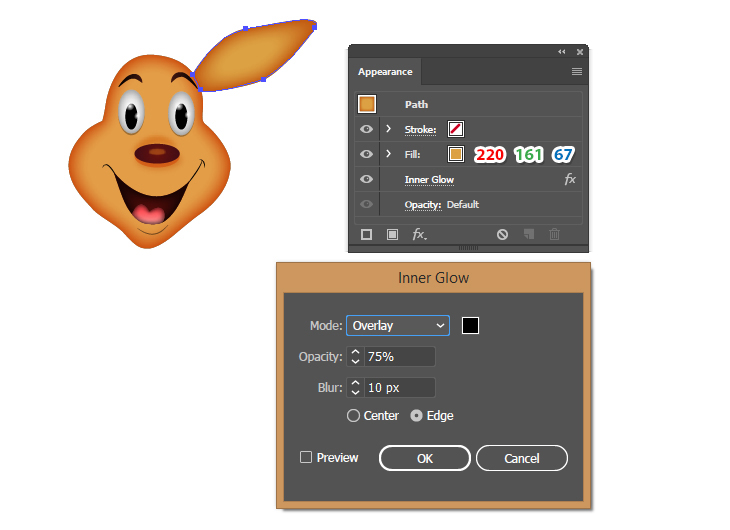
15. Use the Pen Tool (P) to draw the shape of the right ear and color it with R=220, G=161, B=67. Next, apply the Inner Glow effect to give it some dimension.
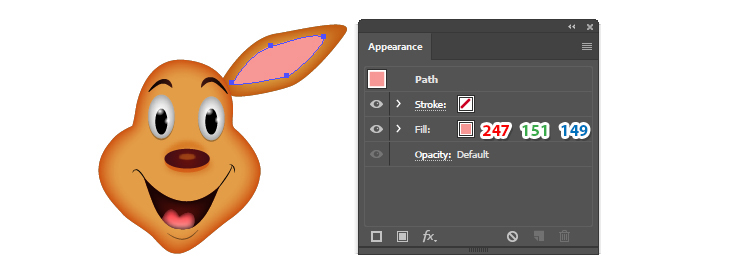
16. Draw a similar but smaller shape in the middle of the ear and color it with pink.
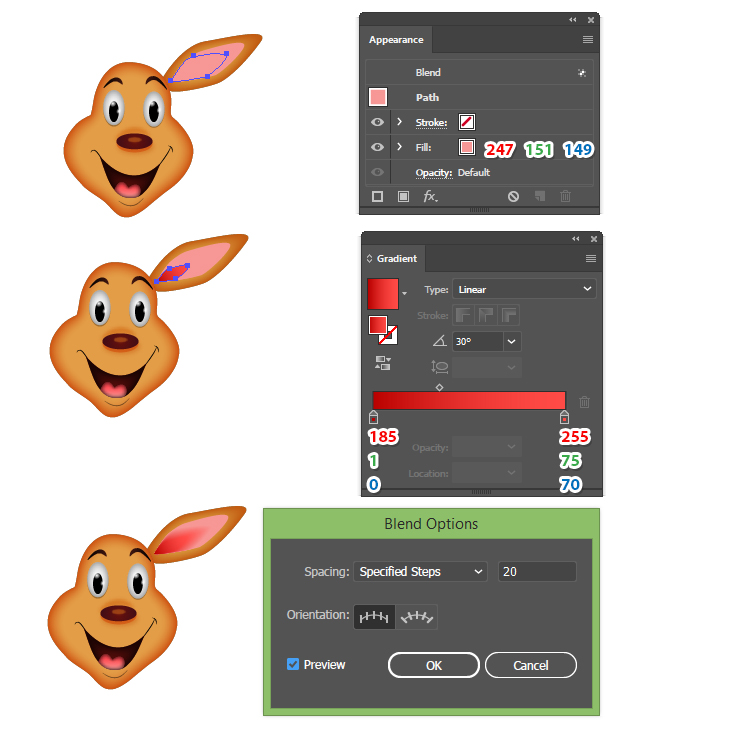
17. Select the pink shape and Copy and Paste in Front (Control-F) to make a copy of it. Scale down this copy, keep the same pink color and place it as shown below.
Make another copy even smaller and fill it with the linear gradient shown. Adjust the gradient so the darker red color is in the inner corner and the lighter red is in the outer corner.
Now, select these two copies and go to Object > Blend > Blend Options. Select 20 Specified Steps and then go back to Object > Blend > Make (Alt-Control-B).
18. Draw the left ear of the kangaroo using the same technique and now the head is ready.

Draw the Body and the Arms of the Kangaroo
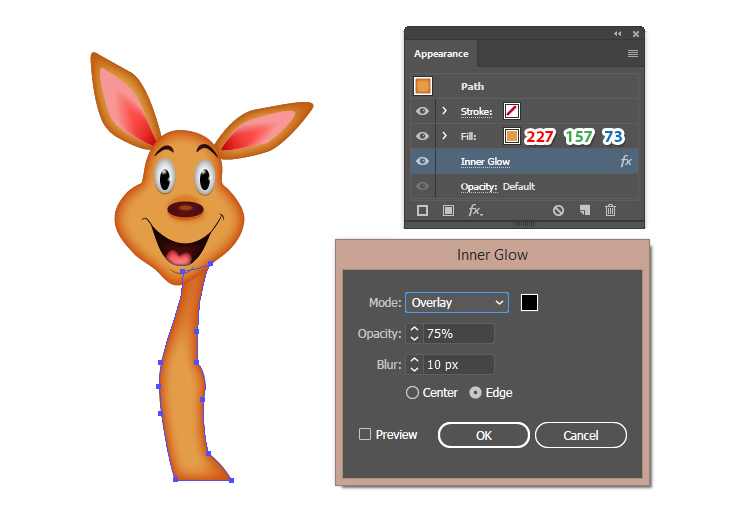
19. At this step we start to draw the body. Take the Pen Tool (P) and draw a shape like in the next image as the neck and the back together. Color it with R=227, G=157, B=73 and then apply the Inner Glow effect.
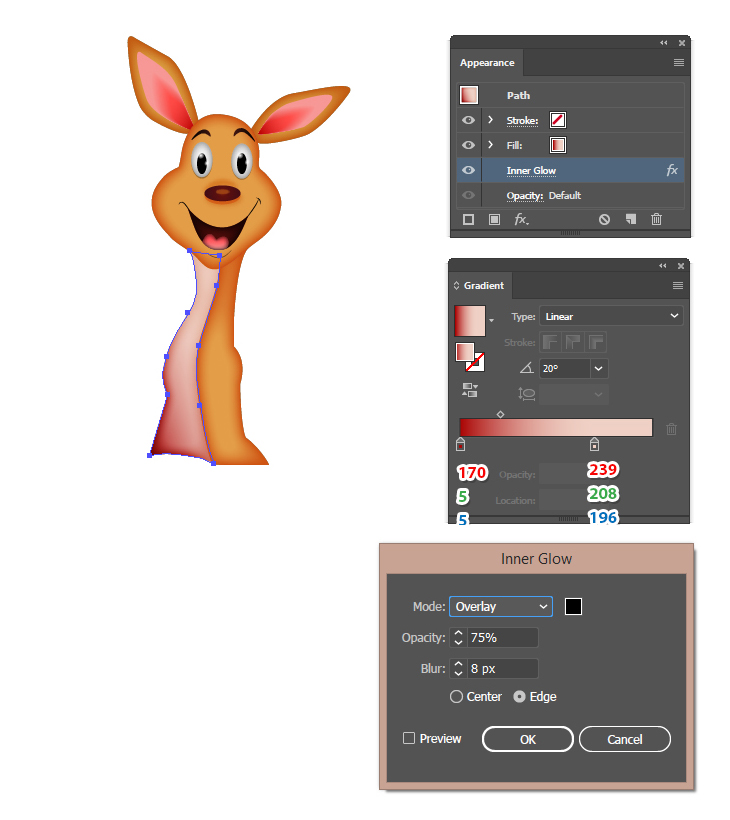
20. Now, draw a shape like below as the neck and the belly together. Fill it with the linear gradient shown and adjust the angle of the gradient so the red color is in the bottom left side of the belly (a shadow from the boxing gloves). After that, apply the Inner Glow effect.
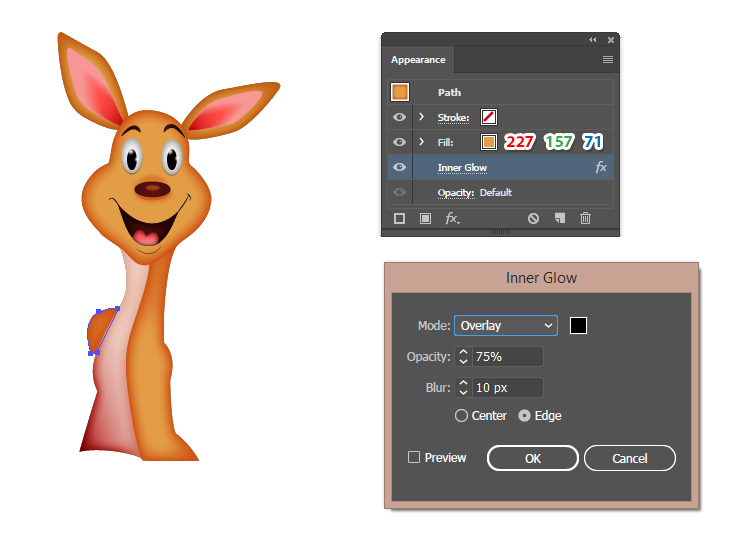
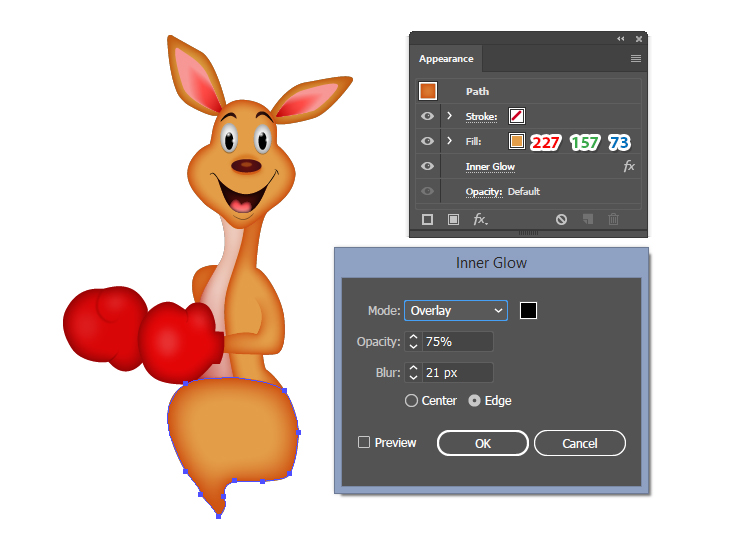
21. Draw a small shape as the arm in the back and color it with R=227, G=157, B=71. Apply the Inner Glow effect again.
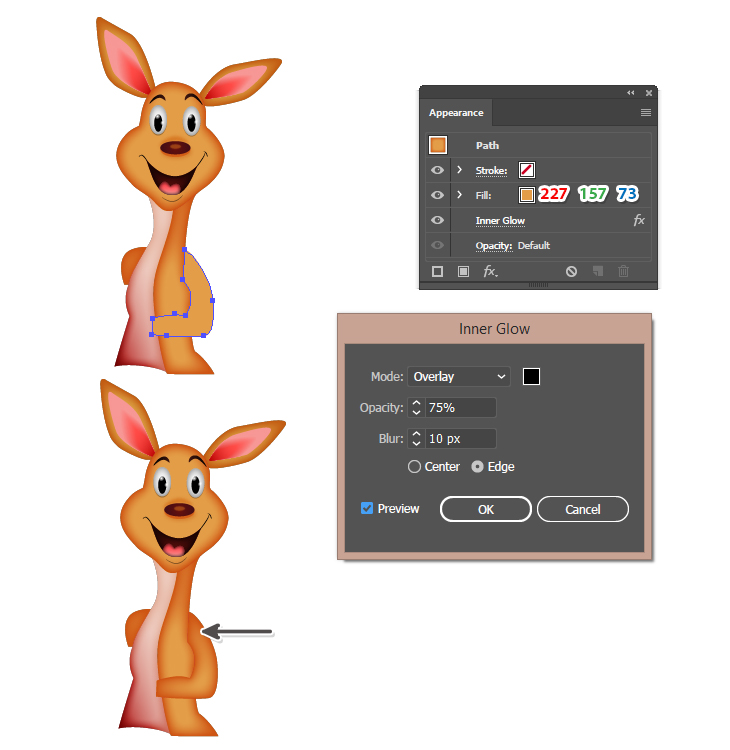
22. At this step we draw the arm in front of the body. Color it with R=227, G=157, B=73 and then apply the Inner Glow effect.
The area at the top of the arm doesn’t look good and we are going to fix it with an Opacity mask next.
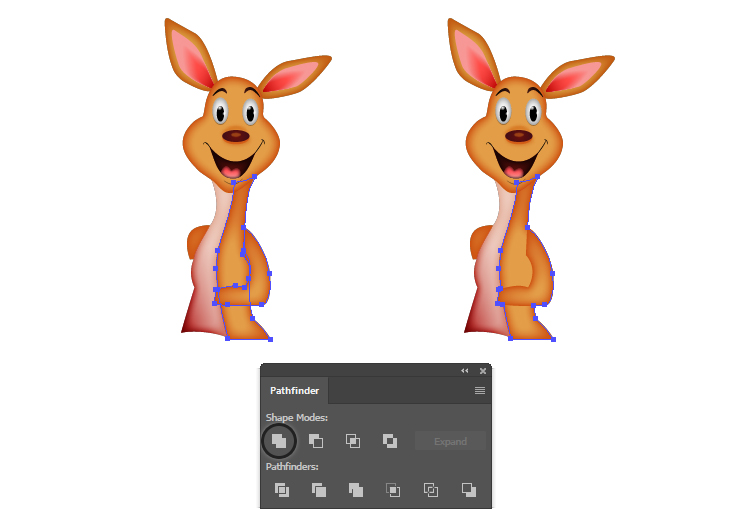
23. Select the shape of the arm an then Copy and Paste in Back (Control-B). Select this copy along with the shape of the back and in the Pathfinder panel, press Unite to obtain a new shape. Keep the existing appearances.
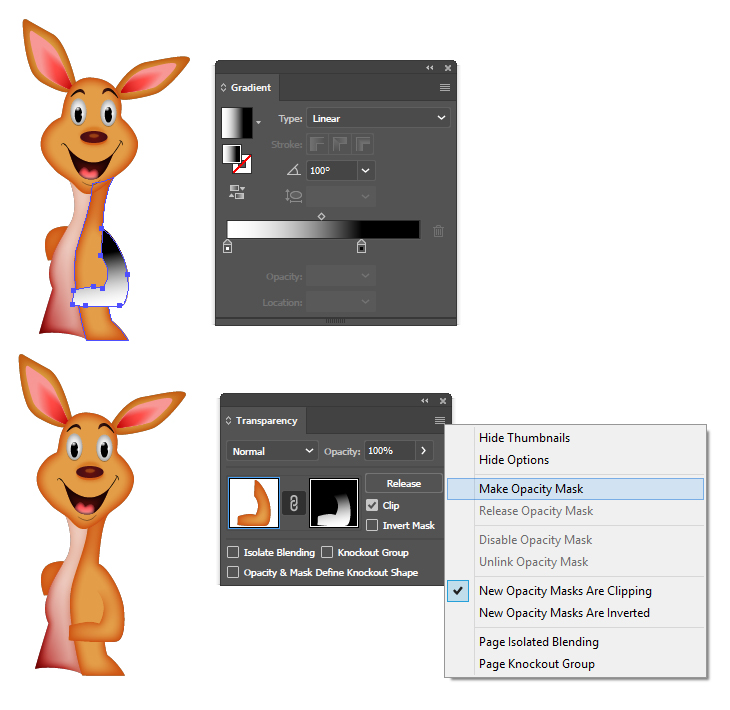
24. Select the arm shape and then Copy and Paste in Front (Control-F). Fill this copy with a white to black linear gradient. Adjust the gradient so the black color is at the top and that part will become invisible and the white is at the bottom so the rest of the arm will remain visible after the opacity mask.
Now, select the original arm shape along with the copy filled with the white to black gradient and go to the Transparency panel. Open the drop-down menu and select Make Opacity Mask. The top area of the arm looks good now.
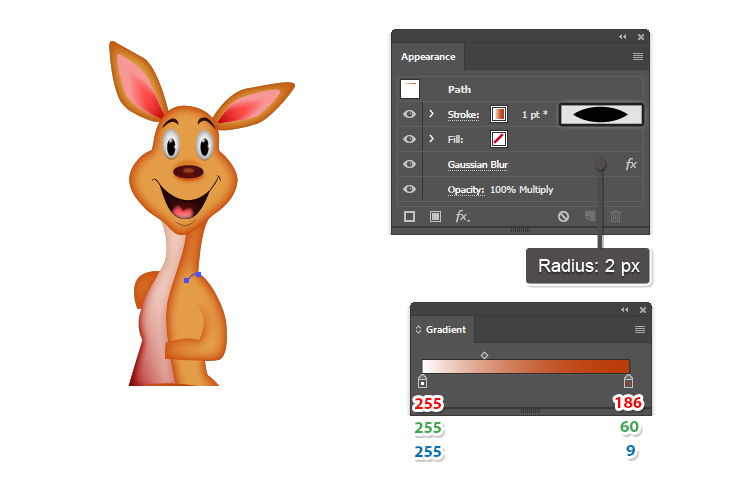
25. Use the Pen Tool (P) to draw a short path above the shoulder. Give it a 1 pt Stroke using a white to brown linear gradient and the Width Profile 1. Next, apply a 2 px Gaussian Blur and set the Blending Mode to Multiply.
Draw the Boxing Gloves of the Kangaroo
26. At this step draw the shape of the glove using the Pen Tool (P). Color it with R=227, G=6, B=7 and then apply the Inner Glow effect to give it some dimension.

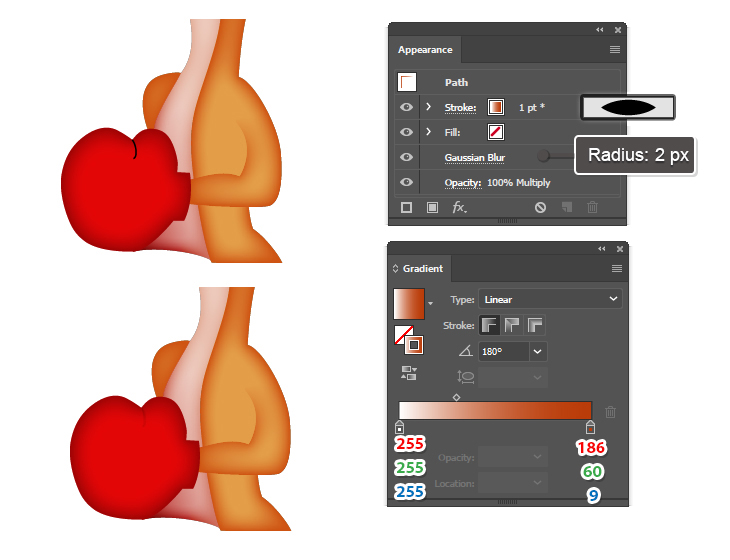
27. Draw a short path in the upper part of the glove to create a crease. Give it a 1 pt Stroke using a white to brown linear gradient and the Width Profile 1. Next, apply a 2 px Gaussian Blur and set the Blending Mode to Multiply.
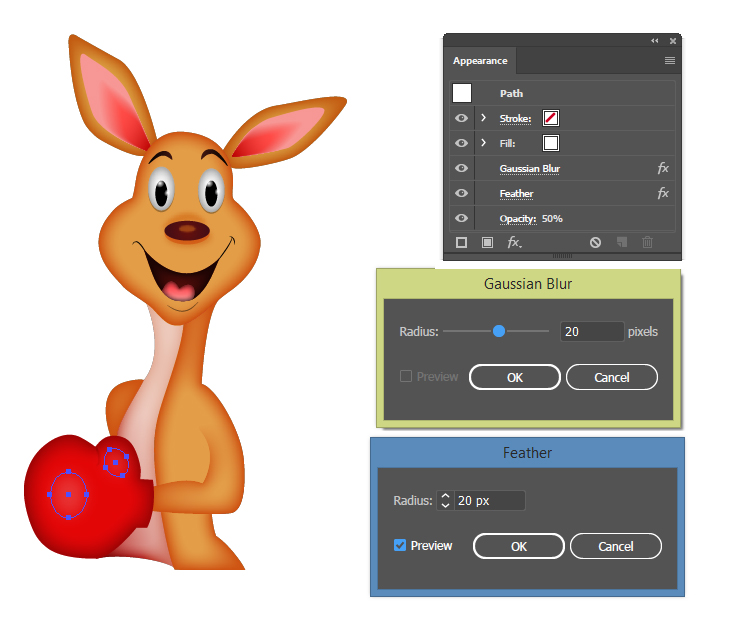
28. To add some shine, take the Ellipse Tool (L) and draw two ellipses of different sizes on the glove. Color them with white and then apply the Gaussian Blur and the Feather effects using the settings shown. Lower the Opacity to 50%.
29. Draw the other boxing glove using the same method and settings.
Draw the Legs of the Kangaroo
30. At this step draw the shape of the front leg like in image below. Color it with R=227, G=157, B=73 and apply the Inner Glow effect.
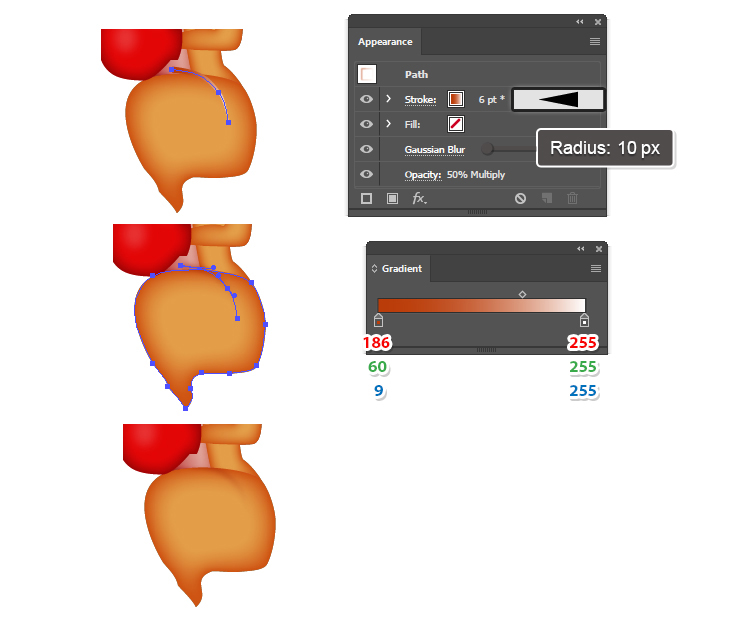
31. Use the Pen Tool (P) to draw a path in the upper part of the leg to create a crease. Select a 6 pt Stroke using a linear gradient from brown to white and the Width Profile 4. The tip of the brush should go downwards otherwise press the Flip Along option in the Stroke panel. Apply a 10 px Gaussian Blur; then set the Blending Mode to Multiply and the Opacity to 50%.
Select the leg shape and then Copy and Paste in Place (Shift-Control-V). Set this copy to stroke-none and fill-none. Now, select the crease path along with the copy of the leg and go to Object > Clipping Mask > Make (Control-7).
32. Next, draw the shape of the leg in the back as in the image below. Color it with R=204, G=131, B=41 and then apply the Inner Glow effect.
Draw the Feet of the Kangaroo
33. At this step draw the shape of the foot in front and after that, draw a path on top as shown below. Now, select the foot and the path and press Divide in the Pathfinder panel followed by Ungroup (Shift-Control-G). You will obtain two separate shapes.
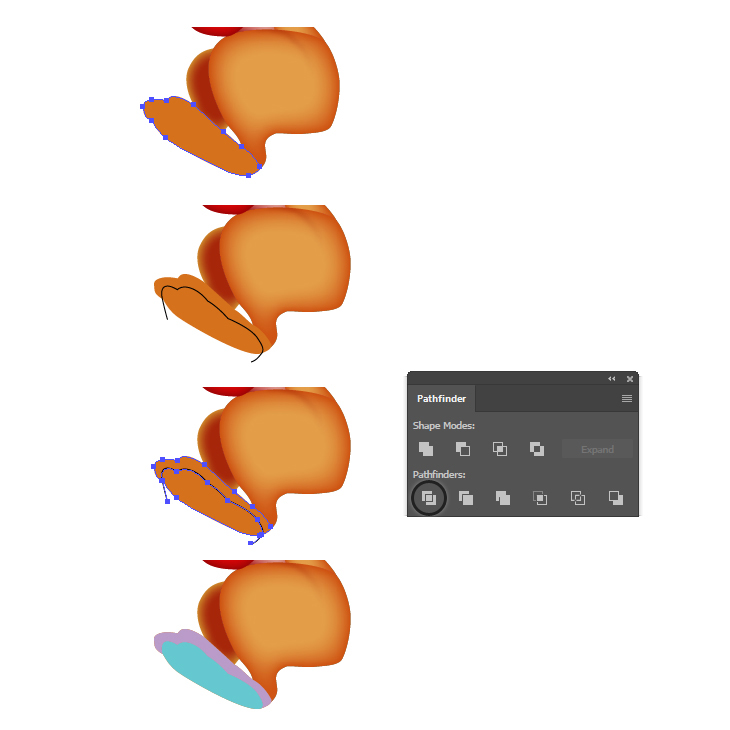
34. Color the purple shape obtained in the previous step with R=227, G=157, B=73 and apply the Inner Glow effect.
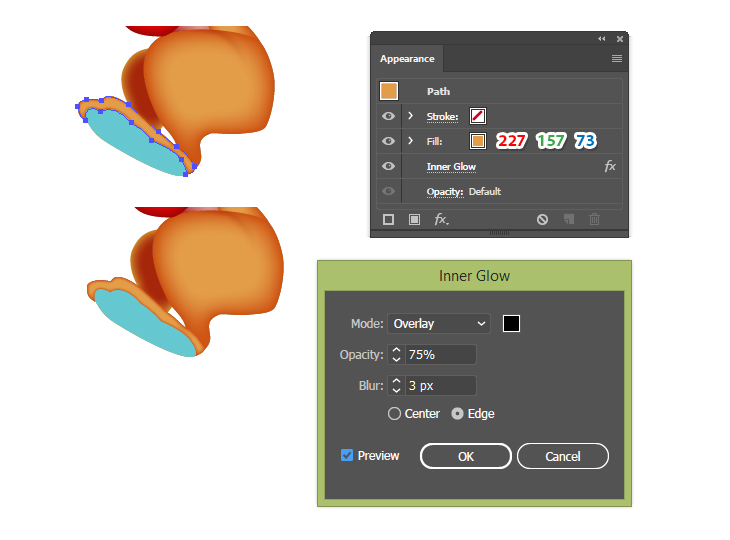
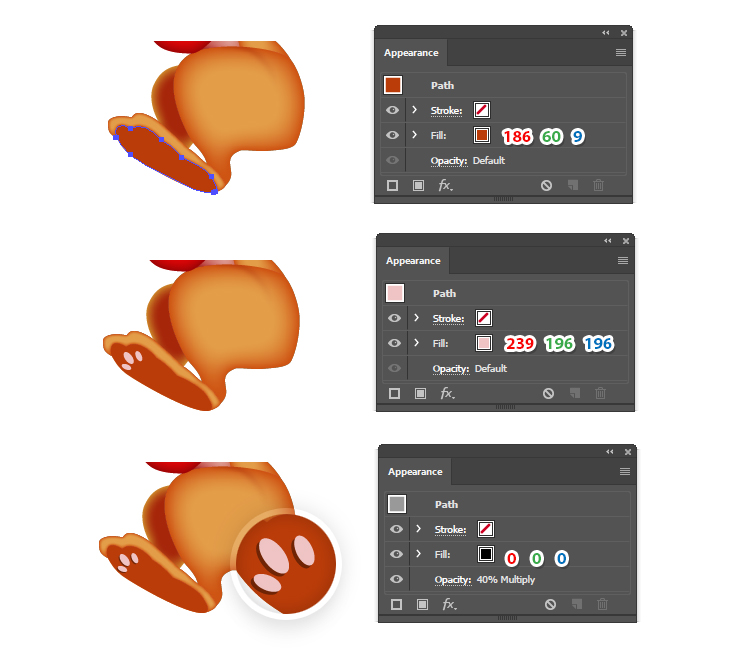
35. Color the blue shape with R=186, G=60, B=9. Next, take the Ellipse Tool (L) and draw three ellipses as the pads filled with light pink.
Copy and Paste in Back (Control-B) the ellipses, move them 1 px to the left and 1 px downwards using the Arrow keys on your keyboard. Also, change the color to black, change the Blending Mode to Multiply and lower the Opacity to 40%.
36. Group (Control-G) all the shapes that make up the foot and make a copy of it. Send it behind the first and optionally, you can make the pads smaller.
Draw the Tail of the Kangaroo
37. At this step we draw the shape of the tail with the Pen Tool (P) and after that, draw a path through the middle. Select both shapes and press Divide in the Pathfinder panel followed by Ungroup (Shift-Control-G). You will obtain two separate shapes.
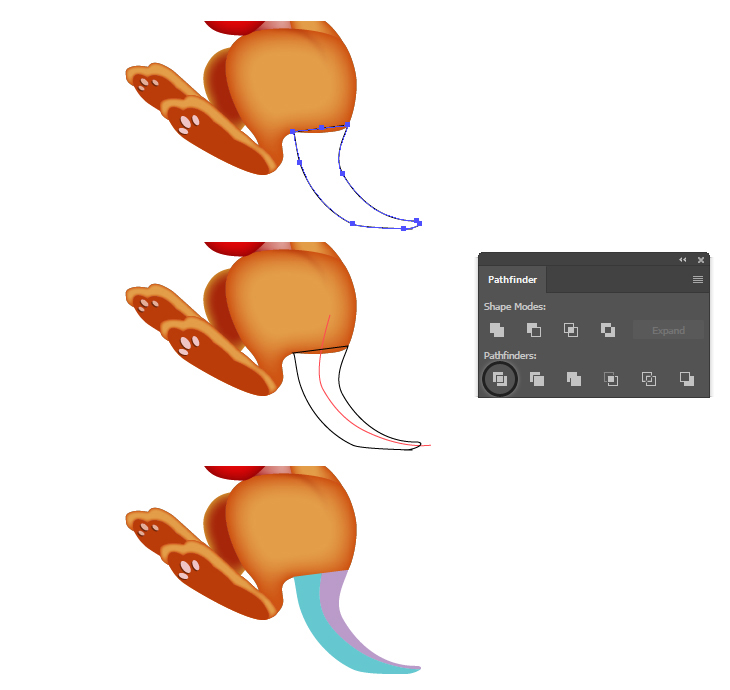
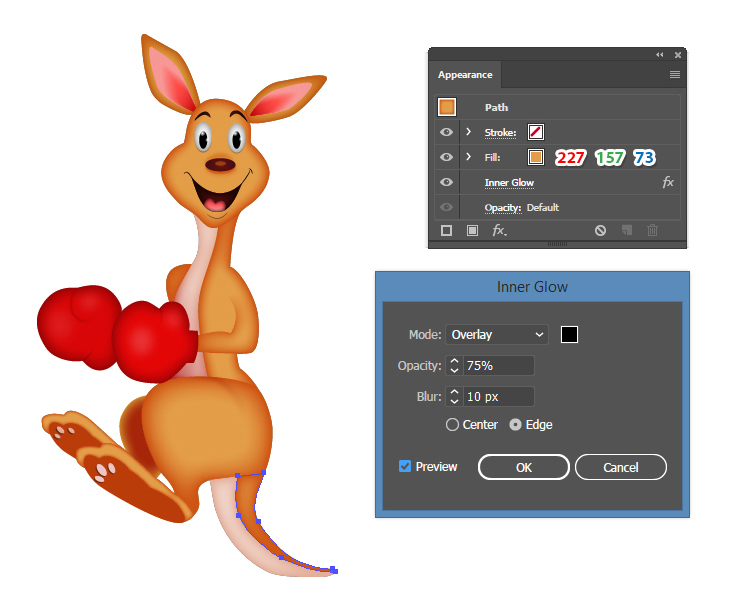
38. Color the purple shape obtained in the previous step with R=227, G=157, B=73 and then apply the Inner Glow effect.
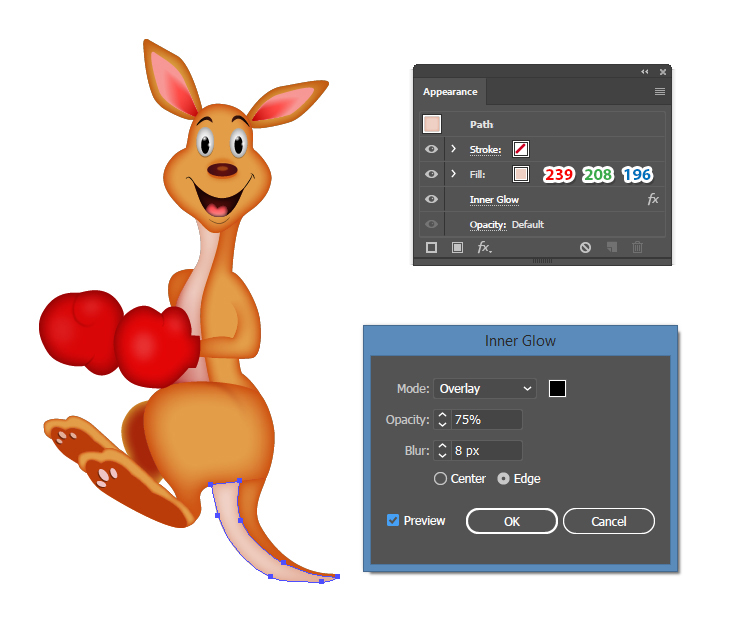
39. Color the blue shape with R=239, G=208, B=196 and then apply the Inner Glow effect.
Create the Final Shadows
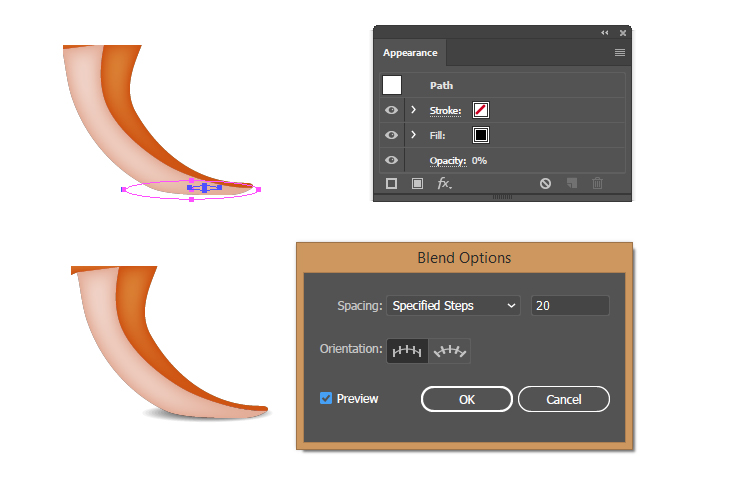
40. Use the Ellipse Tool (L) to draw two ellipses of different sizes on the tip of the tail. Color the small ellipse with black at 100% Opacity and color the bigger ellipse with black at 0% Opacity.
Now, select both ellipses and go to Object > Blend > Blend Options. Choose 20 Specified Steps and then go back to Object > Blend > Make (Alt-Control-B). Send the resulting blend-group behind the tail.
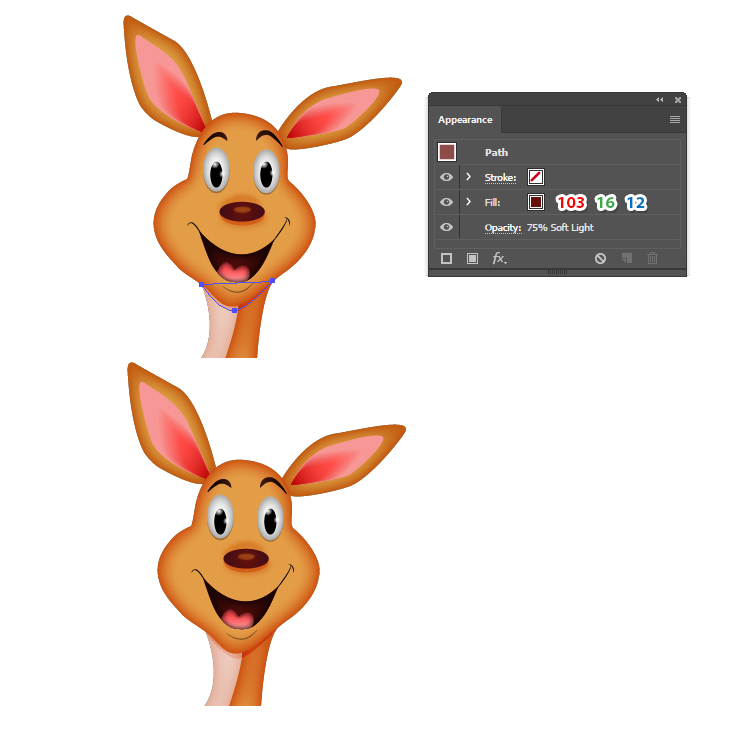
41. Use the Pen Tool (P) to draw a shape like in the image below, slightly below the chin. Color it with R=103, G=16, B=12; then set the Blending Mode to Soft Light and lower the Opacity to 75%. You will obtain a shadow under the chin. Move this shape behind the head but in front of the neck in the Layers panel.
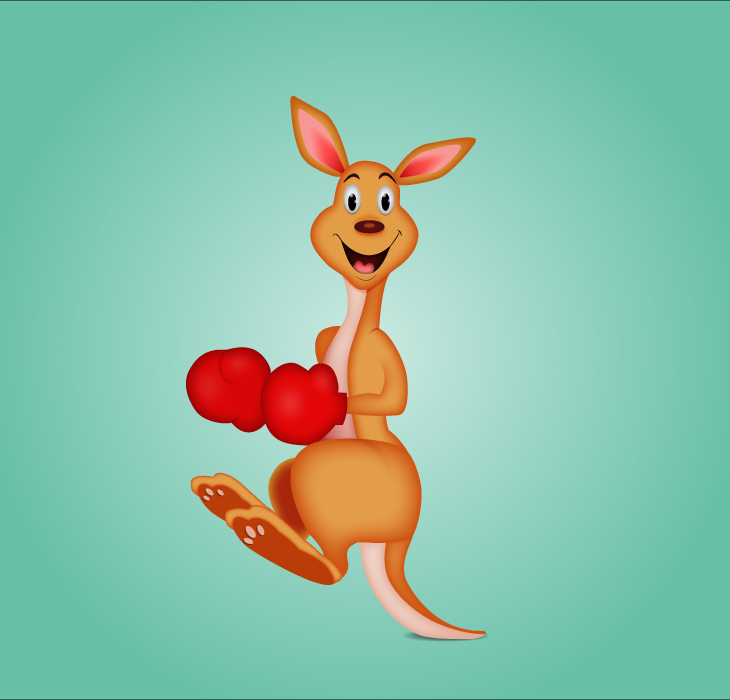
42. At this point the kangaroo is ready.
And You’re Done!
Here is the final image of the cute boxing kangaroo character. I hope you’ve enjoyed this tutorial and can apply these techniques in your future projects.